Xerox 1235/DX Troubleshooting Guide
Xerox 1235/DX - Phaser Color Laser Printer Manual
 |
UPC - 042215474542
View all Xerox 1235/DX manuals
Add to My Manuals
Save this manual to your list of manuals |
Xerox 1235/DX manual content summary:
- Xerox 1235/DX | Troubleshooting Guide - Page 1
Phaser® 1235 Color Printer Advanced Features and Troubleshooting Manual 9/19/00 - Xerox 1235/DX | Troubleshooting Guide - Page 2
are trademarks of Xerox Corporation. TekColor CareSM and RealSUPPORTSM are service marks of Xerox Corporation. Adobe®, Acrobat ™ technology, and IntelliSelect™ are trademarks of Adobe Systems Incorporated or its subsidiaries which may be registered in are associated. Phaser 1235 Network Color Printers - Xerox 1235/DX | Troubleshooting Guide - Page 3
qualified Pantone-licensed software packages. Contact Pantone, Inc. for a current list of qualified licensees. All trademarks noted herein are either the property of Xerox Corporation, Pantone, Inc., or their respective companies. © Pantone, Inc., 1988. Advanced Features and Troubleshooting Manual - Xerox 1235/DX | Troubleshooting Guide - Page 4
the Phaser 1235 Printer will be free from defects in materials and workmanship for a period of one (1) year from the date of shipment. If the product proves defective during the warranty period, Xerox, at its option, will: (1) repair the product by means of telephone support or on-site service at - Xerox 1235/DX | Troubleshooting Guide - Page 5
OF THESE WARRANTIES. XEROX AND ITS VENDORS WILL NOT BE LIABLE FOR ANY INDIRECT, SPECIAL, INCIDENTAL OR CONSEQUENTIAL DAMAGES (INCLUDING LOSS OF PROFITS) IRRESPECTIVE OF WHETHER XEROX OR THE VENDOR HAS ADVANCE NOTICE OF THE POSSIBILITY OF SUCH DAMAGES. Advanced Features and Troubleshooting Manual - Xerox 1235/DX | Troubleshooting Guide - Page 6
Xerox's services, in respect of which the breach occurred. Subject to the above, all conditions and warranties which would or might otherwise be implied in a Consumer contract, whether by operation of statute, inference from circumstances, industry practice or otherwise, are excluded. Phaser 1235 - Xerox 1235/DX | Troubleshooting Guide - Page 7
to correct the problem. I The power cord is attached to the printer as a plug-in device at the back of the printer. In the event it is necessary to remove all electrical power from the printer, disconnect the power cord from the power receptacle. Advanced Features and Troubleshooting Manual - Xerox 1235/DX | Troubleshooting Guide - Page 8
(9,840 ft.). Use at elevations above 3,000 meters (9,840 ft.) exceeds operability limits. I Do not place the printer near a heat source. I Do not place the printer in direct sunlight. I Do not place the printer in line with the cold air flow from an air conditioning system. Phaser 1235 Network Color - Xerox 1235/DX | Troubleshooting Guide - Page 9
the recommended procedure when moving the printer from one location to another. Refer to the Phaser 1235 Network Color Printer Setup Instructions. I Do not place any liquids on the printer. Warning Be careful when working in areas inside the printer identified with a warning symbol. These areas - Xerox 1235/DX | Troubleshooting Guide - Page 10
I Do not remove any trays above the currently selected media source tray. I Do not open the covers while printing. I Do not switch off the printer power while printing. I Do not move the printer while it is printing. Phaser 1235 Network Color Printers - Xerox 1235/DX | Troubleshooting Guide - Page 11
terminal: 0730-06 Hot surface on or in the printer. Use caution to avoid personal injury: 0730-07 0730-08 0730-09 Use caution. Refer to the manual(s) for information: Warning 0730 10 If the product your protection, do not defeat any interlocks. Advanced Features and Troubleshooting Manual - Xerox 1235/DX | Troubleshooting Guide - Page 12
10 Printed Documentation 10 Printer Management Software CD-ROM 11 Using the CD-ROMs 11 Loading Print Media 13 Selecting Print Media 13 Storing Print Media 16 Loading Print Media 16 Tray 1, 2, or 3 16 Multi-Sheet Bypass Feeder (MBF 19 Advanced Features and Troubleshooting Manual xii - Xerox 1235/DX | Troubleshooting Guide - Page 13
Printing Options 23 Printer Drivers 24 Installing the Printer Drivers 24 Configuring the Printer Drivers 25 Printer Driver Features List 26 Printer Driver Feature Descriptions 36 TrueType Options 37 Watermark 38 Managing Printer Usage 39 Introduction 39 xiii Phaser 1235 Network Color - Xerox 1235/DX | Troubleshooting Guide - Page 14
System 50 Menu Hierarchy 50 Menus, Items and Values 52 Special Operating Modes 69 Front Panel Locks 69 Using Printer Management Software 70 Network Printer Services Troubleshooting 79 Before You Begin Troubleshooting 79 Hardware 80 Software 80 Advanced Features and Troubleshooting Manual - Xerox 1235/DX | Troubleshooting Guide - Page 15
Consumables (CRCs 81 Front Panel Messages 82 Printer Management Status Messages 90 Solving Printing Problems 98 Using Printer Options 101 Installation Precautions 101 Hard Drive 115 Certifications (Canadian 116 60 HZ, 115 V 116 European Markets 116 xv Phaser 1235 Network Color Printers - Xerox 1235/DX | Troubleshooting Guide - Page 16
CE Certification 116 EN55022 116 Ordering Information 117 Upgrade Options 117 Supplies 117 Advanced Features and Troubleshooting Manual xvi - Xerox 1235/DX | Troubleshooting Guide - Page 17
. First verify your exact equipment options before proceeding further. All optional features described in this manual are available for your printer and are user installable. For more information, refer to the Phaser 1235 Color Printer User Guide. Advanced Features and Troubleshooting Manual 1 - Xerox 1235/DX | Troubleshooting Guide - Page 18
Getting to Know Your Printer Printer Components Base Configuration Front View 1 Output bin (media delivered face-down) 2 Top cover (Cover A) 3 Front panel 3 Parallel connector 4 Face-up bin 3 (shown closed) 5 Power cord receptacle 6 Power switch 4 56 2 Phaser 1235 Network Color Printers - Xerox 1235/DX | Troubleshooting Guide - Page 19
imaging drum 5 Black toner cartridge (on top of black imaging drum) 6 Black imaging drum 7 Transfer belt (not visible when all four imaging drums are in place) 3 4 5 1 2 Getting to Know Your Printer 6 7 Rear View 1 Face-up bin (shown open) 1 Advanced Features and Troubleshooting Manual 3 - Xerox 1235/DX | Troubleshooting Guide - Page 20
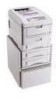
Getting to Know Your Printer Printer Options Optional Paper Trays 1 Tray 2 (530-sheet feeder) 2 Tray 3 (530-sheet feeder) Duplex (2-Sided) 1 Option 1 Duplex option (shown partially pulled out) 4 Phaser 1235 Network Color Printers - Xerox 1235/DX | Troubleshooting Guide - Page 21
printer's features and capabilities. Media Handling Your printer has several media input sources and output destinations as described below. Input Sources I The standard Multi-sheet Bypass Feeder (MBF) functions as either a single-sheet manual not supported supported media and instructions printer - Xerox 1235/DX | Troubleshooting Guide - Page 22
I Mac OS 7.6.1+, 8.x, 9.x, OSX I UNIX (SCO, Red Hat Linux, Solaris, HP-UX, IBM/AIX, SGI, DEC) For more detailed information about supported network environments and protocols, refer to the Phaser Quick Netowrk Install Guide on your Printer Management Software CD-ROM. 6 Phaser 1235 Network Color - Xerox 1235/DX | Troubleshooting Guide - Page 23
-based color management systems can be used with the printer: I PANTONE Color Matching System I Apple ColorSync 2.5 I Image Color Matching (ICM) for Windows 95/Windows 98/ Windows ME, Windows NT and Windows 2000 I ICC (International Color Consortium) Advanced Features and Troubleshooting Manual 7 - Xerox 1235/DX | Troubleshooting Guide - Page 24
Printer copying. Automatic Transparency Detection The printer detects transparencies and optimizes the Bypass Feeder (MBF). Use only Phaser 35 series transparencies. Front Cover using the Windows 9x/ME/2000 driver. Job separators are placed at the sets are held in the printer's hard disk drive until - Xerox 1235/DX | Troubleshooting Guide - Page 25
, low/no paper, low/no toner, etc. To use this feature, establish a mail account for the printer and configure the Xerox Mailinx feature in CentreWare Internet Services. (See the CentreWare Internet Services User Guide located on the Phaser 1235 Color Printer CD-ROM for more information.) Remote - Xerox 1235/DX | Troubleshooting Guide - Page 26
up and running. I User Guide - provides information on day-to-day printer operation. I Advanced Features and Troubleshooting Manual (this book) I Software Install Notes ReadMe I Internet Services Help Note Printer drivers are also contained on the Phaser 1235 Color Printer CD-ROM. The majority of - Xerox 1235/DX | Troubleshooting Guide - Page 27
CD-ROM contains the following documentation and uilities: I Phaser 1235 Color Printer Quick Network Install Guide I CentreWare Internet Services User Guide I CentreWare DP User Guide I CentreWare MC User Guide I Xerox PrinterMap User Guide I Printer Map I CentreWare DP I CentreWare UNIX I CentreWare - Xerox 1235/DX | Troubleshooting Guide - Page 28
Getting to Know Your Printer 12 Phaser 1235 Network Color Printers - Xerox 1235/DX | Troubleshooting Guide - Page 29
, but may be printed 2-sided manually. I Use only Xerox Phaser 35 Series transparencies as other transparencies may cause damage to the fuser. Any damage caused due to the use of unsupported media will not be covered by your printer's warranty. Advanced Features and Troubleshooting Manual 13 - Xerox 1235/DX | Troubleshooting Guide - Page 30
rag content I Transparencies other than Xerox Phaser 35 Transparencies Note Using media not recommended for the Phaser 1235 Color Printer may result in paper jams, print quality problems or printer damage. See Ordering Information for Printer Supplies on page 117 14 Phaser 1235 Network Color - Xerox 1235/DX | Troubleshooting Guide - Page 31
. 3.88 x 7.5 in. 110 x 220 mm 175 x 250 mm 162 x 229 mm • • Printing to the face-up bin at the rear of the printer is recommended. Transparencies A4 210 x 297 mm • • • Letter 8.5 x 11 in. •• • Use only Xerox Phaser 35 Series transparencies. Printing to the face-up bin at the rear of the - Xerox 1235/DX | Troubleshooting Guide - Page 32
(20 lb. bond) paper. Capacity is reduced for heavier/thicker stock. To load print media in a paper tray, use the following steps. For more detailed instructions, see the Phaser 1235 Color Printer User Guide. 1 Pull out the tray. 2 Fan the media to release sheets that are stuck together. 16 - Xerox 1235/DX | Troubleshooting Guide - Page 33
left as you face the printer. I Letterhead should be at the back of the tray. 4 Adjust the width and length guides to fit the stack. printer. I Paper: 530 sheets (75 g/m2/ 20 lb. bond paper) I Transparency: 175 Standard or Premium sheets 6 Close the tray. Advanced Features and Troubleshooting Manual - Xerox 1235/DX | Troubleshooting Guide - Page 34
On-line button to exit the Menu. † Note that the buttons have graphics and numbers only (no written labels) on the 220 V models of the printer. Please see Front Panel Layout on page 39 for button numbers and graphics. 18 Phaser 1235 Network Color - Xerox 1235/DX | Troubleshooting Guide - Page 35
steps. For more detailed instructions, see the Phaser 1235 Color Printer User Guide. 1 Open the Face-up output bin at the rear of the printer and swing out the two as you face the printer. • Labels and Xerox Premium Business Cards should be face-up. Advanced Features and Troubleshooting Manual 19 - Xerox 1235/DX | Troubleshooting Guide - Page 36
Loading Print Media 20 3 Adjust the guides to fit the media width. 4 Set the front panel to d. Press the On-line button to exit the Menu. 7 From the driver: a. Select Multi-sheet Bypass Feeder (MBF) as Paper Source. b. Select the appropriate media size and type. Phaser 1235 Network Color Printers - Xerox 1235/DX | Troubleshooting Guide - Page 37
matches the tray type setting. 8 Send the job to the printer. † Note that the buttons have graphics and numbers only (no written labels) on the 220 V models of the printer. Please see Front Panel Layout on page 39 for button numbers and graphics. Advanced Features and Troubleshooting Manual 21 - Xerox 1235/DX | Troubleshooting Guide - Page 38
Loading Print Media 22 Phaser 1235 Network Color Printers - Xerox 1235/DX | Troubleshooting Guide - Page 39
web server).† Attachment to a mail note Send the print file to the printer as an attachment to a mail note (requires that the printer have an email address). † † Supported file types: PostScript, PCL5c, PDF, TIFF and text files. ‡IP Only, Not IPX Advanced Features and Troubleshooting Manual 23 - Xerox 1235/DX | Troubleshooting Guide - Page 40
be downloaded from website: ftp://ftp.tekcolor.com/ Installing the Printer Drivers Instructions on how to load the printer drivers are on the printer's CD-ROM. In addition, your System Administrator can download drivers directly to each workstation on the network. 24 Phaser 1235 Network Color - Xerox 1235/DX | Troubleshooting Guide - Page 41
page. 6 Click OK to close the printer driver dialog. † Note that the buttons have graphics and numbers only (no written labels) on the 220 V models of the printer. Please see Front Panel Layout on page 39 for button numbers and graphics. Advanced Features and Troubleshooting Manual 25 - Xerox 1235/DX | Troubleshooting Guide - Page 42
available in each type of printer driver. Printer Driver Features List Feature Automatic Image • • • • • • • • • •† • • • • • • • • • • • • • • •† • •‡ • • •† • • • • • • •‡ • † Windows NT 4.0 only ‡ Windows 2000 only 26 Phaser 1235 Network Color Printers - Xerox 1235/DX | Troubleshooting Guide - Page 43
printer driver features. Implementations of some features vary based on your operating system. For more detailed information on the features of your printer driver, see the online help in the driver appear around black text edges on color backgrounds. Advanced Features and Troubleshooting Manual 27 - Xerox 1235/DX | Troubleshooting Guide - Page 44
available for any paper size that is supported for 2-sided (duplex) printing (see Duplex (2-Sided Printing) on page 31). I Your booklet can have any number of page images and the driver prints it on one-fourth that number distance to zero, 50, 100, or 150 dots. 28 Phaser 1235 Network Color Printers - Xerox 1235/DX | Troubleshooting Guide - Page 45
order, then a second set of all three pages in order, then a third set of all three pages in order and so on: 1, 2, 3, 1, 2, 3, 1, 2, 3, 1, 2, 3, 1, 2, 3. Advanced Features and Troubleshooting Manual 29 - Xerox 1235/DX | Troubleshooting Guide - Page 46
Prints a front cover, which is the first page of a print job. It is printed on media different from the rest of the printed document. 30 Phaser 1235 Network Color Printers - Xerox 1235/DX | Troubleshooting Guide - Page 47
from Trays 1, 2 and 3, but not from the Multi-sheet Bypass Feeder (MBF). Transparencies are not supported for 2-sided printing. The printing options are: I 1-Sided This option provides single-sided printing (the cover different Same as "Cover page." Advanced Features and Troubleshooting Manual 31 - Xerox 1235/DX | Troubleshooting Guide - Page 48
." Mirror Image Flips the image orientation 180 degrees, thereby reversing the image and all associated text. N-Pages Up Same as "Multiple Pages Per Side." 32 Phaser 1235 Network Color Printers - Xerox 1235/DX | Troubleshooting Guide - Page 49
. You can select two, four, six, nine or sixteen page images per side of paper. The printer shrinks the page images as needed and arranges them on the paper most appropriately for the paper size and of dark background and/or light text and images. Advanced Features and Troubleshooting Manual 33 - Xerox 1235/DX | Troubleshooting Guide - Page 50
tall. I Rotated Landscape A Rotated Landscape page is wider than it is tall and the image on the page is rotated 180 degrees (upside down). 34 Phaser 1235 Network Color Printers - Xerox 1235/DX | Troubleshooting Guide - Page 51
available media. The options are: I Use printer default. Uses the Page Policy set on the printer as its default. The factory default is Off (see the System Menu description on page 55). When set to white images using cyan, magenta and yellow toner. Advanced Features and Troubleshooting Manual 35 - Xerox 1235/DX | Troubleshooting Guide - Page 52
from 0000 to 7777, using only the digits 0 through 7) in the printer driver before submitting the print job. The printer processes and queues the job, but will not print it until you enter the available after each job when using the Windows 9X/ ME driver. 36 Phaser 1235 Network Color Printers - Xerox 1235/DX | Troubleshooting Guide - Page 53
if your document uses fonts that do not reside on the printer, the driver will download the fonts with the job. If disabled, the driver will always download TrueType fonts to the printer with each job, even if the fonts reside on the printer already. Advanced Features and Troubleshooting Manual 37 - Xerox 1235/DX | Troubleshooting Guide - Page 54
the first page or every page of a document. I This driver feature is independent from features provided by the application. I The driver enables you to specify the text, its font, size, list of predefined watermarks (for example, CONFIDENTIAL, COPY, DRAFT). 38 Phaser 1235 Network Color Printers - Xerox 1235/DX | Troubleshooting Guide - Page 55
a discussion of remote printer management software available for use with your Phaser 1235 Color Printer. Using the Front Panel Front Panel Layout The printer's front panel (shown below Up button 11 Value Down button 1 3 2 4 6 8 10 5 7 9 11 Advanced Features and Troubleshooting Manual 39 - Xerox 1235/DX | Troubleshooting Guide - Page 56
functions. I It informs you of printer status conditions, such as when toner is low, when a paper tray printer. For example, when you press Menu Up or Menu Down, the display may show Menus Job Menu See the section "Menu System" (page 50) for information on the Menu system hierarchy. 40 Phaser 1235 - Xerox 1235/DX | Troubleshooting Guide - Page 57
Functions Button On-Line Enter Menu Up Description Press Online to toggle the printer between on-line and off-line status. It is also used to menu system, the fault is re-displayed when the menu system is exited (if the fault is still active). Advanced Features and Troubleshooting Manual 41 - Xerox 1235/DX | Troubleshooting Guide - Page 58
(cont'd.) Button Menu Down Item Up Item Down Description Press Menu Down to take the printer off-line and enter the menu system. Press Menu Down again to scroll the list of menus. Menu Down is also used .) so that the value of that character can be changed. 42 Phaser 1235 Network Color Printers - Xerox 1235/DX | Troubleshooting Guide - Page 59
requested for releasing or deleting a Secure Print or Proof Print job. The following conditions also apply: I If the printer is on-line, the Value Up button is ignored. I When setting a numeric value (for example, for instead of the requested media. Advanced Features and Troubleshooting Manual 43 - Xerox 1235/DX | Troubleshooting Guide - Page 60
printer on-line, navigate the menu system by following the steps below. For a description of the printer's menus, items and values, see the section Menu System Menu Name Item Name You may either continue to work in the Menu system by repeating the steps above, or exit and return to normal operation - Xerox 1235/DX | Troubleshooting Guide - Page 61
printer automatically exits the Menu system after 60 seconds of inactivity (for example, no button has been pressed). Some commonly performed front panel procedures are described on the following pages: I Printing Printer Internet Services. Printing Printer Reports Troubleshooting Manual 45 - Xerox 1235/DX | Troubleshooting Guide - Page 62
the remaining copies. To send a password-controlled job to the printer, select either the Secure Print or Proof Print job type in the printer driver and enter a 4-digit numeric password, where each digit of the more than one job. 5 When done, press On Line. 46 Phaser 1235 Network Color Printers - Xerox 1235/DX | Troubleshooting Guide - Page 63
print and proof print jobs remain on the printer's hard drive even when you turn off the printer. To delete a secure print or proof print job sent to the printer and stored in the optional hard drive, follow one job. 6 When done, press On Line. Advanced Features and Troubleshooting Manual 47 - Xerox 1235/DX | Troubleshooting Guide - Page 64
Managing Printer Usage Setting Network Addressing The procedure for setting Ethernet, Token Ring and Novell values requires a different keying technique than correct value for the first digit. (Pressing Value Down will reduce the value of the digit by one.) 48 Phaser 1235 Network Color Printers - Xerox 1235/DX | Troubleshooting Guide - Page 65
printer inside the Job Menu, or power the printer off and on again. † Note that the buttons have graphics and numbers only (no written labels) on the 220 V models of the printer. Please see Front Panel Layout on page 39 for button numbers and graphics. Advanced Features and Troubleshooting Manual - Xerox 1235/DX | Troubleshooting Guide - Page 66
52. Job Cancel Job Form Feed Restart Printer Password Tray Enter Password MBF Size MBF Type Tray N Type Tray Sequence Print Delete PCL System Color Adjust PostScript Parallel Font Number Pitch Point is not available if token ring card is installed. 50 Phaser 1235 Network Color Printers - Xerox 1235/DX | Troubleshooting Guide - Page 67
Map System Event Log Disk Directory Print Quantity Select Tray Hex Mode Restart Printer ‡Token Ring menu is available only if the optional Token Ring Card is installed. Note Items in italics appear only when the appropriate option is installed. Advanced Features and Troubleshooting Manual 51 - Xerox 1235/DX | Troubleshooting Guide - Page 68
that can be controlled at the printer's front panel, organized by menu in the printer settings selected in your application or printer driver will partial PCL page. Restart Printer Reboots the printer as if the power printer and stored on the printer's hard disk drive. Note For instructions - Xerox 1235/DX | Troubleshooting Guide - Page 69
value depends on the selection of metric or English units in the Defaults setting in the System Menu. Available values are: MBF Type Tray N Type Tray Sequence 8.5 x 11 in DP or CentreWare Internet Services documentation (located on the Printer Management Software CD-ROM) Troubleshooting Manual 53 - Xerox 1235/DX | Troubleshooting Guide - Page 70
and Items Allows you to establish the default configuration for the printer when printing PCL emulation jobs. The menu's items are: Defaults = Millimeters) The default value depends on the Defaults setting in the System Menu (see page 56). Adds an additional carriage return after every line feed - Xerox 1235/DX | Troubleshooting Guide - Page 71
on the Defaults setting in the System Menu (see page 56). Sets printer to automatically select an alternate paper size and/or type if the requested size and/or type is not loaded. Available values are: Off* Ignore Size Ignore Type Ignore Type and Size Advanced Features and Troubleshooting Manual - Xerox 1235/DX | Troubleshooting Guide - Page 72
Minutes 90 Minutes 60 Minutes 30 Minutes* 15 Minutes Sets the default values for the System Menu's Paper Size item and the PCL Menu's Form Length item. Available values are whether a startup page prints each time the printer restarts. Available values are: On* Off 56 Phaser 1235 Network Color - Xerox 1235/DX | Troubleshooting Guide - Page 73
Description and Items Allows you to make fine adjustments to the color system, thereby modifying the imaging characteristics of the printer. The menu's items are: Color Density Allows fine adjustment of printed based on those factory default values. Advanced Features and Troubleshooting Manual 57 - Xerox 1235/DX | Troubleshooting Guide - Page 74
'd.) Menu PostScript Description and Items Allows you to set options for printing PostScript jobs. Printer driving settings always override front panel settings. The menu's items are: Color Mode Allows error handler or debugger. Available values are: On* Off 58 Phaser 1235 Network Color Printers - Xerox 1235/DX | Troubleshooting Guide - Page 75
port. Available values are: Auto* PCL PostScript Bidirectional Note To submit TIF and PDF files to the printer, this value must be Auto. Enables or disables bidirectional communications through the parallel port. Available values are: On* Off Advanced Features and Troubleshooting Manual 59 - Xerox 1235/DX | Troubleshooting Guide - Page 76
Printer PostScript Note To submit TIF and PDF files to the printer, this value must be Auto. SMB Enable Enables or Note To submit TIF and PDF files to the printer, this value must be Auto. AppSocket Enable To submit TIF and PDF files to the printer, this value must be Auto. EtherTalk Enable - Xerox 1235/DX | Troubleshooting Guide - Page 77
Managing Printer Usage Front Panel Menus, Items and Values (cont'd.) Menu Ethernet (cont) Description and Items HTTP Enable Enables or disables the values are: Auto* 10/HALF 10/FULL 100/HALF 100/FULL HALF = half duplex FULL = full duplex Advanced Features and Troubleshooting Manual 61 - Xerox 1235/DX | Troubleshooting Guide - Page 78
are: Auto* PCL PostScript SMB Enable SMB PDL Note To submit TIF and PDF files to the printer, this value must be Auto. Enables or disables the Token Ring SMB protocol. Available values are: Note To submit TIF and PDF files to the printer, this value must be Auto. 62 Phaser 1235 Network Color - Xerox 1235/DX | Troubleshooting Guide - Page 79
Managing Printer Usage Front Panel Menus, Items and Values (cont'd.) Menu Token Ring (cont) Description and Items IPP Enable Enables or disables the xxxx xxxx xxxx can equal any value within the valid range of 4000 0000 0000 and 7FFF FFFF FFFF) Advanced Features and Troubleshooting Manual 63 - Xerox 1235/DX | Troubleshooting Guide - Page 80
PCL PostScript Binary PostScript PServer Mode Frame Type Note To submit TIF and PDF files to the printer, this value must be Auto. Enables or disables the Novell binary mode of PostScript. Available 802.3 SNAP Ethernet II Token Ring Auto* TR_802.2 TR_SNAP 64 Phaser 1235 Network Color Printers - Xerox 1235/DX | Troubleshooting Guide - Page 81
: 1 - 29 Seconds (2 Seconds*) PServer Name Sets the name of the PServer in this printer. There is a 47 character limit. Available characters are: A - Z, 0 - 9, hyphen Z, 0 - 9, hyphen (-), period (.), underscore (_), equal (=) The default is: Advanced Features and Troubleshooting Manual 65 - Xerox 1235/DX | Troubleshooting Guide - Page 82
printer's current Sheet information and menu settings. Print Service Pack Prints the system test patterns and configuration pages used by the Xerox service organization the following CRCs on the front panel: Black Toner Cyan Toner Magenta Toner Yellow Toner Phaser 1235 Network Color Printers - Xerox 1235/DX | Troubleshooting Guide - Page 83
Value buttons to scroll through all printer events (faults) in the Event History. The most recent is displayed first. Show S/W Levels Displays the current software versions (or levels) on the front panel.: Adobe PS Level Boot Date Engine Version Advanced Features and Troubleshooting Manual 67 - Xerox 1235/DX | Troubleshooting Guide - Page 84
features. Menu Map Prints a page showing the configuration of the front panel Menu tree. System Event Prints a list of the last 100 printer events (as shown in the Log Service Menu - Show Event History section on page 67. Disk Directory Prints a list of fonts and macros loaded on the hard - Xerox 1235/DX | Troubleshooting Guide - Page 85
from the menu system, the printer must be turned off and on again. The CRU Reset function should only be used if the printer did not menu I System menu I PostScript menu I Parallel menu I Ethernet menu I Token Ring menu I Novell menu I Service menu Advanced Features and Troubleshooting Manual 69 - Xerox 1235/DX | Troubleshooting Guide - Page 86
web server. Allows users to access the printer's embedded web server. The embedded web server for Xerox printers is CentreWare Internet Services. See CentreWare Internet Services on page 71. Note Tektronix Phaser printers with PhaserLink will be visible as well. 70 Phaser 1235 Network Color - Xerox 1235/DX | Troubleshooting Guide - Page 87
use that mail account. I Install and configure the Xerox Mail Port Monitor on client workstations. Note See the CentreWare Internet Services User Guide (on the Phaser 1235 Color Printer CD-ROM) for more information on CentreWare Internet Services. Advanced Features and Troubleshooting Manual 71 - Xerox 1235/DX | Troubleshooting Guide - Page 88
Managing Printer Usage 72 Phaser 1235 Network Color Printers - Xerox 1235/DX | Troubleshooting Guide - Page 89
cyan, magenta and yellow) I Transfer belt I Fuser Note LED bars are cleaned at each toner cartridge replacement and cleaning instructions are included with the replacement cartridge. Note To avoid unnecessary printer downtime, be sure to order extra CRCs when the near end of use warnings appear on - Xerox 1235/DX | Troubleshooting Guide - Page 90
This happens during the normal use of a color printer and can be easily remedied by using the color At any time, you can reset the printer to the factory defaults by selecting Color or Item Down. You will see: Processing The printer prints the Color Balance test print. † Note that the - Xerox 1235/DX | Troubleshooting Guide - Page 91
Maintaining the Printer Interpreting the Test Print The Color Balance test print contains numbered images that indicate possible adjustments that can be made. " circle to be the closest gray of any of the circles when compared to the gray background. Advanced Features and Troubleshooting Manual 75 - Xerox 1235/DX | Troubleshooting Guide - Page 92
Maintaining the Printer Making Adjustments Use the following procedures to make adjustments to the color density graphics and numbers only (no written labels) on the 220 V models of the printer. Please see Front Panel Layout on page 39 for button numbers and graphics. 76 Phaser 1235 Network Color - Xerox 1235/DX | Troubleshooting Guide - Page 93
have graphics and numbers only (no written labels) on the 220 V models of the printer. Please see Front Panel Layout on page 39 for button numbers and graphics. Adjustment Recovery Defaults item. The printer will be restored to the default values. Advanced Features and Troubleshooting Manual 77 - Xerox 1235/DX | Troubleshooting Guide - Page 94
Maintaining the Printer 78 Phaser 1235 Network Color Printers - Xerox 1235/DX | Troubleshooting Guide - Page 95
hardware, software and printer maintenance issues. Note Do not use tools or sharp objects to clear paper jams since this may damage the printer. Note Do not touch the bottom surface of the imaging drum. Touching these surfaces may damage them. Advanced Features and Troubleshooting Manual 79 - Xerox 1235/DX | Troubleshooting Guide - Page 96
Know Your Printer on page 1. I Is the printer connected to a computer or network? Software I Is the correct printer driver installed on the workstation? I Is your driver properly configured for the destination printer? For further information, refer to Printing on page 23. 80 Phaser 1235 Network - Xerox 1235/DX | Troubleshooting Guide - Page 97
prevent printing. I Maintain a supply of consumables (especially toner cartridges). I Replace consumables when prompted by the printer. Note Specific instructions for replacing each consumable are included with the individual replacement packages. Advanced Features and Troubleshooting Manual 81 - Xerox 1235/DX | Troubleshooting Guide - Page 98
a hard disk read error that prevented the data from being read. Press the Enter button to clear the message. Turn off the printer, wait 15 seconds, then turn on the printer. If the problem persists, check the support links at www.xerox.com/officeprinting/1235support. 82 Phaser 1235 Network Color - Xerox 1235/DX | Troubleshooting Guide - Page 99
. During the printer's self diagnostics there was a problem reading the engine EPROM. Turn off the printer, wait 15 seconds, then turn on the printer. If the problem persists, check the support links at www.xerox.com/officeprinting/1235support. Advanced Features and Troubleshooting Manual 83 - Xerox 1235/DX | Troubleshooting Guide - Page 100
Troubleshooting Front Panel Messages (cont'd.) printer. Turn off the printer, make sure the fuser is properly installed and turn on the printer. If the problem persists, install a new fuser. For further assistance, visit the support links at www.xerox.com/officeprinting/1235support. 84 Phaser 1235 - Xerox 1235/DX | Troubleshooting Guide - Page 101
printer will cause this fault. If the problem persists, install a new fuser. For further assistance, visit the support links at www.xerox. printer to clear the jam. For more information, see the sections Solving Printing Problems (page 98). Advanced Features and Troubleshooting Manual - Xerox 1235/DX | Troubleshooting Guide - Page 102
Troubleshooting Front printer's self diagnostics it was detected that the power supply voltage is out of specification. Turn off the printer, wait 15 seconds, then turn on the printer. If the problem persists, check the support links at www.xerox.com/officeprinting/1235support. 86 Phaser 1235 - Xerox 1235/DX | Troubleshooting Guide - Page 103
lever, located on the right hand side of the printer, forward and then push backward to return the lever to its home position. Then turn on the printer. If the problem persists, check the support links at www.xerox.com/officeprinting/1235support. Advanced Features and Troubleshooting Manual 87 - Xerox 1235/DX | Troubleshooting Guide - Page 104
by the printer. Turn off the printer, make sure the transfer belt is properly installed and turn on the printer. If the problem persists, install a new transfer belt. For further assistance, visit the support links at www.xerox.com/officeprinting/1235support. 88 Phaser 1235 Network Color - Xerox 1235/DX | Troubleshooting Guide - Page 105
has been detected with the indicated tray's interface and communication path. Turn off the printer, wait 15 seconds, then turn on the printer. If the problem persists, check the support links at www.xerox.com/officeprinting/1235support. Paper did not exit the indicated tray properly, causing a paper - Xerox 1235/DX | Troubleshooting Guide - Page 106
enter the transport area correctly, causing a paper jam. Open Cover A and refer to the labels on the printer to clear the jam. Paper did not exit the paper feed area correctly, causing a paper jam. Open Cover A and refer to the labels on the printer to clear the jam. 90 Phaser 1235 Network Color - Xerox 1235/DX | Troubleshooting Guide - Page 107
the printer. Turn off the printer, make sure the imaging drum is properly installed and turn on the printer. If the problem persists, install a new imaging drum. For further assistance, check the support links at www.xerox.com/officeprinting/1235support. Advanced Features and Troubleshooting Manual - Xerox 1235/DX | Troubleshooting Guide - Page 108
Troubleshooting Printer Management Status Messages ( message. Turn off the printer, wait 15 seconds, then turn on the printer. If the problem persists, visit the support links at www.xerox.com/officeprinting/1235support for further Install a new imaging drum. 92 Phaser 1235 Network Color Printers - Xerox 1235/DX | Troubleshooting Guide - Page 109
www.xerox.com/officeprinting/1235support. One of the LED bars is reporting a temperature error. Turn off the printer, wait 15 seconds, then turn on the printer. If the problem persists, check the support links at www.xerox.com/officeprinting/1235support. Advanced Features and Troubleshooting Manual - Xerox 1235/DX | Troubleshooting Guide - Page 110
.xerox.com/officeprinting/1235support. An error has been detected with the home position of the front paper feeder. Turn off the printer, wait 15 seconds, then turn on the printer. If the problem persists, check the support links at www.xerox.com/officeprinting/1235support. 94 Phaser 1235 Network - Xerox 1235/DX | Troubleshooting Guide - Page 111
. An error has been detected with the front panel interface and communication path. Turn off the printer, wait 15 seconds, then turn on the printer. If the problem persists, check the support links at www.xerox.com/officeprinting/1235support. Advanced Features and Troubleshooting Manual 95 - Xerox 1235/DX | Troubleshooting Guide - Page 112
drum is properly installed and turn on the printer. If the problem persists, install a new imaging drum. For further assistance, visit the support links at www.xerox.com/officeprinting/1235support. The level of toner in the toner cartridge is low. The toner cartridge should be replaced soon, as it - Xerox 1235/DX | Troubleshooting Guide - Page 113
the tray as soon as possible to avoid printing interruptions. The printer has detected that the paper level in Tray 3 is low. Printing can continue until the tray runs out of paper. Reload the tray as soon as possible to avoid printing interruptions. Advanced Features and Troubleshooting Manual 97 - Xerox 1235/DX | Troubleshooting Guide - Page 114
Troubleshooting Solving Printing Problems If you have any problems with the operation of your printer, refer to the table below for suggested remedies. Printer Operation Problems Problem The printer and the printer continues not to print, check the support links at www.xerox.com/officeprinting/ - Xerox 1235/DX | Troubleshooting Guide - Page 115
and check the support links at www.xerox.com/officeprinting/1235support for further assistance. I If an error page was not printed, the printer may require additional memory to process the job. I Verify that the port is set to Auto or PostScript. Advanced Features and Troubleshooting Manual 99 - Xerox 1235/DX | Troubleshooting Guide - Page 116
correct printer driver. I For a PostScript job, set the Print Errors item in the PostScript Menu to On and resend the job. I If an error page prints, there is a problem in the PostScript coding. The error page contains vital information. Retain the page and check the support links at www.xerox.com - Xerox 1235/DX | Troubleshooting Guide - Page 117
the printer, it is front-heavy and could tip forward. Follow the recommended procedure when moving the printer from one location to another. Refer to the Phaser 1235 Color Printer Setup Instructions. , again discharge any static electricity. Advanced Features and Troubleshooting Manual 101 - Xerox 1235/DX | Troubleshooting Guide - Page 118
of the PostScript file system. I Support of the PJL/PCL file system. I Support for Secure Print and Proof Print jobs. I Downloading fonts, forms and overlays. I TIFF and PDF printing Installation Follow this procedure to install the hard drive. 1 Turn off the printer and disconnect cables and - Xerox 1235/DX | Troubleshooting Guide - Page 119
board with the printer's guide channel and slide the board all the way into the printer until it stops. problems occur, reinstall the drive. If problems persist, check the support links at www.xerox.com/officeprinting/1235support for assistance. Advanced Features and Troubleshooting Manual - Xerox 1235/DX | Troubleshooting Guide - Page 120
Additional fonts can be downloaded to the printer with the Font download Utility, the PCL 5C driver, or PJL commands. Font Download Utility the hard drive and is supported on Windows 95/Windows 98, NT4.0 and Windows 2000. It can be installed from the Phaser 1235 Color Printer CD-ROM. Type the PJL - Xerox 1235/DX | Troubleshooting Guide - Page 121
fonts or macros to the printer's file system. If a file with the printer. / can be any combination of up to 40 alphanumeric characters. - This is the binary file data to be downloaded, such as font files and macro data. Advanced Features and Troubleshooting Manual - Xerox 1235/DX | Troubleshooting Guide - Page 122
Options The following is a sequence of commands that can be sent to the printer to download a macro to the hard drive. In this example, the macro is named "a_macro." %- byte count (after the "n" and before the "W") must equal the ID byte count plus 1. 106 Phaser 1235 Network Color Printers - Xerox 1235/DX | Troubleshooting Guide - Page 123
byte count plus 1. FSDELETE Command The FSDELETE command is used to delete files from the printer's hard drive. Syntax @PJL FSDELETE NAME = "pathname" [] Parameters Parameter same parameters as the FSDOWNLOAD command (see page 105). Advanced Features and Troubleshooting Manual 107 - Xerox 1235/DX | Troubleshooting Guide - Page 124
The controller board and internal printer options (Hard Drive, Token install the Token Ring Card. 1 Turn off the printer and disconnect cables and power cord. 2 Remove the controller board and slide the controller board out of the printer. Place it on a stable horizontal surface. 3 Remove the - Xerox 1235/DX | Troubleshooting Guide - Page 125
controller board with the printer's guide channel and slide the board all the way into the printer until it stops. problems occur, reinstall the card. If problems persist, check the support links at www.xerox.com/officeprinting/1235support for assistance. Advanced Features and Troubleshooting Manual - Xerox 1235/DX | Troubleshooting Guide - Page 126
Memory Note DISCHARGE STATIC ELECTRICITY: The controller board and internal printer options (Hard Drive, Token Ring Card, Memory) are Installation Follow this procedure to install additional memory. 1 Turn off the printer and disconnect cables and power cord. 2 Remove the screws that secure the - Xerox 1235/DX | Troubleshooting Guide - Page 127
printer. 8 Print a Configuration Sheet (as described on page 45) and confirm that the total memory is correct. If any problems occur, reinstall the memory. If problems persist, check the support links at www.xerox.com/officeprinting/1235support for assistance. Advanced Features and Troubleshooting - Xerox 1235/DX | Troubleshooting Guide - Page 128
Using Printer Options 112 Phaser 1235 Network Color Printers - Xerox 1235/DX | Troubleshooting Guide - Page 129
Printer Specifications Physical Specifications 430 mm (16.93 in.) width 620 mm (24.4 in.) depth 430 mm (16.93 Hz I 200 - 240 VAC, 50/60 Hz Power Consumption: 300 W av. / 1000 W max. Energy Star Compliant Blue Angel Compliant Printer Specifications Advanced Features and Troubleshooting Manual 113 - Xerox 1235/DX | Troubleshooting Guide - Page 130
Printer Specifications Performance Specifications Resolution I 600 x 600 dpi I 600 x 1200 dpi Print Speed I Up to 20 ppm (pages (PostScript and PCL 5C) Interfaces I IEEE 1284-B bi-directional parallel I Ethernet 10BaseT and 100BaseTx I Optional: Token Rin 114 Phaser 1235 Network Color Printers - Xerox 1235/DX | Troubleshooting Guide - Page 131
PRINTER the instructions, TV technician for help. Changes or modifications to this equipment not specifically approved by the Xerox Corporation Xerox Corporation Phone:(800) 828-6571 Address:Xerox Corporation 800 Phillips Road Webster, New York 14580 USA Advanced Features and Troubleshooting Manual - Xerox 1235/DX | Troubleshooting Guide - Page 132
Markets CE Certification The CE marking applied to this product symbolizes Xerox Europe Declaration of Conformity with the following applicable directives of the EN55022 Configuration Base Printer Base Printer with Token Ring Card Specification EN55022-B EN55022-B 116 Phaser 1235 Network Color - Xerox 1235/DX | Troubleshooting Guide - Page 133
1235 013R90133 Imaging Drum, Magenta; Phaser 1235 013R90134 Imaging Drum, Yellow; Phaser 1235 013R90135 Fuser, 110 Volt; Phaser 1235 008R12685 Fuser, 220 Volt; Phaser 1235 008R12686 Transfer Belt; Phaser 1235 001R00559 Ordering Information Advanced Features and Troubleshooting Manual - Xerox 1235/DX | Troubleshooting Guide - Page 134
) 210 x 297 mm 50 sheets 50 sheets 50 sheets 50 sheets Part Number 016-1896-00 016-1897-00 016-1894-00 016-1895-00 Xerox Phaser Transparency Sleeves and Pockets Item Transparency Sleeve A/Letter size A4 size Part Number 016-1130-00 016-1131-00 118 Phaser 1235 Network Color Printers - Xerox 1235/DX | Troubleshooting Guide - Page 135
99.1 mm labels Part Number 016-1695-00 016-1696-00 016-1688-00 016-1689-00 Xerox Phaser Premium Business Cards Item Description A/Letter (U.S.) 8.5 x 11 in. (50 lb. bond) A4 Contains instructions and five alcohol wipes Part Number 016-1845-00 Advanced Features and Troubleshooting Manual 119 - Xerox 1235/DX | Troubleshooting Guide - Page 136
Ordering Information 120 Phaser 1235 Network Color Printers - Xerox 1235/DX | Troubleshooting Guide - Page 137
• 23, 70 CentreWare for SUN/Solaris • 23 CentreWare Internet Services • 23, 71 CentreWare TTY for UNIX • 23 Cleaning the printer • 73 CMYK Interpretation Setting in PostScript driver • 37 CMYK Simulation Setting in PostScript driver • 30 Collating output Setting in PostScript jobs • 29 Color Adjust - Xerox 1235/DX | Troubleshooting Guide - Page 138
31 E Email Event notification via • 9 Printing via • 9 Enlarge image Setting in PostScript driver • 37 Enter key • 41 Advanced Features and Troubleshooting Manual Ethernet Menu • 60 ➝ 61 AppSocket Enable • 60 AppSocket PDL • 60 Default Gateway • 61 EtherTalk Enable • 60 HTTP Enable • 61 IP Address - Xerox 1235/DX | Troubleshooting Guide - Page 139
Drivers for • 24 Magenta imaging drum Location • 3 Mail Send/Receive • 71 MBF Type item • 53 media supported Image Setting in PostScript driver • 32 Network operating systems • 6 Network Printer Services • 70 Novell Menu driver • 35 Page Policy item • 55 Advanced Features and Troubleshooting Manual - Xerox 1235/DX | Troubleshooting Guide - Page 140
Print Service Pack item • 66 Print Test Patterns item • 66 Printer cleaning • 73 Printer components • 2 ➝ 4 Printer documentation • 10 ➝ 11 Printer drivers See Drivers Printer features • 5 ➝ 9 Printer Management Software CD • 11 Printer reports Printing • 45 Types • 45 Problems See Troubleshooting - Xerox 1235/DX | Troubleshooting Guide - Page 141
driver • 37 Reports Printing • 45 Resolution • 7 Restart Printer 54 System Event Log item • 68 System Toner cartridge Replacing • 73 Top cover Location • 2 Top cover release Location • 2 Transfer belt Location • 3 Replacing • 73 Transparency detection • 8 Advanced Features and Troubleshooting Manual - Xerox 1235/DX | Troubleshooting Guide - Page 142
2 Description of • 5 Location • 4 Tray 2 Type item • 53 Tray 3 Description of • 5 Location • 4 Tray 3 Type item • 53 Troubleshooting Operation problems • 98 ➝ 100 TrueType fonts PCL jobs • 37 U UNIX Drivers for • 24 V Value Down key • 43 Value Up key • 43 W Watermarks Setting in PostScript jobs • 38 - Xerox 1235/DX | Troubleshooting Guide - Page 143
Advanced Features and Troubleshooting Manual - Xerox 1235/DX | Troubleshooting Guide - Page 144
Advanced Features and Troubleshooting Manual
-
 1
1 -
 2
2 -
 3
3 -
 4
4 -
 5
5 -
 6
6 -
 7
7 -
8
-
9
-
10
-
11
-
12
-
13
-
14
-
15
-
16
-
17
-
18
-
19
-
20
-
21
-
22
-
23
-
24
-
25
-
26
-
27
-
28
-
29
-
30
-
31
-
32
-
33
-
34
-
35
-
36
-
37
-
38
-
39
-
40
-
41
-
42
-
43
-
44
-
45
-
46
-
47
-
48
-
49
-
50
-
51
-
52
-
53
-
54
-
55
-
56
-
57
-
58
-
59
-
60
-
61
-
62
-
63
-
64
-
65
-
66
-
67
-
68
-
69
-
70
-
71
-
72
-
73
-
74
-
75
-
76
-
77
-
78
-
79
-
80
-
81
-
82
-
83
-
84
-
85
-
86
-
87
-
88
-
89
-
90
-
91
-
92
-
93
-
94
-
95
-
96
-
97
-
98
-
99
-
100
-
101
-
102
-
103
-
104
-
105
-
106
-
107
-
108
-
109
-
110
-
111
-
112
-
113
-
114
-
115
-
116
-
117
-
118
-
119
-
120
-
121
-
122
-
123
-
124
-
125
-
126
-
127
-
128
-
129
-
130
-
131
-
132
-
133
-
134
-
135
-
136
-
137
-
138
-
139
-
140
-
141
-
142
-
143
-
144
 |
 |

Phaser
®
1235 Color Printer
Advanced Features and Troubleshooting Manual
9/19/00