Yamaha AV-S70 Owner's Manual - Page 23
MENU FUNCTIONS, Adjusting Display Brightness, Setting Auto Power On/Off - dsp
 |
View all Yamaha AV-S70 manuals
Add to My Manuals
Save this manual to your list of manuals |
Page 23 highlights
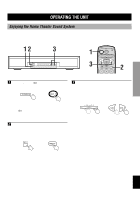
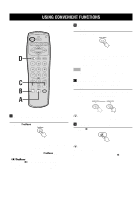
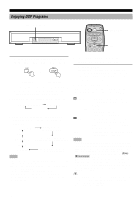
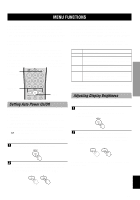
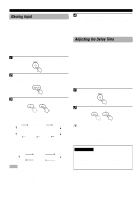
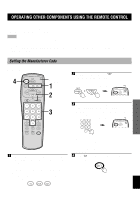
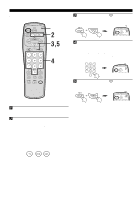
PREPARATION OPERATION MENU FUNCTIONS The menu functions include: "Auto Power" for setting automatic power on/off, "Dimmer" for adjusting display brightness, "Input Name" for naming input, and "Delay Time" for adjusting the delay time used for surround sound. Adjustments on the menu functions should be performed with the remote control. Each time MENU on the remote control is pressed, the function displayed will cycle in the order: "Auto Power", "Dimmer", "Input Name", "Delay Time" (only appears when the selected DSP program is DOLBY DIGITAL/ DOLBY PRO LOGIC, or DOLBY DIGITAL ENHANCED/ DOLBY PRO LOGIC ENHANCED), and input display. INPUT selector button MENU +/- MENU Setting Auto Power On/Off Auto Power functions as described below. 1. No input signal and no buttons have been operated for 30 minutes. 2. Auto Power Off automatically shuts off the power. (The STANDBY indicator will slowly flash.) 3. If a signal is input, Auto Power On automatically turns the power on. (Or power can be turned on again using p on the remote control.) You can set sensitivity for the Auto Power function or turn the Auto Power function off completely. 1 Press MENU to display "Auto Power". The Auto Power function may not function properly depending on the signal output level of connected component. In this case, you can refer to the table given below to change the sensitivity of the Auto Power function. Pressing + will cycle through the selections from top to bottom, while pressing - will cycle through the selections from bottom to top. Display OFF 1 2 3 Setting/Symptom Do not use the Auto Power function. When Auto Power On does not function even though a signal arrives or when Auto Power Off results even though there is a continuing signal. Ordinary setting when using the Auto Power function. When Auto Power On results even though no signal has arrived, or when Auto Power Off does not result even though there is no current signal. To cancel the menu functions, press MENU until the input display returns. Adjusting Display Brightness The display brightness of the front speaker unit can be adjusted as follows. 1 Press MENU to display "Dimmer". The currently brightness level (such as "Dimmer: ±0") will be displayed. 2 Press MENU + or - to adjust the brightness. Pressing + will brighten the display, while pressing - will dim the display. Brightness can be adjusted from -3 (dimmest) to +3 (brightest). 2 To set Auto Power On, use the MENU + or - to select the "Auto Power 2". To set Auto Power Off, use the MENU - to select the "OFF". To cancel the menu functions, press MENU until the input display returns. REMOTE CONTROL APPENDIX English 21
-
 1
1 -
2
-
3
-
4
-
5
-
6
-
7
-
8
-
9
-
10
-
11
-
12
-
13
-
14
-
15
-
16
-
17
-
 18
18 -
 19
19 -
 20
20 -
 21
21 -
 22
22 -
 23
23 -
 24
24 -
 25
25 -
 26
26 -
 27
27 -
 28
28 -
29
-
30
-
31
-
32
-
33
-
34
-
35
-
36
-
37
-
38
-
39
-
40
 |
 |
