Yamaha CVP-69A Owner's Manual - Page 108
Saving, Loading, Renaming, and Deleting Micro-tuning Files
 |
View all Yamaha CVP-69A manuals
Add to My Manuals
Save this manual to your list of manuals |
Page 108 highlights
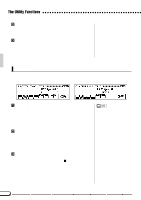
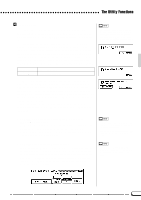
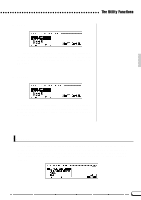
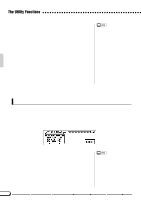
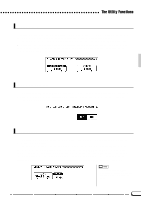
The Utility Functions ZSelect the Micro Tuning Function XSelect a Key ...Select the key you want to tune by pressing the key on the keyboard. The selected key will appear on the display. • The Micro-Tuning settings are retained in memory even when the power is turned off if the BACKUP page TUNE/ MICRO TUNING parameter is turned ON (page 107), otherwise all keys are set to "0". CTune ...Use the TUNE s and t buttons to tune the selected key as required. The data dial and [+]/[-] buttons can also be used. You can play the key being tuned to check the sound during this operation. The maximum tuning range is ±100 cents (100 cents = one semitone). The normal tuning (±0cent) for the selected key can be instantly recalled by simultaneously pressing the TUNE s and t buttons. VRepeat as Necessary Repeat steps 2 and 3 until all the required keys have been tuned. s Disk Operations: Saving, Loading, Renaming, and Deleting Micro-tuning Files Make sure that the disk you want to use for this operation is inserted in the disk drive, and both the song record or playback modes are not engaged before proceeding. ZSelect a File Operation Use the fourth LCD button to select the LOAD, SAVE, DELETE, or RENAME operation. XPress START ...Press the START LCD button to begin the selected operation, then proceed according to the selected operation as described below: • The Micro Tuning Disk Operations cannot be used when the song record or playback mode is engaged - the "Button not valid!" alert will be displayed. 105
-
 1
1 -
2
-
3
-
4
-
5
-
6
-
7
-
8
-
9
-
10
-
11
-
12
-
13
-
14
-
15
-
16
-
17
-
18
-
19
-
20
-
21
-
22
-
23
-
24
-
25
-
26
-
27
-
28
-
29
-
30
-
31
-
32
-
33
-
34
-
35
-
36
-
37
-
38
-
39
-
40
-
41
-
42
-
43
-
44
-
45
-
46
-
47
-
48
-
49
-
50
-
51
-
52
-
53
-
54
-
55
-
56
-
57
-
58
-
59
-
60
-
61
-
62
-
63
-
64
-
65
-
66
-
67
-
68
-
69
-
70
-
71
-
72
-
73
-
74
-
75
-
76
-
77
-
78
-
79
-
80
-
81
-
82
-
83
-
84
-
85
-
86
-
87
-
88
-
89
-
90
-
91
-
92
-
93
-
94
-
95
-
96
-
97
-
98
-
99
-
100
-
101
-
102
-
 103
103 -
 104
104 -
 105
105 -
 106
106 -
 107
107 -
 108
108 -
 109
109 -
 110
110 -
 111
111 -
 112
112 -
 113
113 -
114
-
115
-
116
-
117
-
118
-
119
-
120
-
121
-
122
-
123
-
124
-
125
-
126
-
127
-
128
-
129
-
130
-
131
-
132
-
133
-
134
-
135
-
136
-
137
-
138
-
139
-
140
-
141
-
142
-
143
-
144
-
145
-
146
-
147
-
148
-
149
-
150
-
151
-
152
-
153
-
154
-
155
-
156
-
157
-
158
-
159
-
160
-
161
-
162
-
163
 |
 |
