Yamaha DM2000 Owner's Manual - Page 169
About the GEQs, Editing GEQs, Use the EFFECTS/PLUG INS [DISPLAY] button to locate the GEQ Edit
 |
View all Yamaha DM2000 manuals
Add to My Manuals
Save this manual to your list of manuals |
Page 169 highlights
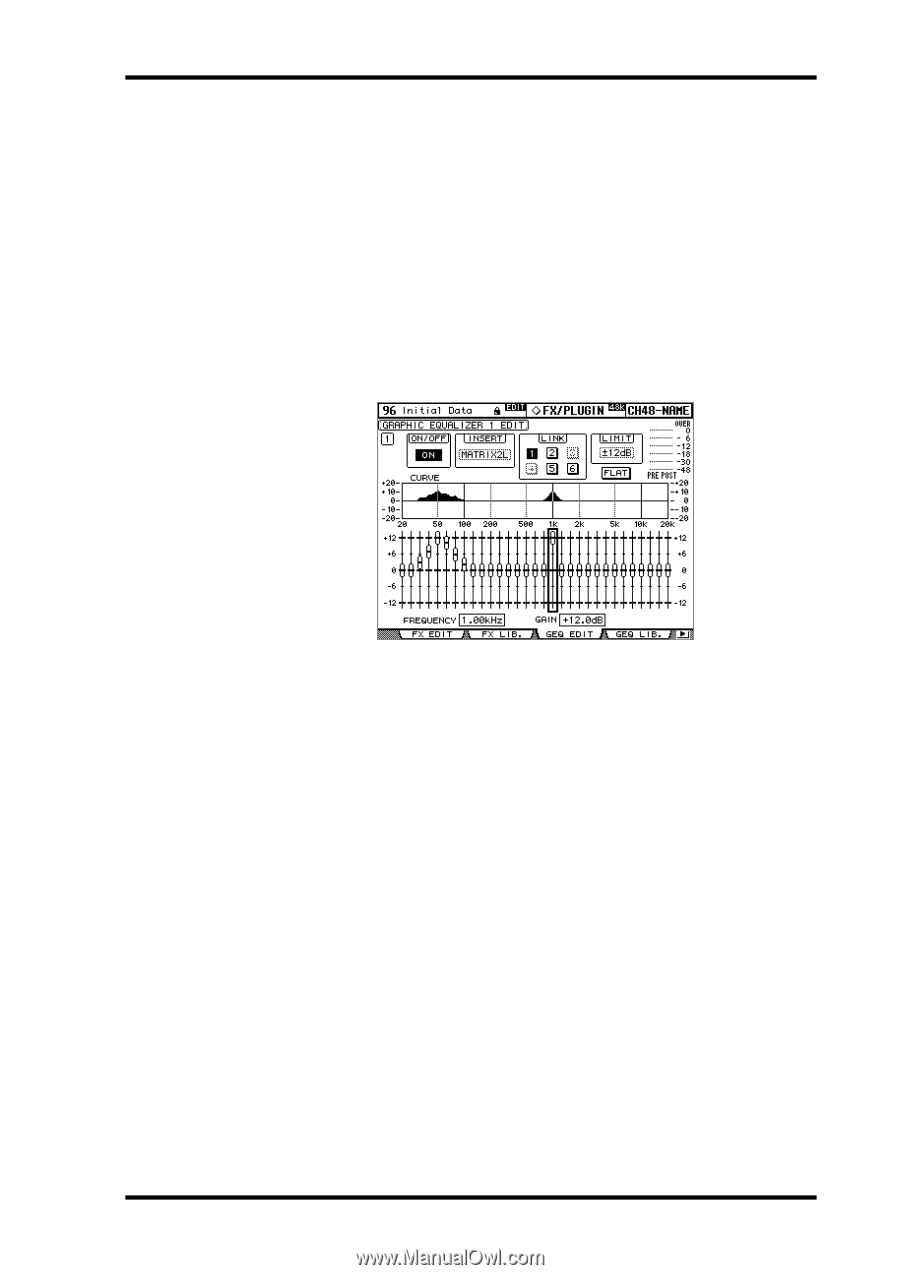
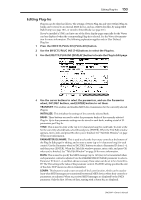
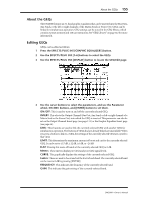
About the GEQs 155 About the GEQs The DM2000 features six 31-band graphic equalizers that can be inserted into the Bus Outs, Aux Sends, or the left or right channels of the Matrix Sends or Stereo Out. GEQs can be linked for simultaneous operation. GEQ settings can be stored in the GEQ library, which contains 1 preset memory and 128 user memories. See "GEQ Library" on page 142 for more information. Editing GEQs GEQs can be edited as follows. 1 Press the EFFECTS/PLUG INS [GRAPHIC EQUALIZERS] button. 2 Use the EFFECTS/PLUG INS [1-6] buttons to select the GEQs. 3 Use the EFFECTS/PLUG INS [DISPLAY] button to locate the GEQ Edit page. 4 Use the cursor buttons to select the parameters, and use the Parameter wheel, INC/DEC buttons, and [ENTER] button to set them. ON/OFF: This is used to turn on and off the currently selected GEQ. INSERT: This selects the Output Channel (Bus Out, Aux Send, or left or right channel of a Matrix Send or the Stereo Out) into which the GEQ is inserted. This parameter can also be set on the Output Channel Insert page (see page 111) or the Graphic Equalizer Insert page (see page 66). LINK: These buttons are used to link the currently selected GEQ with another GEQ for simultaneous operation. The buttons of GEQs that are already linked are unavailable. When you press a button to link to a GEQ, the settings of the currently selected GEQ are copied to that GEQ. LIMIT: This determines the maximum amount of boost and cut for the currently selected GEQ. It can be set to ±15 dB, ±12 dB, ±6 dB, or -24 dB. FLAT: Pressing this resets all bands of the currently selected GEQ to 0 dB. Meters: These meters display pre-GEQ and post-GEQ signal levels. CURVE: This graphically displays the settings of the currently selected GEQ. Faders: These are used to boost and cut the level of each band. The currently selected band can be reset to 0 dB by pressing [ENTER]. FREQUENCY: This indicates the frequency of the currently selected band. GAIN: This indicates the gain setting of the currently selected band. DM2000-Owner's Manual
-
 1
1 -
2
-
3
-
4
-
5
-
6
-
7
-
8
-
9
-
10
-
11
-
12
-
13
-
14
-
15
-
16
-
17
-
18
-
19
-
20
-
21
-
22
-
23
-
24
-
25
-
26
-
27
-
28
-
29
-
30
-
31
-
32
-
33
-
34
-
35
-
36
-
37
-
38
-
39
-
40
-
41
-
42
-
43
-
44
-
45
-
46
-
47
-
48
-
49
-
50
-
51
-
52
-
53
-
54
-
55
-
56
-
57
-
58
-
59
-
60
-
61
-
62
-
63
-
64
-
65
-
66
-
67
-
68
-
69
-
70
-
71
-
72
-
73
-
74
-
75
-
76
-
77
-
78
-
79
-
80
-
81
-
82
-
83
-
84
-
85
-
86
-
87
-
88
-
89
-
90
-
91
-
92
-
93
-
94
-
95
-
96
-
97
-
98
-
99
-
100
-
101
-
102
-
103
-
104
-
105
-
106
-
107
-
108
-
109
-
110
-
111
-
112
-
113
-
114
-
115
-
116
-
117
-
118
-
119
-
120
-
121
-
122
-
123
-
124
-
125
-
126
-
127
-
128
-
129
-
130
-
131
-
132
-
133
-
134
-
135
-
136
-
137
-
138
-
139
-
140
-
141
-
142
-
143
-
144
-
145
-
146
-
147
-
148
-
149
-
150
-
151
-
152
-
153
-
154
-
155
-
156
-
157
-
158
-
159
-
160
-
161
-
162
-
163
-
 164
164 -
 165
165 -
 166
166 -
 167
167 -
 168
168 -
 169
169 -
 170
170 -
 171
171 -
 172
172 -
 173
173 -
 174
174 -
175
-
176
-
177
-
178
-
179
-
180
-
181
-
182
-
183
-
184
-
185
-
186
-
187
-
188
-
189
-
190
-
191
-
192
-
193
-
194
-
195
-
196
-
197
-
198
-
199
-
200
-
201
-
202
-
203
-
204
-
205
-
206
-
207
-
208
-
209
-
210
-
211
-
212
-
213
-
214
-
215
-
216
-
217
-
218
-
219
-
220
-
221
-
222
-
223
-
224
-
225
-
226
-
227
-
228
-
229
-
230
-
231
-
232
-
233
-
234
-
235
-
236
-
237
-
238
-
239
-
240
-
241
-
242
-
243
-
244
-
245
-
246
-
247
-
248
-
249
-
250
-
251
-
252
-
253
-
254
-
255
-
256
-
257
-
258
-
259
-
260
-
261
-
262
-
263
-
264
-
265
-
266
-
267
-
268
-
269
-
270
-
271
-
272
-
273
-
274
-
275
-
276
-
277
-
278
-
279
-
280
-
281
-
282
-
283
-
284
-
285
-
286
-
287
-
288
-
289
-
290
-
291
-
292
-
293
-
294
-
295
-
296
-
297
-
298
-
299
-
300
-
301
-
302
-
303
-
304
-
305
-
306
-
307
-
308
-
309
-
310
-
311
-
312
-
313
-
314
-
315
-
316
-
317
-
318
-
319
-
320
-
321
-
322
-
323
-
324
-
325
-
326
-
327
-
328
-
329
-
330
-
331
-
332
-
333
-
334
-
335
-
336
-
337
-
338
-
339
-
340
-
341
-
342
-
343
-
344
-
345
-
346
-
347
-
348
-
349
-
350
-
351
-
352
-
353
-
354
-
355
-
356
-
357
-
358
-
359
-
360
-
361
-
362
 |
 |