Yamaha YSP 3000 Owner's Manual - Page 85
DINPUT RENAME, EHDMI SET, INPUT RENAME Input rename, HDMI SET HDMI settings
 |
UPC - 027108928616
View all Yamaha YSP 3000 manuals
Add to My Manuals
Save this manual to your list of manuals |
Page 85 highlights
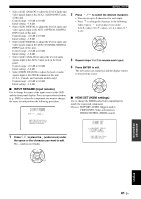
p p p p • Select AUX1 ANALOG to adjust the level of audio and video signals input at the AUX 1 AUDIO INPUT jacks of this unit. Control range: -6.0 dB to 0.0 dB Initial setting: -3.0 dB • Select AUX1 DIGITAL to adjust the level of audio and video signals input at the AUX 1 OPTICAL DIGITAL INPUT jack of this unit. Control range: -6.0 dB to 0.0 dB Initial setting: -3.0 dB • Select AUX2 DIGITAL to adjust the level of audio and video signals input at the AUX 2 COAXIAL DIGITAL INPUT jack of this unit. Control range: -6.0 dB to 0.0 dB Initial setting: -3.0 dB • Select AUX3 ANALOG to adjust the level of audio signals input at the AUX 3 input jack on the front panel. Control range: -6.0 dB to 0.0 dB Initial setting: -3.0 dB • Select DOCK ANALOG to adjust the level of audio signals input at the DOCK terminal of this unit (U.S.A., Canada, and Australia models only). Control range: -6.0 dB to 0.0 dB Initial setting: -3.0 dB ■ INPUT RENAME (Input rename) Use to change the name of the input source in the OSD and the front panel display. Press an input selector button (e.g., DVD) to select the component you want to change the name for and perform the following procedure. D)INPUT RENAME DVD -> DVD p [ ]/[ ]:Position [ ]/[ ]:Character [ENTER]:Return 1 Press / to place the _ (underscore) under the space or the character you want to edit. The _ (underscore) flashes. p MANUAL SETUP 2 Press / to select the desired character. • You can use up to 8 characters for each input. • Press to change the character in the following order or press to go in the reverse order: A to Z, a space, 0 to 9, a space, a to z, a space, #, *, +, etc. ENTER 3 Repeat steps 1 to 2 to rename each input. 4 Press ENTER to exit. The new names are registered, and the display returns to the previous screen. ENTER ■ HDMI SET (HDMI settings) Use to change the HDMI audio/video output/input to match the connected component. Choices: SUPPORT AUDIO (Support audio), VIDEO INFO (Video information), HDMI CONTROL (HDMI control) E)HDMI SET . a)SUPPORT AUDIO b)VIDEO INFO c)HDMI CONTROL [ ]/[ ]:Up/Down [ENTER]:Enter ENTER ADVANCED OPERATION English 81 En
-
 1
1 -
2
-
3
-
4
-
5
-
6
-
7
-
8
-
9
-
10
-
11
-
12
-
13
-
14
-
15
-
16
-
17
-
18
-
19
-
20
-
21
-
22
-
23
-
24
-
25
-
26
-
27
-
28
-
29
-
30
-
31
-
32
-
33
-
34
-
35
-
36
-
37
-
38
-
39
-
40
-
41
-
42
-
43
-
44
-
45
-
46
-
47
-
48
-
49
-
50
-
51
-
52
-
53
-
54
-
55
-
56
-
57
-
58
-
59
-
60
-
61
-
62
-
63
-
64
-
65
-
66
-
67
-
68
-
69
-
70
-
71
-
72
-
73
-
74
-
75
-
76
-
77
-
78
-
79
-
 80
80 -
 81
81 -
 82
82 -
 83
83 -
 84
84 -
 85
85 -
 86
86 -
 87
87 -
 88
88 -
 89
89 -
 90
90 -
91
-
92
-
93
-
94
-
95
-
96
-
97
-
98
-
99
-
100
-
101
-
102
-
103
-
104
-
105
-
106
-
107
-
108
-
109
-
110
-
111
-
112
-
113
-
114
-
115
-
116
-
117
-
118
-
119
-
120
-
121
-
122
-
123
-
124
-
125
-
126
-
127
-
128
-
129
 |
 |
