2001 Ford F150 Owner Guide 4th Printing - Page 252
2001 Ford F150 Manual
Page 252 highlights
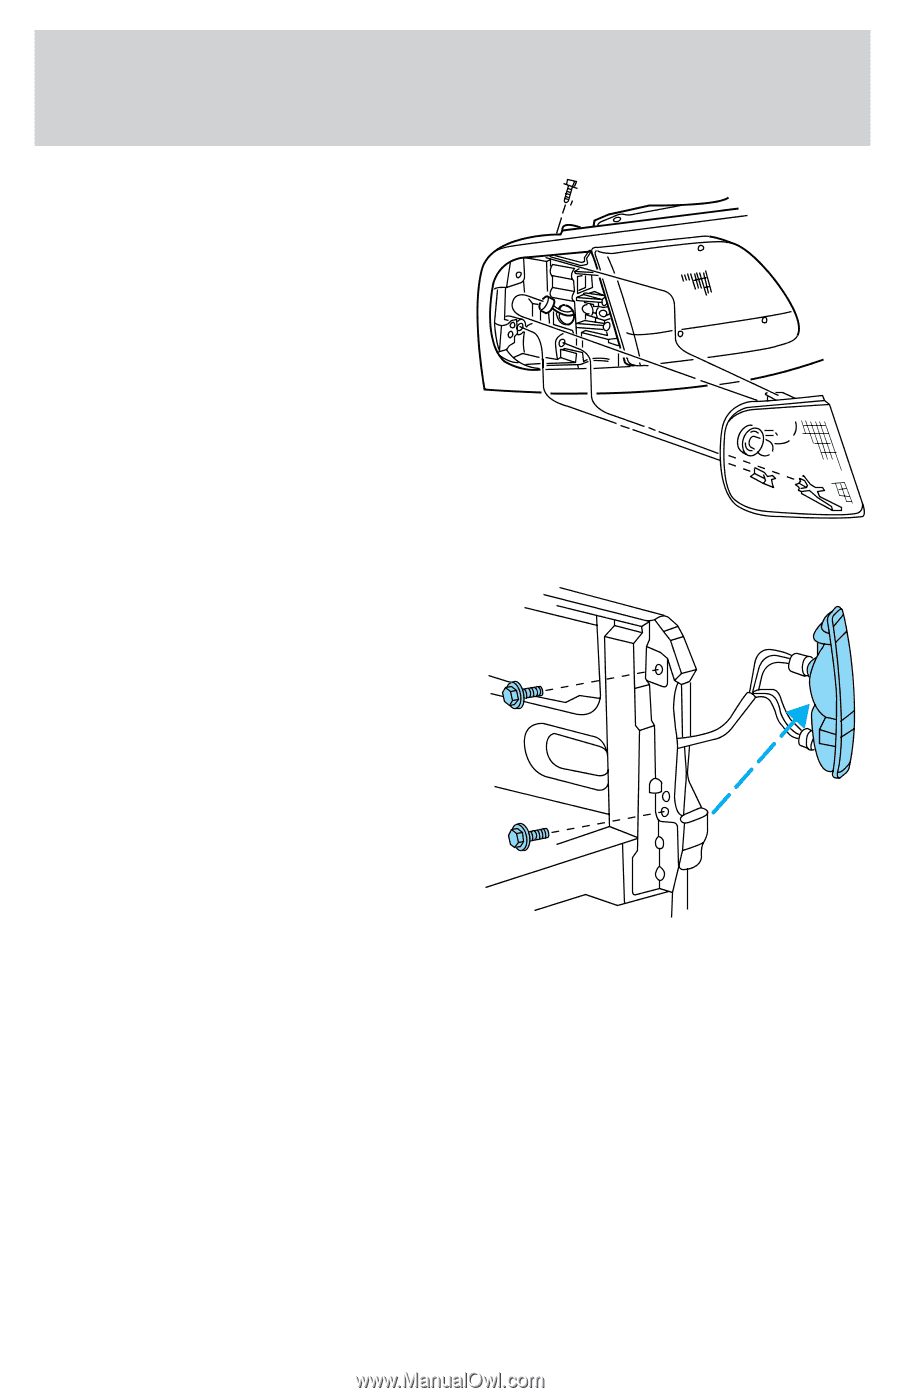
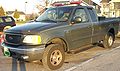
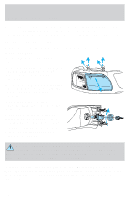
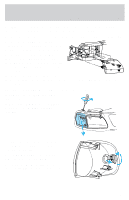
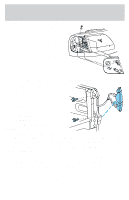
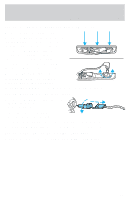
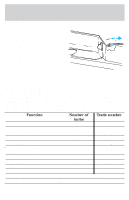
Maintenance and care 6. Align top and bottom ribs of parking lamp assembly with corresponding slots on front of vehicle. 7. Push gently until parking lamp assembly seats (you will hear a snap). 8. Install screw on lamp assembly. Replacing tail/brake/turn signal/backup lamp bulbs The tail/brake/turn signal and backup lamp bulbs are located in the tail lamp assembly, one just below the other. Follow the same steps to replace either bulb: 1. If equipped, remove tail lamp covers. 2. Open the liftgate to expose the lamp assembly screws. 3. Remove the two bolts from the tail lamp assembly. 4. Carefully pull the lamp assembly from the tailgate pillar to disengage two hidden snap-in retainers. (Flare side and Super Crewtail lamps are not equipped with snap-in retainers.) 5. Remove bulb socket from the lamp assembly by turning it counterclockwise. 6. Pull bulb straight out of socket and press in the new bulb. 7. Install the bulb socket into the lamp assembly by turning clockwise. 8. Carefully install the tail lamp assembly on tailgate pillar snapping the two snap-in retainers into place. (Flare side and Super Crewtail lamps do not snap into place but have two tabs which fit into slots.) 9. Secure the tail lamp on the vehicle with two bolts. 252
-
 1
1 -
2
-
3
-
4
-
5
-
6
-
7
-
8
-
9
-
10
-
11
-
12
-
13
-
14
-
15
-
16
-
17
-
18
-
19
-
20
-
21
-
22
-
23
-
24
-
25
-
26
-
27
-
28
-
29
-
30
-
31
-
32
-
33
-
34
-
35
-
36
-
37
-
38
-
39
-
40
-
41
-
42
-
43
-
44
-
45
-
46
-
47
-
48
-
49
-
50
-
51
-
52
-
53
-
54
-
55
-
56
-
57
-
58
-
59
-
60
-
61
-
62
-
63
-
64
-
65
-
66
-
67
-
68
-
69
-
70
-
71
-
72
-
73
-
74
-
75
-
76
-
77
-
78
-
79
-
80
-
81
-
82
-
83
-
84
-
85
-
86
-
87
-
88
-
89
-
90
-
91
-
92
-
93
-
94
-
95
-
96
-
97
-
98
-
99
-
100
-
101
-
102
-
103
-
104
-
105
-
106
-
107
-
108
-
109
-
110
-
111
-
112
-
113
-
114
-
115
-
116
-
117
-
118
-
119
-
120
-
121
-
122
-
123
-
124
-
125
-
126
-
127
-
128
-
129
-
130
-
131
-
132
-
133
-
134
-
135
-
136
-
137
-
138
-
139
-
140
-
141
-
142
-
143
-
144
-
145
-
146
-
147
-
148
-
149
-
150
-
151
-
152
-
153
-
154
-
155
-
156
-
157
-
158
-
159
-
160
-
161
-
162
-
163
-
164
-
165
-
166
-
167
-
168
-
169
-
170
-
171
-
172
-
173
-
174
-
175
-
176
-
177
-
178
-
179
-
180
-
181
-
182
-
183
-
184
-
185
-
186
-
187
-
188
-
189
-
190
-
191
-
192
-
193
-
194
-
195
-
196
-
197
-
198
-
199
-
200
-
201
-
202
-
203
-
204
-
205
-
206
-
207
-
208
-
209
-
210
-
211
-
212
-
213
-
214
-
215
-
216
-
217
-
218
-
219
-
220
-
221
-
222
-
223
-
224
-
225
-
226
-
227
-
228
-
229
-
230
-
231
-
232
-
233
-
234
-
235
-
236
-
237
-
238
-
239
-
240
-
241
-
242
-
243
-
244
-
245
-
246
-
 247
247 -
 248
248 -
 249
249 -
 250
250 -
 251
251 -
 252
252 -
 253
253 -
 254
254 -
 255
255 -
 256
256 -
 257
257 -
258
-
259
-
260
-
261
-
262
-
263
-
264
-
265
-
266
-
267
-
268
-
269
-
270
-
271
-
272
-
273
-
274
-
275
-
276
-
277
-
278
-
279
-
280
-
281
-
282
-
283
-
284
-
285
-
286
-
287
-
288
-
289
-
290
-
291
-
292
-
293
-
294
-
295
-
296
 |
 |