2001 Nissan Altima Owner's Manual - Page 162
2001 Nissan Altima Manual
Page 162 highlights
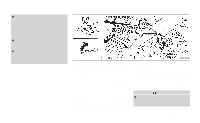
4. Lower the vehicle slowly until the tire touches the ground. Then, with the wheel nut wrench, tighten the wheel nuts securely in the sequence as illustrated. Lower the vehicle completely. WARNING ● Incorrect wheel nuts or improperly tightened wheel nuts can cause the wheel to become loose or come off. This could cause an accident. WCE0004 Adjust tire pressure to the COLD pressure. COLD pressure: After vehicle has been parked for three hours or more or driven less than 1 mile (1.6 km). COLD tire pressures are shown on the tire placard affixed to the driver's door, center pillar. 5. With the spare tire installed on the vehicle, place the damaged tire in the spare tire storage area. Put the jack rod and wheel nut wrench in the tool bag and place the tool bag in the spare tire storage area. 6. Place the spare tire cover and the trunk floor carpeting over the damaged tire. Installing the spare tire The spare tire is designed for emergency use. See specific instructions under the heading ''Wheels and tires'' in the ''Doit-yourself'' section. 1. Clean any mud or dirt from the surface between the wheel and hub. 2. Carefully put the spare tire on and install the wheel nuts finger-tight. 3. With the wheel nut wrench, tighten wheel nuts alternately and evenly until they are tight. ● Do not use oil or grease on the wheel studs or nuts. This could cause the nuts to become loose. ● Retighten the wheel nuts when the vehicle has been driven for 600 miles (1,000 km) (also in cases of a flat tire, etc.). As soon as possible, tighten the wheel nuts to the specified torque with a torque wrench. Wheel nut tightening torque: 72 to 86 ft-lb (98 to 117 N m) In case of emergency 6-7
-
 1
1 -
2
-
3
-
4
-
5
-
6
-
7
-
8
-
9
-
10
-
11
-
12
-
13
-
14
-
15
-
16
-
17
-
18
-
19
-
20
-
21
-
22
-
23
-
24
-
25
-
26
-
27
-
28
-
29
-
30
-
31
-
32
-
33
-
34
-
35
-
36
-
37
-
38
-
39
-
40
-
41
-
42
-
43
-
44
-
45
-
46
-
47
-
48
-
49
-
50
-
51
-
52
-
53
-
54
-
55
-
56
-
57
-
58
-
59
-
60
-
61
-
62
-
63
-
64
-
65
-
66
-
67
-
68
-
69
-
70
-
71
-
72
-
73
-
74
-
75
-
76
-
77
-
78
-
79
-
80
-
81
-
82
-
83
-
84
-
85
-
86
-
87
-
88
-
89
-
90
-
91
-
92
-
93
-
94
-
95
-
96
-
97
-
98
-
99
-
100
-
101
-
102
-
103
-
104
-
105
-
106
-
107
-
108
-
109
-
110
-
111
-
112
-
113
-
114
-
115
-
116
-
117
-
118
-
119
-
120
-
121
-
122
-
123
-
124
-
125
-
126
-
127
-
128
-
129
-
130
-
131
-
132
-
133
-
134
-
135
-
136
-
137
-
138
-
139
-
140
-
141
-
142
-
143
-
144
-
145
-
146
-
147
-
148
-
149
-
150
-
151
-
152
-
153
-
154
-
155
-
156
-
 157
157 -
 158
158 -
 159
159 -
 160
160 -
 161
161 -
 162
162 -
 163
163 -
 164
164 -
 165
165 -
 166
166 -
 167
167 -
168
-
169
-
170
-
171
-
172
-
173
-
174
-
175
-
176
-
177
-
178
-
179
-
180
-
181
-
182
-
183
-
184
-
185
-
186
-
187
-
188
-
189
-
190
-
191
-
192
-
193
-
194
-
195
-
196
-
197
-
198
-
199
-
200
-
201
-
202
-
203
-
204
-
205
-
206
-
207
-
208
-
209
-
210
-
211
-
212
-
213
-
214
-
215
-
216
-
217
-
218
-
219
-
220
-
221
-
222
-
223
-
224
-
225
-
226
-
227
-
228
-
229
-
230
-
231
-
232
-
233
-
234
-
235
-
236
-
237
-
238
-
239
-
240
-
241
-
242
-
243
-
244
-
245
-
246
-
247
-
248
-
249
-
250
-
251
-
252
-
253
-
254
-
255
-
256
-
257
-
258
 |
 |
