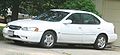
2001 Nissan Altima Owner's Manual - Page 202
2001 Nissan Altima Manual
Page 202 highlights
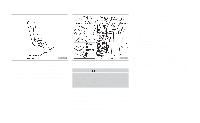
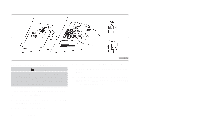
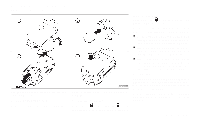
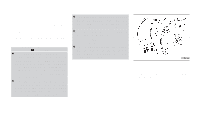
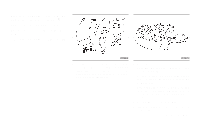
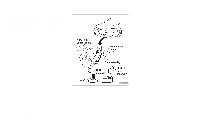
Adjusting the headlight aim Before performing aiming adjustment, make sure of the following: a. Use an aiming wall screen. b. Keep all of the tires inflated to the correct pressure. c. Place the vehicle and screen on level ground. d. See that the vehicle is unloaded (except for full levels of coolant, engine oil and fuel, and that the spare tire, jack, and tools are stored). Have the driver or an equivalent weight placed in the driver's seat. LDI0010 LDI0011 3. Remove the three nuts and one bolt mounting the headlamp assembly (see above illustration). 4. Pull the headlamp assembly evenly away from the front of the vehicle to access the bulb sockets. 5. Disconnect the harness connector from the back side of the bulb socket (see above illustration). 6. Turn the bulb retaining ring counterclockwise until it is free from the headlamp assembly and then remove it. 7. Remove the bulb by pulling it straight out of the lamp assembly. Do not shake the bulb when removing it. 8. Follow the instructions in reverse order to install new bulb. Headlamp mounting nuts and bolt torque: 36 to 47 in-lb (4.1 to 5.3 N m) Low beam 1. Open the hood. Turn headlamp low beam on. 2. Adjust the vertical aim by turning the adjusting screw. ● Cover the opposite lamp and ensure the fog lamps (if so equipped) are turned off. ● Adjust beam pattern until cutoff line is positioned at the same height off ground as bulb center (on H-line). Do-it-yourself 8-25
-
 1
1 -
2
-
3
-
4
-
5
-
6
-
7
-
8
-
9
-
10
-
11
-
12
-
13
-
14
-
15
-
16
-
17
-
18
-
19
-
20
-
21
-
22
-
23
-
24
-
25
-
26
-
27
-
28
-
29
-
30
-
31
-
32
-
33
-
34
-
35
-
36
-
37
-
38
-
39
-
40
-
41
-
42
-
43
-
44
-
45
-
46
-
47
-
48
-
49
-
50
-
51
-
52
-
53
-
54
-
55
-
56
-
57
-
58
-
59
-
60
-
61
-
62
-
63
-
64
-
65
-
66
-
67
-
68
-
69
-
70
-
71
-
72
-
73
-
74
-
75
-
76
-
77
-
78
-
79
-
80
-
81
-
82
-
83
-
84
-
85
-
86
-
87
-
88
-
89
-
90
-
91
-
92
-
93
-
94
-
95
-
96
-
97
-
98
-
99
-
100
-
101
-
102
-
103
-
104
-
105
-
106
-
107
-
108
-
109
-
110
-
111
-
112
-
113
-
114
-
115
-
116
-
117
-
118
-
119
-
120
-
121
-
122
-
123
-
124
-
125
-
126
-
127
-
128
-
129
-
130
-
131
-
132
-
133
-
134
-
135
-
136
-
137
-
138
-
139
-
140
-
141
-
142
-
143
-
144
-
145
-
146
-
147
-
148
-
149
-
150
-
151
-
152
-
153
-
154
-
155
-
156
-
157
-
158
-
159
-
160
-
161
-
162
-
163
-
164
-
165
-
166
-
167
-
168
-
169
-
170
-
171
-
172
-
173
-
174
-
175
-
176
-
177
-
178
-
179
-
180
-
181
-
182
-
183
-
184
-
185
-
186
-
187
-
188
-
189
-
190
-
191
-
192
-
193
-
194
-
195
-
196
-
 197
197 -
 198
198 -
 199
199 -
 200
200 -
 201
201 -
 202
202 -
 203
203 -
 204
204 -
 205
205 -
 206
206 -
 207
207 -
208
-
209
-
210
-
211
-
212
-
213
-
214
-
215
-
216
-
217
-
218
-
219
-
220
-
221
-
222
-
223
-
224
-
225
-
226
-
227
-
228
-
229
-
230
-
231
-
232
-
233
-
234
-
235
-
236
-
237
-
238
-
239
-
240
-
241
-
242
-
243
-
244
-
245
-
246
-
247
-
248
-
249
-
250
-
251
-
252
-
253
-
254
-
255
-
256
-
257
-
258
 |
 |
