2001 Nissan Altima Owner's Manual - Page 205
2001 Nissan Altima Manual
Page 205 highlights
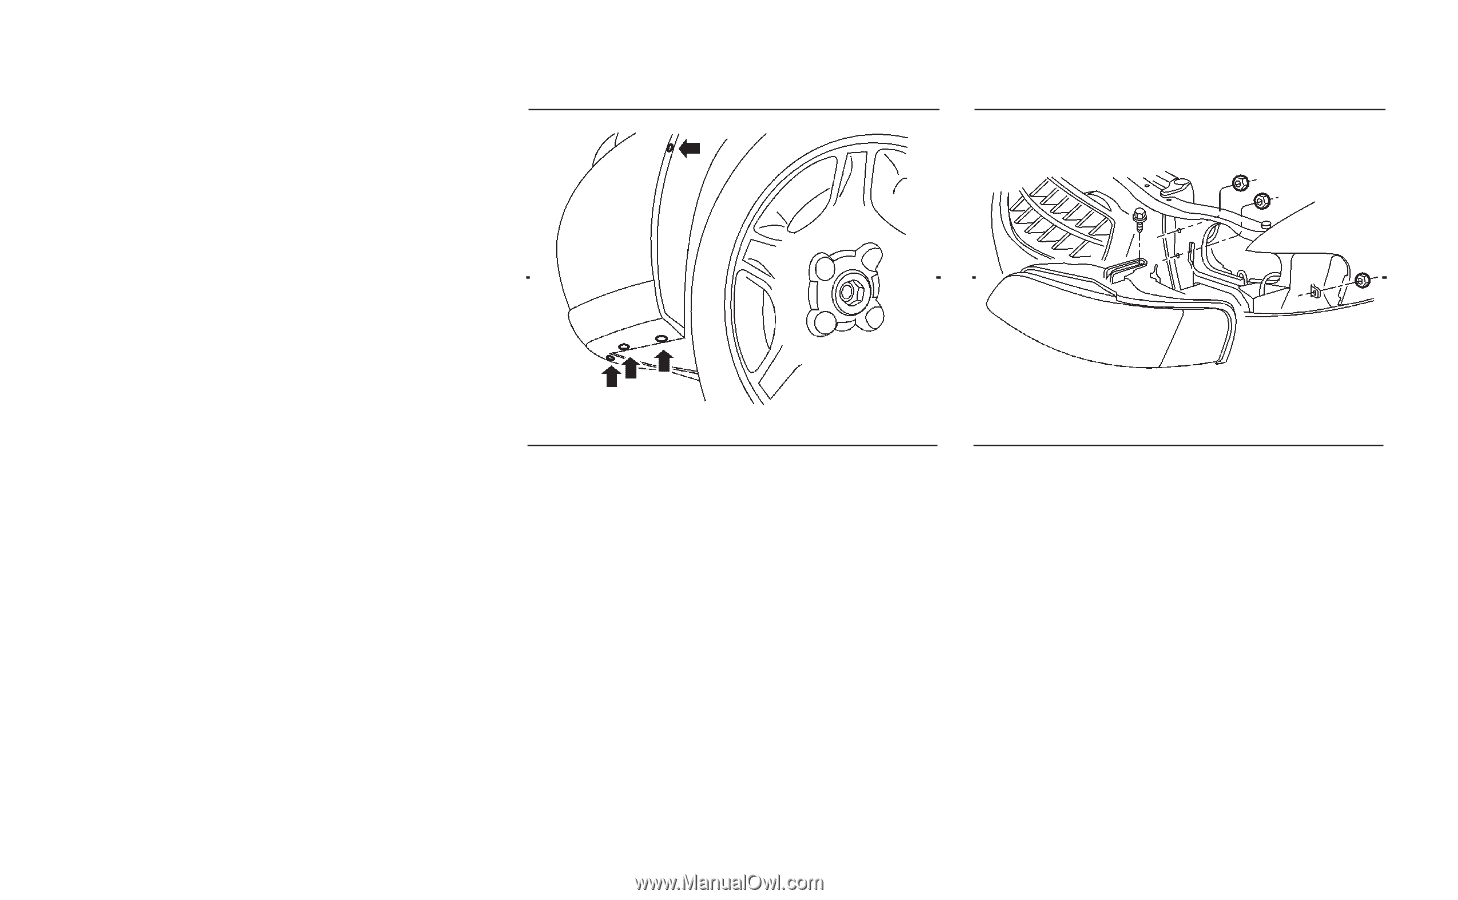
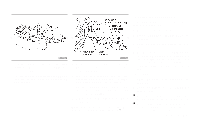
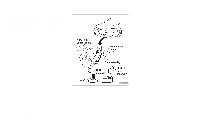
FRONT TURN SIGNAL LAMP Replacing the front turn signal lamp bulb 1. Disconnect the negative (-) battery cable. 2. Reach between the grille and radiator to access the turn signal bulb socket. 3. Rotate the socket counter-clockwise and pull it out of the headlamp assembly. Do not shake the bulb socket when removing it. 4. Pull the bulb out of the socket. 5. Follow the instructions in reverse order to install new bulb. LDI0009 LDI0010 FRONT PARKING AND CORNERING LAMP Replacing the front parking and cornering lamp bulb 1. Disconnect the negative (-) battery cable. 2. Remove the four screws from the bottom of the front fender protector (see above illustration) and position the fender protector aside to allow access to the headlamp mounting fasteners. 3. Remove the three nuts and one bolt mounting the headlamp assembly (see above illustration). 4. Pull the headlamp assembly evenly away from the front of the vehicle to access the bulb sockets. 5. Rotate the socket counter-clockwise and pull it out of the headlamp assembly. Do not shake the bulb socket when removing it. 6. Pull the bulb out of the socket. 7. Follow the instructions in reverse order to install new bulb. 8-28 Do-it-yourself
-
 1
1 -
2
-
3
-
4
-
5
-
6
-
7
-
8
-
9
-
10
-
11
-
12
-
13
-
14
-
15
-
16
-
17
-
18
-
19
-
20
-
21
-
22
-
23
-
24
-
25
-
26
-
27
-
28
-
29
-
30
-
31
-
32
-
33
-
34
-
35
-
36
-
37
-
38
-
39
-
40
-
41
-
42
-
43
-
44
-
45
-
46
-
47
-
48
-
49
-
50
-
51
-
52
-
53
-
54
-
55
-
56
-
57
-
58
-
59
-
60
-
61
-
62
-
63
-
64
-
65
-
66
-
67
-
68
-
69
-
70
-
71
-
72
-
73
-
74
-
75
-
76
-
77
-
78
-
79
-
80
-
81
-
82
-
83
-
84
-
85
-
86
-
87
-
88
-
89
-
90
-
91
-
92
-
93
-
94
-
95
-
96
-
97
-
98
-
99
-
100
-
101
-
102
-
103
-
104
-
105
-
106
-
107
-
108
-
109
-
110
-
111
-
112
-
113
-
114
-
115
-
116
-
117
-
118
-
119
-
120
-
121
-
122
-
123
-
124
-
125
-
126
-
127
-
128
-
129
-
130
-
131
-
132
-
133
-
134
-
135
-
136
-
137
-
138
-
139
-
140
-
141
-
142
-
143
-
144
-
145
-
146
-
147
-
148
-
149
-
150
-
151
-
152
-
153
-
154
-
155
-
156
-
157
-
158
-
159
-
160
-
161
-
162
-
163
-
164
-
165
-
166
-
167
-
168
-
169
-
170
-
171
-
172
-
173
-
174
-
175
-
176
-
177
-
178
-
179
-
180
-
181
-
182
-
183
-
184
-
185
-
186
-
187
-
188
-
189
-
190
-
191
-
192
-
193
-
194
-
195
-
196
-
197
-
198
-
199
-
 200
200 -
 201
201 -
 202
202 -
 203
203 -
 204
204 -
 205
205 -
 206
206 -
 207
207 -
 208
208 -
 209
209 -
 210
210 -
211
-
212
-
213
-
214
-
215
-
216
-
217
-
218
-
219
-
220
-
221
-
222
-
223
-
224
-
225
-
226
-
227
-
228
-
229
-
230
-
231
-
232
-
233
-
234
-
235
-
236
-
237
-
238
-
239
-
240
-
241
-
242
-
243
-
244
-
245
-
246
-
247
-
248
-
249
-
250
-
251
-
252
-
253
-
254
-
255
-
256
-
257
-
258
 |
 |