2011 Subaru Impreza Owner's Manual - Page 163
2011 Subaru Impreza Manual

Page 163 highlights
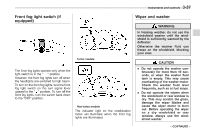
3-42 Instruments and controls other similar items. Periodically wipe the sensors clean using a piece of dry soft cotton cloth or an applicator. ! Compass zone adjustment displayed. 4. Releasing the button for 3 seconds will exit the zone setting mode. ! Compass calibration 1. For optimum calibration, switch off all nonessential electrical accessories (rear window defogger, heater/air conditioning system, spotlight, etc.) and ensure all doors are shut. 2. Drive to an open, level area away from large metallic objects or structures and make certain the ignition switch is in the "ON" position. 3. Press and hold the right button for 6 - 7 seconds then release, and the compass will enter the calibration mode. "CAL" and direction will be displayed. 4. Drive slowly in a circle until "CAL" disappears from the display (approximately two to three circles). The compass is now calibrated. 5. Further calibration may be necessary should outside influences cause the mirror to read inaccurately. You will know that this has occurred if your compass begins to read in only limited directions. Should you encounter this situation, return to step one of the above procedure and recalibrate the mirror. & Auto-dimming mirror/compass with HomeLink® (if equipped) Compass calibration zones 1. The zone setting is factory preset to Zone 8. Refer to the "Compass calibration zones" map shown above to verify that the compass zone setting is correct for your geographical location. 2. Press and hold the right button for 3 seconds then release, and the word "ZONE" will briefly appear and then the zone number will be displayed. 3. Press the right-hand button repeatedly to cycle the display through all possible zone settings. Stop cycling when the correct zone setting for your location is 1) 2) 3) 4) 5) 6) 7) 8) HomeLink® button 1 HomeLink® button 2 LED HomeLink® button 3 Sensor Automatic dimming on/off button Compass display button Compass display The auto-dimming mirror has an anti-glare feature which automatically reduces glare coming from headlights of vehicles behind you. It also contains a built-in compass and HomeLink® wireless control system. . By pressing the automatic dimming on/ off button, the automatic dimming function
-
 1
1 -
2
-
3
-
4
-
5
-
6
-
7
-
8
-
9
-
10
-
11
-
12
-
13
-
14
-
15
-
16
-
17
-
18
-
19
-
20
-
21
-
22
-
23
-
24
-
25
-
26
-
27
-
28
-
29
-
30
-
31
-
32
-
33
-
34
-
35
-
36
-
37
-
38
-
39
-
40
-
41
-
42
-
43
-
44
-
45
-
46
-
47
-
48
-
49
-
50
-
51
-
52
-
53
-
54
-
55
-
56
-
57
-
58
-
59
-
60
-
61
-
62
-
63
-
64
-
65
-
66
-
67
-
68
-
69
-
70
-
71
-
72
-
73
-
74
-
75
-
76
-
77
-
78
-
79
-
80
-
81
-
82
-
83
-
84
-
85
-
86
-
87
-
88
-
89
-
90
-
91
-
92
-
93
-
94
-
95
-
96
-
97
-
98
-
99
-
100
-
101
-
102
-
103
-
104
-
105
-
106
-
107
-
108
-
109
-
110
-
111
-
112
-
113
-
114
-
115
-
116
-
117
-
118
-
119
-
120
-
121
-
122
-
123
-
124
-
125
-
126
-
127
-
128
-
129
-
130
-
131
-
132
-
133
-
134
-
135
-
136
-
137
-
138
-
139
-
140
-
141
-
142
-
143
-
144
-
145
-
146
-
147
-
148
-
149
-
150
-
151
-
152
-
153
-
154
-
155
-
156
-
157
-
 158
158 -
 159
159 -
 160
160 -
 161
161 -
 162
162 -
 163
163 -
 164
164 -
 165
165 -
 166
166 -
 167
167 -
 168
168 -
169
-
170
-
171
-
172
-
173
-
174
-
175
-
176
-
177
-
178
-
179
-
180
-
181
-
182
-
183
-
184
-
185
-
186
-
187
-
188
-
189
-
190
-
191
-
192
-
193
-
194
-
195
-
196
-
197
-
198
-
199
-
200
-
201
-
202
-
203
-
204
-
205
-
206
-
207
-
208
-
209
-
210
-
211
-
212
-
213
-
214
-
215
-
216
-
217
-
218
-
219
-
220
-
221
-
222
-
223
-
224
-
225
-
226
-
227
-
228
-
229
-
230
-
231
-
232
-
233
-
234
-
235
-
236
-
237
-
238
-
239
-
240
-
241
-
242
-
243
-
244
-
245
-
246
-
247
-
248
-
249
-
250
-
251
-
252
-
253
-
254
-
255
-
256
-
257
-
258
-
259
-
260
-
261
-
262
-
263
-
264
-
265
-
266
-
267
-
268
-
269
-
270
-
271
-
272
-
273
-
274
-
275
-
276
-
277
-
278
-
279
-
280
-
281
-
282
-
283
-
284
-
285
-
286
-
287
-
288
-
289
-
290
-
291
-
292
-
293
-
294
-
295
-
296
-
297
-
298
-
299
-
300
-
301
-
302
-
303
-
304
-
305
-
306
-
307
-
308
-
309
-
310
-
311
-
312
-
313
-
314
-
315
-
316
-
317
-
318
-
319
-
320
-
321
-
322
-
323
-
324
-
325
-
326
-
327
-
328
-
329
-
330
-
331
-
332
-
333
-
334
-
335
-
336
-
337
-
338
-
339
-
340
-
341
-
342
-
343
-
344
-
345
-
346
-
347
-
348
-
349
-
350
-
351
-
352
-
353
-
354
-
355
-
356
-
357
-
358
-
359
-
360
-
361
-
362
-
363
-
364
-
365
-
366
-
367
-
368
-
369
-
370
-
371
-
372
-
373
-
374
-
375
-
376
-
377
-
378
-
379
-
380
-
381
-
382
-
383
-
384
-
385
-
386
-
387
-
388
-
389
-
390
-
391
-
392
-
393
-
394
-
395
-
396
-
397
-
398
-
399
-
400
-
401
-
402
-
403
-
404
-
405
-
406
-
407
-
408
-
409
-
410
-
411
-
412
-
413
-
414
-
415
-
416
-
417
-
418
-
419
-
420
-
421
-
422
-
423
-
424
-
425
-
426
-
427
-
428
-
429
-
430
-
431
-
432
-
433
-
434
-
435
-
436
-
437
-
438
-
439
-
440
-
441
-
442
-
443
-
444
-
445
-
446
-
447
-
448
-
449
-
450
 |
 |
