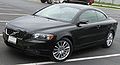
2007 Volvo C70 Owner's Manual - Page 137
2007 Volvo C70 Manual
Page 137 highlights
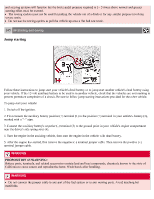
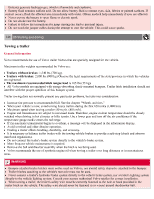
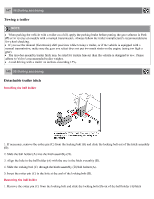
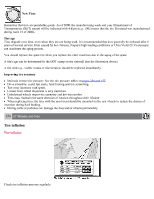
147 06 Starting and driving Towing a trailer NOTE When parking the vehicle with a trailer on a hill, apply the parking brake before putting the gear selector in Park ( P) or in reverse on models with a manual transmission. Always follow the trailer manufacturer's recommendations for wheel chocking. If you use the manual (Geartronic) shift positions while towing a trailer, or if the vehicle is equipped with a manual transmission, make sure the gear you select does not put too much strain on the engine (using too high a gear). The drawbar assembly/trailer hitch may be rated for trailers heavier than the vehicle is designed to tow. Please adhere to Volvo's recommended trailer weights. Avoid driving with a trailer on inclines exceeding 15%. 148 06 Starting and driving Detachable trailer hitch Installing the ball holder 1. If necessary, remove the cotter pin (C) from the locking bolt (B) and slide the locking bolt out of the hitch assembly (D). 2. Slide the ball holder (A) into the hitch assembly (D). 3. Align the hole in the ball holder (A) with the one in the hitch assembly (D). 4. Slide the locking bolt (C) through the hitch assembly (D)/ball holder (A). 5. Insert the cotter pin (C) in the hole at the end of the locking bolt (B). Removing the ball holder 1. Remove the cotter pin (C) from the locking bolt and slide the locking bolt (B) out of the ball holder (A)/hitch
-
 1
1 -
2
-
3
-
4
-
5
-
6
-
7
-
8
-
9
-
10
-
11
-
12
-
13
-
14
-
15
-
16
-
17
-
18
-
19
-
20
-
21
-
22
-
23
-
24
-
25
-
26
-
27
-
28
-
29
-
30
-
31
-
32
-
33
-
34
-
35
-
36
-
37
-
38
-
39
-
40
-
41
-
42
-
43
-
44
-
45
-
46
-
47
-
48
-
49
-
50
-
51
-
52
-
53
-
54
-
55
-
56
-
57
-
58
-
59
-
60
-
61
-
62
-
63
-
64
-
65
-
66
-
67
-
68
-
69
-
70
-
71
-
72
-
73
-
74
-
75
-
76
-
77
-
78
-
79
-
80
-
81
-
82
-
83
-
84
-
85
-
86
-
87
-
88
-
89
-
90
-
91
-
92
-
93
-
94
-
95
-
96
-
97
-
98
-
99
-
100
-
101
-
102
-
103
-
104
-
105
-
106
-
107
-
108
-
109
-
110
-
111
-
112
-
113
-
114
-
115
-
116
-
117
-
118
-
119
-
120
-
121
-
122
-
123
-
124
-
125
-
126
-
127
-
128
-
129
-
130
-
131
-
 132
132 -
 133
133 -
 134
134 -
 135
135 -
 136
136 -
 137
137 -
 138
138 -
 139
139 -
 140
140 -
 141
141 -
 142
142 -
143
-
144
-
145
-
146
-
147
-
148
-
149
-
150
-
151
-
152
-
153
-
154
-
155
-
156
-
157
-
158
-
159
-
160
-
161
-
162
-
163
-
164
-
165
-
166
-
167
-
168
-
169
-
170
-
171
-
172
-
173
-
174
-
175
-
176
-
177
-
178
-
179
-
180
-
181
-
182
-
183
-
184
-
185
-
186
-
187
-
188
-
189
-
190
-
191
-
192
-
193
-
194
-
195
-
196
-
197
-
198
-
199
-
200
-
201
-
202
-
203
-
204
-
205
-
206
-
207
-
208
-
209
-
210
-
211
-
212
-
213
-
214
-
215
-
216
-
217
 |
 |
