2008 Volvo S40 Owner's Manual - Page 76
2008 Volvo S40 Manual

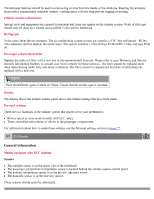
Page 76 highlights
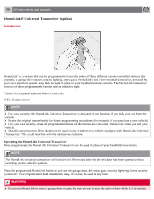
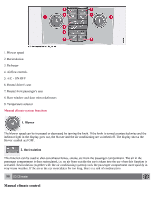
door. Press and hold the trained HomeLink button. The garage door opener has the rolling code feature if the indicator light flashes rapidly and then turns solid after 2 seconds. To train a garage door with the rolling code feature, follow these instructions (the aid of a second person may make the training quicker and easier): 1. Locate the training button on the garage door opener motor head unit. Exact location and color of the button may vary by garage door opener brand. If there is difficulty locating the training button, reference the garage door opener owner's manual or please visit our Web site at www.homelink.com. 2. Press the training button on the garage door opener motor head unit (which activates the "training light"). NOTE Following step 2, there are 30 seconds in which to initiate step 3. 3. Firmly press and release the programmed HomeLink® button. Press and release the HomeLink button a second time to complete the training process. (Some garage door openers may require 83 02 Instruments and controls HomeLink® Universal Transceiver (option) you to do this procedure a third time to complete the training.) The garage door opener should now recognize the HomeLink Wireless Control System. The remaining two buttons may now be trained if this has not previously been done. Refer to the Programming portion of this text. The HomeLink Wireless Control System (once programmed) or the original handheld transmitter may be used to activate the garage door. In the event that there are still difficulties in programming the HomeLink Wireless Control System, please visit our Web site, www.homelink.com. Reprogramming a Single HomeLink Button To program a device to HomeLink using a HomeLink button previously trained, follow these steps: 1. Press and hold the desired HomeLink button. Do NOT release until step 4 has been completed. 2. When the indicator light begins to flash slowly (after 20 seconds), position the handheld transmitter 1 to 3 inches away from the HomeLink surface. 3. Press and hold the handheld transmitter button. The HomeLink indicator light will flash, first slowly and then rapidly. 4. When the indicator light begins to flash rapidly, release both buttons. The previous device has now been erased and the new device can be activated by pushing the HomeLink button that has just been programmed. This procedure will not affect any other programmed HomeLink. Erasing Channels Individual buttons cannot be erased. However, to erase all three programmed buttons: 1. Press and hold the two outside buttons until the indicator light begins to flash (after 20 seconds). 2. Release both buttons.
-
 1
1 -
2
-
3
-
4
-
5
-
6
-
7
-
8
-
9
-
10
-
11
-
12
-
13
-
14
-
15
-
16
-
17
-
18
-
19
-
20
-
21
-
22
-
23
-
24
-
25
-
26
-
27
-
28
-
29
-
30
-
31
-
32
-
33
-
34
-
35
-
36
-
37
-
38
-
39
-
40
-
41
-
42
-
43
-
44
-
45
-
46
-
47
-
48
-
49
-
50
-
51
-
52
-
53
-
54
-
55
-
56
-
57
-
58
-
59
-
60
-
61
-
62
-
63
-
64
-
65
-
66
-
67
-
68
-
69
-
70
-
 71
71 -
 72
72 -
 73
73 -
 74
74 -
 75
75 -
 76
76 -
 77
77 -
 78
78 -
 79
79 -
 80
80 -
 81
81 -
82
-
83
-
84
-
85
-
86
-
87
-
88
-
89
-
90
-
91
-
92
-
93
-
94
-
95
-
96
-
97
-
98
-
99
-
100
-
101
-
102
-
103
-
104
-
105
-
106
-
107
-
108
-
109
-
110
-
111
-
112
-
113
-
114
-
115
-
116
-
117
-
118
-
119
-
120
-
121
-
122
-
123
-
124
-
125
-
126
-
127
-
128
-
129
-
130
-
131
-
132
-
133
-
134
-
135
-
136
-
137
-
138
-
139
-
140
-
141
-
142
-
143
-
144
-
145
-
146
-
147
-
148
-
149
-
150
-
151
-
152
-
153
-
154
-
155
-
156
-
157
-
158
-
159
-
160
-
161
-
162
-
163
-
164
-
165
-
166
-
167
-
168
-
169
-
170
-
171
-
172
-
173
-
174
-
175
-
176
-
177
-
178
-
179
-
180
-
181
-
182
-
183
-
184
-
185
-
186
-
187
-
188
-
189
-
190
-
191
-
192
-
193
-
194
-
195
-
196
-
197
-
198
-
199
-
200
-
201
-
202
-
203
-
204
-
205
-
206
-
207
-
208
-
209
-
210
-
211
-
212
-
213
-
214
-
215
-
216
-
217
-
218
-
219
-
220
-
221
-
222
-
223
-
224
-
225
-
226
-
227
-
228
-
229
-
230
-
231
-
232
-
233
-
234
-
235
-
236
-
237
-
238
-
239
 |
 |