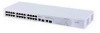
3Com 2226 User Guide - Page 30
Setting the IP Address, Con the Switch's IP settings. Available options - console settings
 |
UPC - 662705479828
View all 3Com 2226 manuals
Add to My Manuals
Save this manual to your list of manuals |
Page 30 highlights
30 CHAPTER 4: CONFIGURING THE SWITCH 3Com recommends using automatic IP configuration only for the initial setup. Once you gain access to the console, you should assign an IP address to the Switch (either by using DHCP or assigning a static IP address) to ensure successful communication between the Switch and other network devices. Setting the IP Address To set the IP address for the Switch: 1 Click IP Settings on the menu. The IP Settings screen appears. Figure 11 IP Settings Screen 2 Configure the Switch's IP settings. Available options are listed in Table 8. Table 8 IP Setting Options Option Description IP Address Mode Specify how the Switch will get its IP address. Available options include: ■ DHCP - Select this option if you have a DHCP server on the network and you want the Switch to automatically obtain an IP address from it ■ Static - Select this option if you want to manually assign an IP address to the Switch IP Address Specify an IP address that you want to assign to the Switch. This option is only available if IP Address Mode is set to Static. The IP address that is assigned to the Switch also becomes the IP address for VLAN 1. Subnet Mask Specify a subnet mask address that you want to assign to the Switch. This option is only available if IP Address Mode is set to Static. The default subnet mask is 255.255.0.0. Default Gateway Specify the IP address of the gateway router between this Switch and management stations on other network segments. This option is only available if IP Address Mode is set to Static. MAC Address Read-only field that displays the Switch's MAC or physical address 3 After you configure the Switch's IP address settings, click Apply to save your changes.
-
 1
1 -
2
-
3
-
4
-
5
-
6
-
7
-
8
-
9
-
10
-
11
-
12
-
13
-
14
-
15
-
16
-
17
-
18
-
19
-
20
-
21
-
22
-
23
-
24
-
 25
25 -
 26
26 -
 27
27 -
 28
28 -
 29
29 -
 30
30 -
 31
31 -
 32
32 -
 33
33 -
 34
34 -
 35
35 -
36
-
37
-
38
-
39
-
40
-
41
-
42
-
43
-
44
-
45
-
46
-
47
-
48
-
49
-
50
-
51
-
52
-
53
-
54
-
55
-
56
-
57
-
58
-
59
-
60
-
61
-
62
-
63
-
64
-
65
-
66
-
67
-
68
-
69
 |
 |
