3Com 3C17203 Getting Started Guide - Page 30
Setting Up Overview, IP Configuration, Manual IP Configuration
 |
UPC - 662705363738
View all 3Com 3C17203 manuals
Add to My Manuals
Save this manual to your list of manuals |
Page 30 highlights
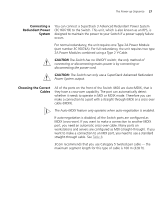
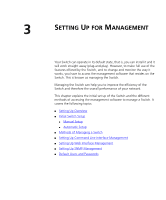
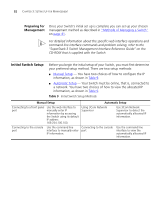
30 CHAPTER 3: SETTING UP FOR MANAGEMENT Setting Up Overview This section gives an overview of what you need to do to get your Switch set up and ready for management when it is in its default state. Detailed procedural steps are contained in the sections that follow. In brief, you need to: ■ Configure IP information for your Switch by completing initial Switch setup ■ Prepare for your chosen method of management CAUTION: To protect your Switch from unauthorized access, you must change all default passwords as soon as possible, even if you do not intend to actively manage your Switch. For more information on default users and changing default passwords, see "Default Users and Passwords" on page 46. IP Configuration You can use one of the following methods to allocate IP information to your Switch (essential if you wish to manage your Switch across the network). Manual IP Configuration You can choose to configure the IP information yourself. The Switch remembers the information that you enter until you change it again or set the configuration method to Automatic. You should use the Manual IP configuration method if: ■ you do not have a DHCP or BootP server on your network, or ■ you want to remove the risk of the IP address ever changing, or ■ it is not possible to configure the DHCP or BootP server to allocate static IP addresses (this is necessary to ensure that the Switch is always allocated the same IP address). For most installations, 3Com recommends that you configure the Switch manually. This makes management simpler and more reliable as it is not dependent on a DHCP or BootP server, and eliminates the risk of the IP address changing. If you wish to manually enter IP information for your Switch, work through the "Manual Setup" section on page 33 and connect to a front panel port or the console port to manually configure the IP information.
-
 1
1 -
2
-
3
-
4
-
5
-
6
-
7
-
8
-
9
-
10
-
11
-
12
-
13
-
14
-
15
-
16
-
17
-
18
-
19
-
20
-
21
-
22
-
23
-
24
-
 25
25 -
 26
26 -
 27
27 -
 28
28 -
 29
29 -
 30
30 -
 31
31 -
 32
32 -
 33
33 -
 34
34 -
 35
35 -
36
-
37
-
38
-
39
-
40
-
41
-
42
-
43
-
44
-
45
-
46
-
47
-
48
-
49
-
50
-
51
-
52
-
53
-
54
-
55
-
56
-
57
-
58
-
59
-
60
-
61
-
62
-
63
-
64
-
65
-
66
-
67
-
68
-
69
-
70
-
71
-
72
-
73
-
74
-
75
-
76
 |
 |
