3Com 3C17203 Getting Started Guide - Page 45
Setting Up SNMP Management, Pre-requisites - us open
 |
UPC - 662705363738
View all 3Com 3C17203 manuals
Add to My Manuals
Save this manual to your list of manuals |
Page 45 highlights
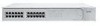
Setting Up SNMP Management 45 If you get an error message, check that your IP information has been entered correctly and the Switch is powered up. 3 Open your web browser and enter the IP address of the Switch that you wish to manage in the URL locator, for example, in the following format: http:// xxx.xxx.xxx.xxx 4 At the login and password prompts, enter admin as your user name and press Return at the password prompt (or the password of your choice if you have already modified the default passwords). 5 Click on the Device View button to display the web management options. Setting Up SNMP Management Any network management application running the Simple Network Management Protocol (SNMP) can manage a Switch if: ■ The correct Management Information Bases (MIBs) are installed on the management workstation. ■ The management workstation is connected to the Switch using a port in VLAN 1 (the Default VLAN). By default, all ports on the Switch are in VLAN 1. You can use the 3Com Network Supervisor application that is provided on the CD-ROM that accompanies your Switch to provide SNMP management for your Switch. If you use 3Com Network Supervisor it automatically loads the correct MIBs and necessary files onto your workstation. Pre-requisites ■ Documentation supplied with the SNMP network management application software. To manage your Switch using an SNMP network management application, you need to specify SNMP community strings for the users defined on the Switch. You can do this using the command line interface system management snmp community command - refer to the command line interface section of the "SuperStack 3 Switch Management Interface Reference Guide" for more information.
-
 1
1 -
2
-
3
-
4
-
5
-
6
-
7
-
8
-
9
-
10
-
11
-
12
-
13
-
14
-
15
-
16
-
17
-
18
-
19
-
20
-
21
-
22
-
23
-
24
-
25
-
26
-
27
-
28
-
29
-
30
-
31
-
32
-
33
-
34
-
35
-
36
-
37
-
38
-
39
-
 40
40 -
 41
41 -
 42
42 -
 43
43 -
 44
44 -
 45
45 -
 46
46 -
 47
47 -
 48
48 -
 49
49 -
 50
50 -
51
-
52
-
53
-
54
-
55
-
56
-
57
-
58
-
59
-
60
-
61
-
62
-
63
-
64
-
65
-
66
-
67
-
68
-
69
-
70
-
71
-
72
-
73
-
74
-
75
-
76
 |
 |