3M MP220 Quick Start Guide - Page 7
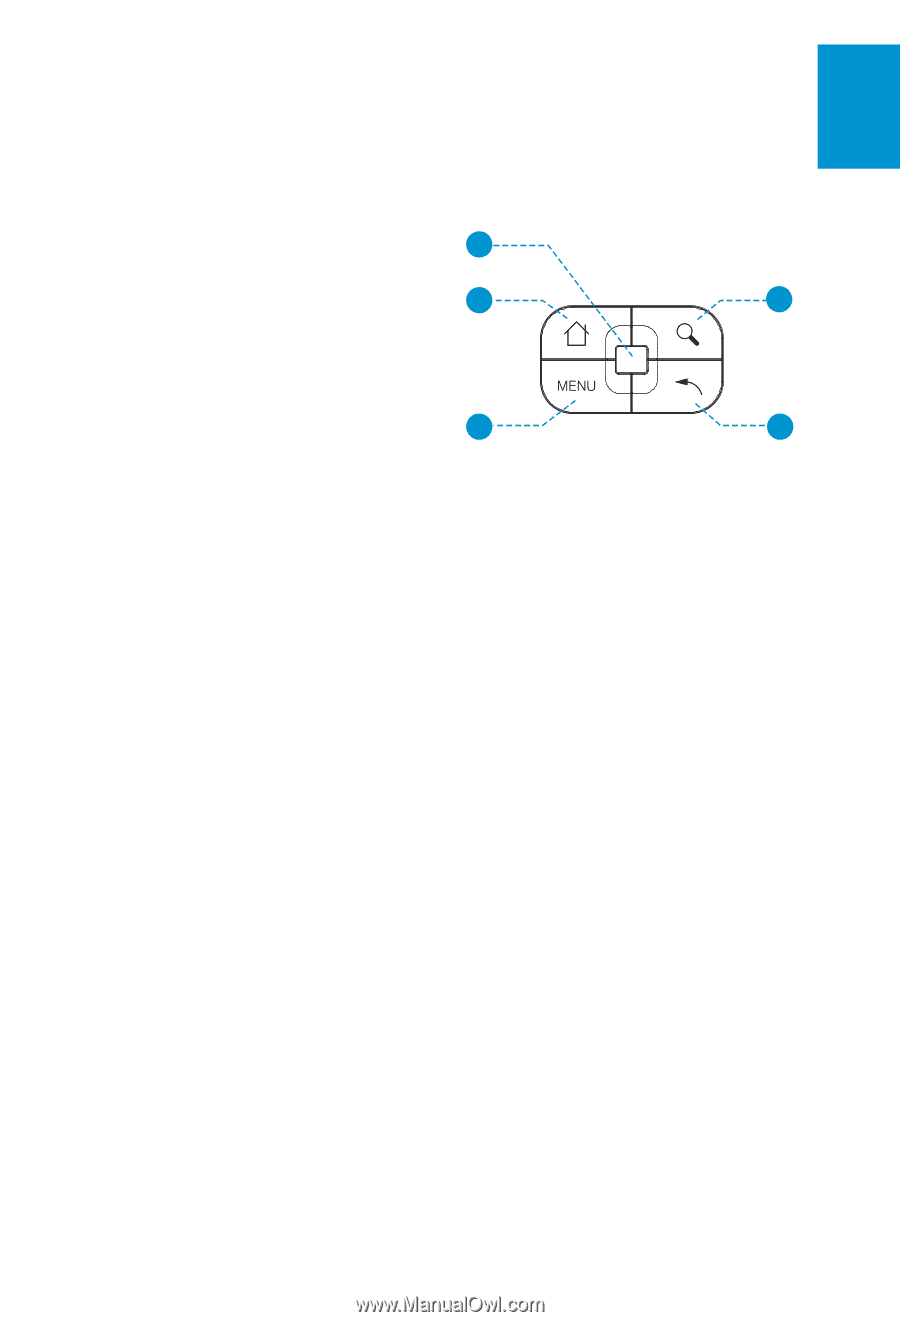
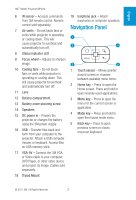
Navigation Panel - remote control
 |
View all 3M MP220 manuals
Add to My Manuals
Save this manual to your list of manuals |
Page 7 highlights
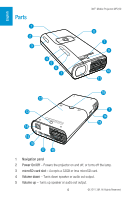
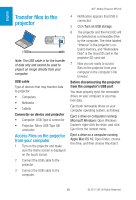
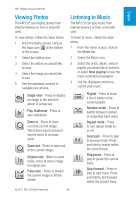
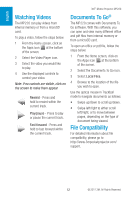
English 3M™ Mobile Projector MP220 6 IR sensor - Accepts commands from 3M remote control. Remote control sold separately. 7 Air vents - Do not block fans or vents while projector is operating or cooling down. This will cause projector to overheat and automatically turn off. 8 Status indicator LED 9 Focus wheel - Adjusts to sharpen image. 10 Cooling fans - Do not block fans or vents while projector is operating or cooling down. This will cause projector to overheat and automatically turn off. 11 Lens 12 Battery compartment 13 Battery cover securing screw 14 Speakers 15 DC power in - Powers the projector or charges the battery using the 3M power supply. 16 USB - Transfer files back and forth from your computer to the projector. Attach a USB computer mouse, or keyboard. Access files on USB memory stick. 17 VGA-AV - Connect the 3M VGA or Video cable to your computer, DVD Player, or other video device and project its image. Cables sold separately. 18 Tripod Mount 19 Earphone jack - Attach earphones or computer speakers. Navigation Panel 1 2 4 3 5 1 Touch sensor - Moves pointer around screen or chooses between available menu items. 2 Home key - Press to open the Home screen. Press and hold to open recently used applications. 3 Menu key - Press to open the menu for the current screen or application. 4 Mode key - Press and hold to open the mouse mode menu. 5 Back key - Press to open previous screen or closes onscreen keyboard. © 2011 3M. All Rights Reserved. 7
-
 1
1 -
 2
2 -
 3
3 -
 4
4 -
 5
5 -
 6
6 -
 7
7 -
 8
8 -
 9
9 -
 10
10 -
 11
11 -
 12
12 -
13
-
14
 |
 |