3Ware 9500S-8MI Installation Guide - Page 25
To install the controller in the computer, controller after you have seated it in the slot.
 |
UPC - 693494950816
View all 3Ware 9500S-8MI manuals
Add to My Manuals
Save this manual to your list of manuals |
Page 25 highlights
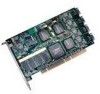
Installing a Serial ATA RAID Controller Note: The connectors on the end of the serial controller and the drive are susceptible to damage from excessive bending. Be careful not to insert or remove the serial cable connector at an angle. 3 Repeat steps 2 and 3 for each additional interface cable. (You will connect one cable for each hard drive you will attach.) To install the controller in the computer 1 If the computer is running, shut it down. Turn off power to the computer and disconnect the power cord from the outlet. 2 Make sure you are properly grounded. (For details about safety precautions, see page 10.) 3 Open the computer case according to the manufacturer's instructions. 4 Find the PCI slot you want to use for the serial 3ware RAID controller. For a discussion of which slot to use, see "Selecting the Slot in Which to Install the Controller" on page 8 5 Remove the metal filler bracket for the slot. Save this screw; it will be used to secure the serial 3ware RAID controller after you have seated it in the slot. 6 Position the card in the slot so that the contacts will mate with the grooves in the slot, and all pins make proper contact with the PCI slot pins when pushed into place. The 3ware RAID controller is keyed to ensure proper installation into a full-sized PCI slot. Make sure that the contacts will mate with the grooves in the slot. www.3ware.com 17
-
 1
1 -
2
-
3
-
4
-
5
-
6
-
7
-
8
-
9
-
10
-
11
-
12
-
13
-
14
-
15
-
16
-
17
-
18
-
19
-
 20
20 -
 21
21 -
 22
22 -
 23
23 -
 24
24 -
 25
25 -
 26
26 -
 27
27 -
 28
28 -
 29
29 -
 30
30 -
31
-
32
-
33
-
34
-
35
-
36
-
37
-
38
-
39
-
40
-
41
-
42
-
43
-
44
-
45
-
46
-
47
-
48
-
49
-
50
-
51
-
52
-
53
-
54
-
55
-
56
-
57
-
58
-
59
-
60
-
61
-
62
-
63
-
64
-
65
-
66
-
67
-
68
-
69
-
70
-
71
-
72
-
73
-
74
-
75
-
76
-
77
-
78
-
79
-
80
-
81
-
82
-
83
-
84
-
85
-
86
-
87
-
88
-
89
-
90
-
91
-
92
-
93
-
94
-
95
-
96
-
97
-
98
-
99
-
100
-
101
-
102
-
103
-
104
-
105
-
106
-
107
-
108
-
109
-
110
-
111
-
112
-
113
-
114
-
115
-
116
-
117
-
118
-
119
-
120
-
121
-
122
-
123
-
124
-
125
-
126
 |
 |
