AIWA CX-NHMT75 Operating Instructions - Page 8
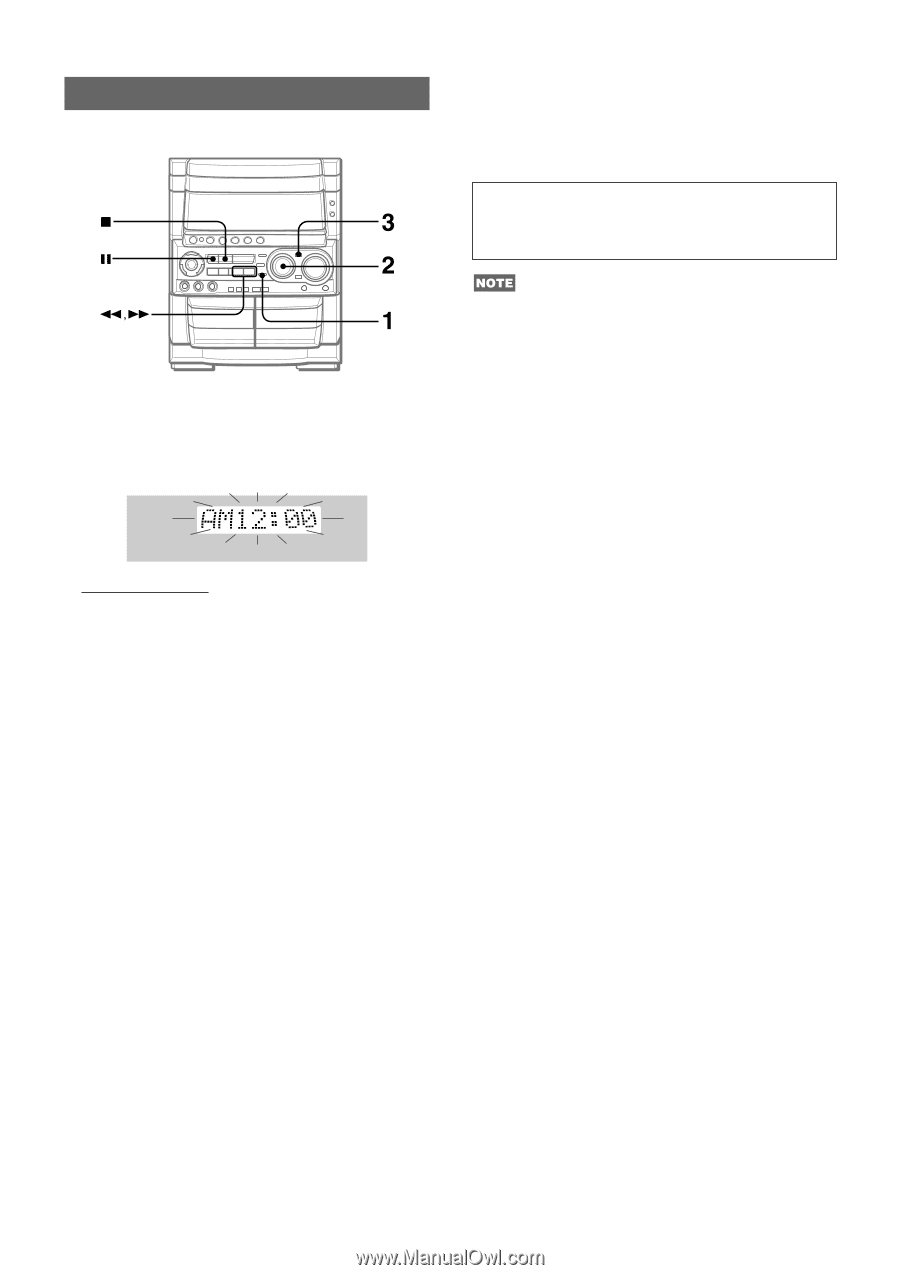
Setting The Clock
 |
View all AIWA CX-NHMT75 manuals
Add to My Manuals
Save this manual to your list of manuals |
Page 8 highlights
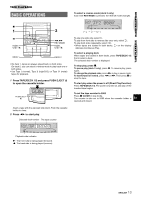
SETTING THE CLOCK To switch to the 24-hour standard Press CLOCK and then press s within 4 seconds. Repeat the same procedure to restore the 12-hour standard. In the 12-hour standard, "AM 12:00" indicates midnight and "PM 12:00" indicates noon. If the clock display flashes If the display flashes when the clock is displayed, it indicates that the clock has stopped due to a power failure or the removal of the power cord. The current time needs to be reset. If the power-economizing mode (page 7) is on, the unit blacks out when the power is turned off. To view the clock, press CLOCK so that the time is displayed for 4 seconds. 1 Press CLOCK. The clock is displayed. (The ":" between the hours and minutes flashes.) 2 Within 4 seconds, turn MULTI JOG to designate the hour and the minute. Turning MULTI JOG changes both the hour and the minute. f or g is also available in place of MULTI JOG. Holding these buttons down will vary the time rapidly. 3 Press ENTER or a. The clock starts from 00 seconds. To restore an original clock setting Press CLOCK before completing step 3 to restore the previous time setting. This cancels any new setting. To view the clock when another display is in the display Press CLOCK. The time is displayed for 4 seconds and then the original display reappears. However, the clock cannot be displayed during recording. 8 ENGLISH
-
 1
1 -
2
-
 3
3 -
 4
4 -
 5
5 -
 6
6 -
 7
7 -
 8
8 -
 9
9 -
 10
10 -
 11
11 -
 12
12 -
 13
13 -
14
-
15
-
16
-
17
-
18
-
19
-
20
-
21
-
22
-
23
-
24
-
25
-
26
-
27
-
28
-
29
-
30
-
31
-
32
-
33
-
34
-
35
-
36
-
37
-
38
-
39
-
40
-
41
-
42
-
43
-
44
-
45
-
46
-
47
-
48
-
49
-
50
-
51
-
52
-
53
-
54
-
55
-
56
-
57
-
58
-
59
-
60
-
61
-
62
-
63
-
64
-
65
-
66
-
67
-
68
-
69
-
70
-
71
-
72
-
73
-
74
-
75
-
76
-
77
-
78
-
79
-
80
-
81
-
82
-
83
-
84
-
85
-
86
-
87
-
88
-
89
-
90
-
91
-
92
 |
 |