Aastra 390 390 Screenphone User Guide - Page 5
Install on a wall, Insert number card, Insert Faceplate, Customize the telephone
 |
View all Aastra 390 manuals
Add to My Manuals
Save this manual to your list of manuals |
Page 5 highlights
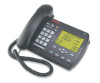
Installation rests on the stand. Connect the phone cord to a phone jack and plug the power adapter into a power outlet. handset cradle. Gently bend the clear plastic lens into the slot, over the number card. 6. Install on a wall To install the Model 390 on a wall: Connect the cord to the wall jack (A). Coil the phone cord into the space provided on the back of the phone (B). Then align the telephone so the hooks on the wall plate (C) align with the wall-mount slots on the back of the phone, as shown here. Push the phone onto the pegs, then slide it down until it is secure (D). Plug the power adaptor into a power outlet (E). Note: You may wish to purchase a short phone cord from a local supplier for a wall installation. 8. Insert Faceplate Snap the faceplate into the recess provided above the dial pad. Slide the tab on the left-hand side of the faceplate into the slot. Then press on the right-hand side of the faceplate to snap it into place. D A C 9. Customize the telephone Follow the instructions in the section "Customizing your phone" to customize your Model 390 telephone. B E 7. Insert number card Write your telephone number on the number card, and place it into the card slot on the telephone, located under the mouthpiece in the Model 390 User Guide 5
-
 1
1 -
 2
2 -
 3
3 -
 4
4 -
 5
5 -
 6
6 -
 7
7 -
 8
8 -
 9
9 -
 10
10 -
 11
11 -
12
-
13
-
14
-
15
-
16
-
17
-
18
 |
 |
