Acer C112 User Manual - Page 19
Connecting a computer to the USBconnector, Start > Programs > EZ Display > EZ, Display
 |
View all Acer C112 manuals
Add to My Manuals
Save this manual to your list of manuals |
Page 19 highlights
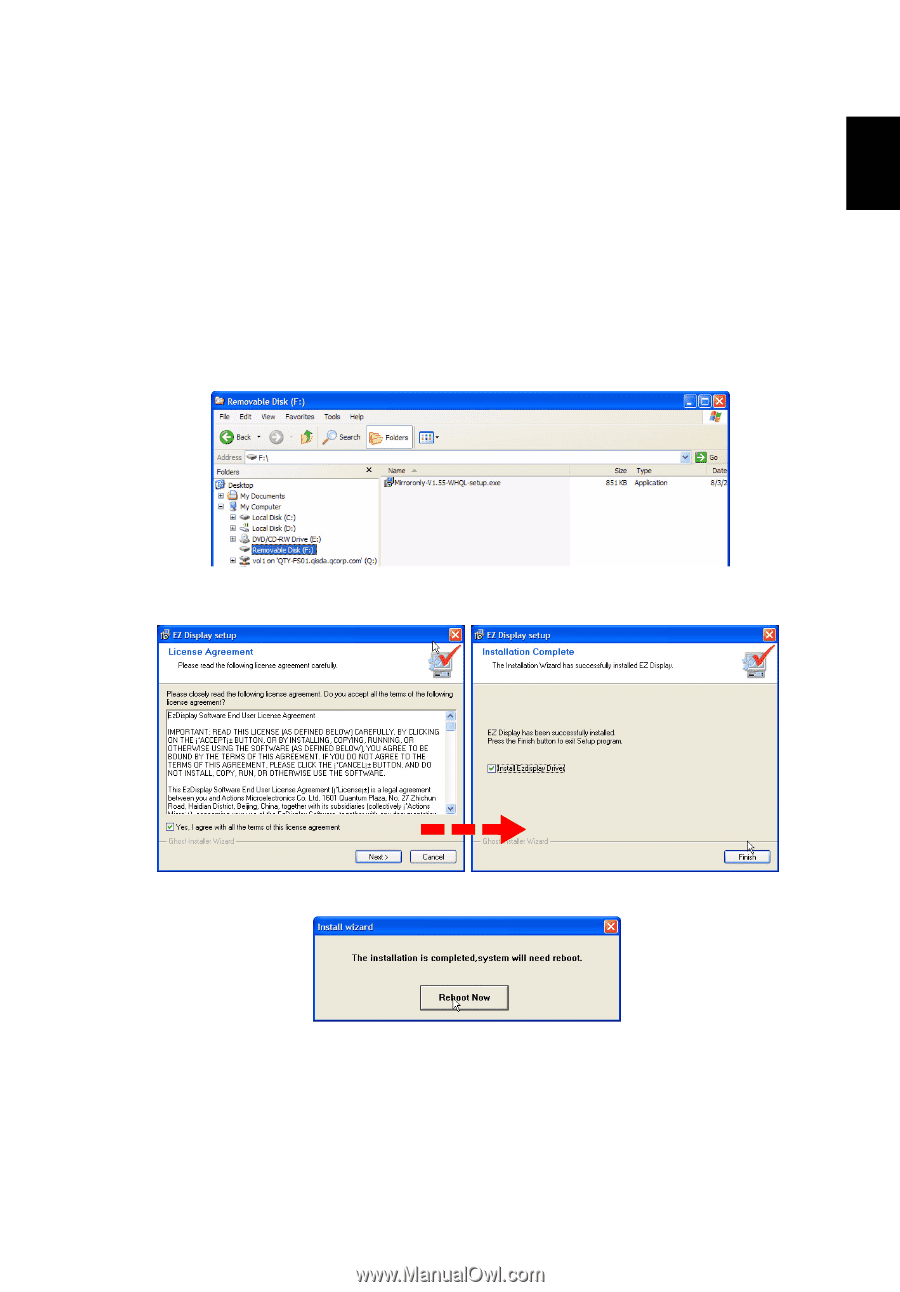
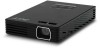
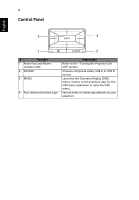
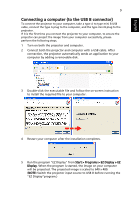
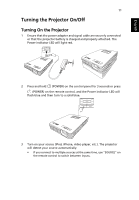
English 9 Connecting a computer (to the USB B connector) To connect the projector to your computer, take a type A to type mini B USB cable, connect the type A plug to the computer, and the type mini B plug to the projector. If it is the first time you connect the projector to your computer, to ensure the projector can project the image from your computer successfully, please perform the following steps. 1 Turn on both the projector and computer. 2 Connect both the projector and computer with a USB cable. After connection, the projector automatically sends an application to your computer by adding a removable disk. 3 Double-click the executable file and follow the on-screen instruction to install the required file to your computer. 4 Restart your computer after the installation completes. 5 Run the program "EZ Display" from Start > Programs > EZ Display > EZ Display. When the program is started, the image on your computer will be projected. The projected image is scaled to 640 x 480. (NOTE: Switch the projector input source to USB B before running the "EZ Display"program.)
-
 1
1 -
2
-
3
-
4
-
5
-
6
-
7
-
8
-
9
-
10
-
11
-
12
-
13
-
 14
14 -
 15
15 -
 16
16 -
 17
17 -
 18
18 -
 19
19 -
 20
20 -
 21
21 -
 22
22 -
 23
23 -
 24
24 -
25
-
26
-
27
-
28
-
29
-
30
-
31
-
32
-
33
-
34
-
35
-
36
-
37
-
38
 |
 |