Acer DA222HQL User Manual - Page 20
Connecting to AC power, Connecting to a PC as a monitor, Inserting a SD card (optional) - windows
 |
View all Acer DA222HQL manuals
Add to My Manuals
Save this manual to your list of manuals |
Page 20 highlights
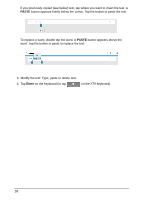
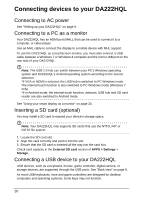
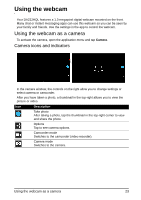
Connecting devices to your DA222HQL Connecting to AC power See "Setting up your DA222HQL" on page 9. Connecting to a PC as a monitor Your DA222HQL has an HDMI port (MHL), that can be used to connect it to a computer, or video player. Use an MHL cable to connect the display to a mobile device with MHL support. To use the DA222HQL as a touchscreen monitor, you must also connect a USB cable between a Windows 7 or Windows 8 computer and the micro USB port on the rear side of your DA222HQL. Note: The USB 2.0 hub can switch between your PC's Windows operating system and DA222HQL's Android operating system according to the Source selection. *If VGA or HDMI is selected, the USB hub is switched to PC Windows mode. The internal touch function is also switched to PC Windows mode (Windows 7 only). *If in Android mode, the internal touch function, webcam, USB hub and SD card reader are also switched to Android mode. See "Using your smart display as a monitor" on page 24. Inserting a SD card (optional) You may install a SD card to expand your device's storage space. Note: Your DA222HQL only supports SD cards that use the NTFS, FAT or FAT32 file system. 1. Locate the SD card slot. 2. Align the card correctly and push it into the slot. 3. Ensure that the SD card is inserted all the way into the card slot. Check card capacity in the External SD card section of APPS > Settings > Storage. Connecting a USB device to your DA222HQL USB devices, such as a keyboard, mouse, game controller, digital camera, or storage devices, are supported through the USB ports. See "Back view" on page 8. As most USB keyboards, mice and game controllers are designed for desktop computers and operating systems, some keys may not function. 20
-
 1
1 -
2
-
3
-
4
-
5
-
6
-
7
-
8
-
9
-
10
-
11
-
12
-
13
-
14
-
 15
15 -
 16
16 -
 17
17 -
 18
18 -
 19
19 -
 20
20 -
 21
21 -
 22
22 -
 23
23 -
 24
24 -
 25
25 -
26
-
27
-
28
-
29
-
30
-
31
-
32
 |
 |
