Adobe 65015459 Server Guide - Page 28
Installing Contribute Publishing Server by using the WAR File Installation
 |
UPC - 883919159980
View all Adobe 65015459 manuals
Add to My Manuals
Save this manual to your list of manuals |
Page 28 highlights
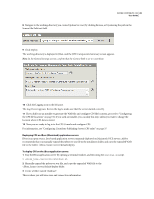
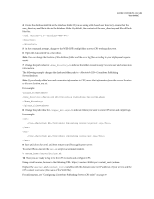
ADOBE CONTRIBUTE CS3 25 User Guide Note: If you are installing on the Solaris platform, substitute solaris for linux in the command. The installer extracts the installation files, and then runs the install script. 4 View each screen of the license agreement, and then accept the agreement to continue with the installation. 5 In the Installation Method screen, select the Simple Installation option. 6 In the Installation Folder screen accept the default installation location or enter another location. 7 In the Administrator Password screen, enter an administrative password to restrict access to the CPS Console. This is not the same password used to protect the Contribute administrator role, so you might want to make a note of it. 8 Review the Summary screen, and then press Enter when you are ready to begin the installation. When the installer finishes, the Installation Complete screen displays a list of scripts that you can use to start and stop CPS. 9 Press Enter to exit the installer, and then change to the installation folder. 10 Enter the following command to start CPS: sh ./bin/startCPS.sh When you see the message, Server contribute-wps ready, the server has started. 11 Now you are ready to log in to the CPS Console and configure CPS. For information, see "Configuring Contribute Publishing Server (CPS only)" on page 37. Installing Contribute Publishing Server by using the WAR File Installation Use the WAR File Installation for CPS if your computer is already running a J2EE application server or if there is not a Simple Installation installer for your platform. Note: If your platform doesn't have an installer, and you need to perform the WAR File Installation but do not have a Java application server, you can download a trial version of the JRun 4 server with limited licensing capabilities. For more information, see the Adobe website at www.adobe.com. The WAR File installation process involves the following steps: 1 Generate the WAR file. In this step you'll use an installer to generate the WAR file and configure CPS file locations (see "Generating the WAR file using an installer" on page 25). Note: If there is not an installer for your platform, you might be able to download the zip file containing the WAR file and associated data files. In this case, you can skip the step for generating the WAR file, and proceed to the next step for deploying the WAR file. 2 Deploy the WAR file. After you have the WAR file, you are ready to deploy it (see "Deploying the WAR file" on page 26). Generating the WAR file using an installer The first step in the WAR File Installation for CPS is using an installer to generate a WAR file and associated data files in a directory structure. The installer also configures the WAR files to reference the installed data files. Note: If you want to change the location of these data files you can do so later, after you generate and deploy the WAR file. For more information, see "Configuring the CPS file locations" on page 30.
-
 1
1 -
2
-
3
-
4
-
5
-
6
-
7
-
8
-
9
-
10
-
11
-
12
-
13
-
14
-
15
-
16
-
17
-
18
-
19
-
20
-
21
-
22
-
 23
23 -
 24
24 -
 25
25 -
 26
26 -
 27
27 -
 28
28 -
 29
29 -
 30
30 -
 31
31 -
 32
32 -
 33
33 -
34
-
35
-
36
-
37
-
38
-
39
-
40
-
41
-
42
-
43
-
44
-
45
-
46
-
47
-
48
-
49
-
50
-
51
-
52
-
53
-
54
-
55
-
56
-
57
-
58
 |
 |
