Adobe 65015459 Server Guide - Page 32
>/Contribute Publishing
 |
UPC - 883919159980
View all Adobe 65015459 manuals
Add to My Manuals
Save this manual to your list of manuals |
Page 32 highlights
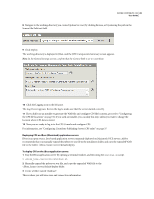
ADOBE CONTRIBUTE CS3 29 User Guide 4 Create the database.xml file in the database folder. If you are using a file-based user directory, ensure that the user_directory.xml file is also in the database folder. By default, the contents of the user_directory.xml file will look like this: 5 At the command prompt, change to the WEB-INF/config folder in your CPS working directory. 6 Open the ckm.xml file in a text editor. Note: You can change the location of the database folder and the error log files according to your deployment requirements. 7 Change the path value for to indicate the folder created in step 3 to store user and connection information. The following example changes the database folder path to: /Contribute Publishing Server/database. Note: If you already added user and connection information in CPS, move that information from the current location to the new location you set. For example: /Contribute Publishing Server/database 8 Change the path value for to indicate where you want to store CPS error and output logs. For example: /Contribute Publishing Server/logs/out.log /Contribute Publishing Server/err.log 9 Save and close ckm.xml, and then restart your JBoss application server. To restart JBoss, execute the run.sh script in a terminal window. % /server/bin/run.sh 10 Now you are ready to log in to the CPS Console and configure CPS. Using a web browser, browse to the following URL: https:///8080/cps//admin. Replace the and variables with the domain name (or IP address) of your server, and the CPS context root name (the name of the WAR file). For information, see "Configuring Contribute Publishing Server (CPS only)" on page 37.
-
 1
1 -
2
-
3
-
4
-
5
-
6
-
7
-
8
-
9
-
10
-
11
-
12
-
13
-
14
-
15
-
16
-
17
-
18
-
19
-
20
-
21
-
22
-
23
-
24
-
25
-
26
-
 27
27 -
 28
28 -
 29
29 -
 30
30 -
 31
31 -
 32
32 -
 33
33 -
 34
34 -
 35
35 -
 36
36 -
 37
37 -
38
-
39
-
40
-
41
-
42
-
43
-
44
-
45
-
46
-
47
-
48
-
49
-
50
-
51
-
52
-
53
-
54
-
55
-
56
-
57
-
58
 |
 |
