Alesis Vortex Wireless 2 Vortex Wireless 2 Editor - User Guide - Page 3
Introduction - preset editor
 |
View all Alesis Vortex Wireless 2 manuals
Add to My Manuals
Save this manual to your list of manuals |
Page 3 highlights
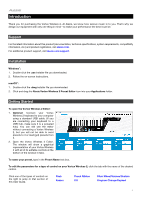
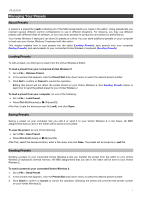
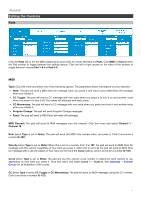
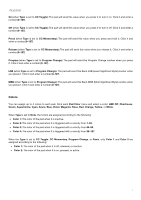
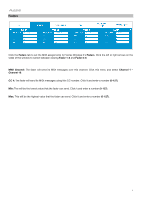
Introduction Thank you for purchasing the Vortex Wireless 2. At Alesis, we know how serious music is to you. That's why we design our equipment with only one thing in mind-to make your performance the best it can be. Support For the latest information about this product (documentation, technical specifications, system requirements, compatibility information, etc.) and product registration, visit alesis.com. For additional product support, visit alesis.com/support. Installation Windows®: 1. Double-click the .exe installer file you downloaded. 2. Follow the on-screen instructions. macOS®: 1. Double-click the .dmg installer file you downloaded. 2. Click and drag the Alesis Vortex Wireless 2 Preset Editor icon into your Applications folder. Getting Started To open the Vortex Wireless 2 Editor: 1. Optional: Connect your Vortex Wireless 2 keyboard to your computer using a standard USB cable. (If you are connecting your keyboard to a USB hub, make sure it is a powered hub.) You can still use the editor without connecting a Vortex Wireless 2, but you will not be able to send presets to it or load (get) presets from it. 2. Open the Vortex Wireless 2 Editor. The window will show a graphical representation of your Vortex Wireless 2 with all of its editable controls at the bottom of the window in tabs. To name your preset, type in the Preset Name text box. To edit the parameters for a type of control on your Vortex Wireless 2, click the tab with the name of the desired control. Click one of the types of controls on the right to jump to that section of this User Guide. Pads Faders Touch Ribbon Tilt Pitch Wheel/Volume/Sustain Program Change/Keybed 3
-
 1
1 -
 2
2 -
 3
3 -
 4
4 -
 5
5 -
 6
6 -
 7
7 -
 8
8 -
 9
9 -
10
-
11
-
12
-
13
-
14
-
15
 |
 |