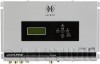
Alpine PXE-H650 User Guide - Page 10
Way Output Settings, WARNING, Ampli, er Levels - setting up the
 |
UPC - 793276310262
View all Alpine PXE-H650 manuals
Add to My Manuals
Save this manual to your list of manuals |
Page 10 highlights
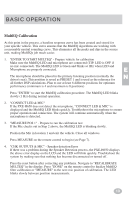
BASIC OPERATION 7. "AntEQ SAVING" - AntEQ completes and saves the resulting filters. AntEQ has flattened out any equalization that is inherent in the factory radio. This is in preparation for the MultEQ process in the upcoming steps. After completing this process, the settings are saved and recalled when required for new settings. 2-Way Output Settings 8. "2-WAY OUTPUT" - Following "AntEQ SAVING" If the FRONT Output is configured as a 2-Way system, select 'Y' at the prompt and press "ENTER." The default 'N' assumes only a single, full range Front (Front L2/R2). If 'Y' is selected, the crossover is set in Step 9 below. If 'N' is selected, skip to the AMP LEVELS adjustments. FRONT 1 is turned OFF and FRONT 2 is set as a Full Bandwidth output. WARNING: Output of the PXE-H650 is not muted at this point. Make sure volume levels are at reasonable levels. 9. "FRONT 1 HPF" - Set the High-pass crossover point The FRONT 1 high-pass crossover is set to 5 kHz by default. This also selects the FRONT 2 Low-pass crossover at the same point. Use the ▼ or ▲ button to change the value in the HPF field. Values available for each crossover are listed in the "ADJUSTMENTS & RANGES" section. Press "ENTER" to continue. WARNING: Output of the PXE-H650 is not muted at this point. Make sure volume levels are at reasonable levels. Amplifier Levels 10. "ADJUST XOVER + AMP LEVELS" - Make adjustments to match amp levels Play Track 3 of the PXE-H650 Setup Disc in the Factory Head unit. This is a Pink Noise signal to facilitate the trimming of the amplifier level controls. WARNING: Output of the PXE-H650 is not muted at this point. Make sure volume levels are at reasonable levels. While listening to the system, use the amp's level controls to match the output of each of the speakers. Level matching does not have to be exact as the MultEQ processing will make the final tweaks to the system. Matching levels as closely as possible makes MultEQ's job a little easier and faster. Typical coarse amp levels are: 12 o'clock (middle position on gain controls) for Front and Rear amp input levels, 3 o'clock (or 3/4 position) for Subwoofer amp input level. 11. After all adjustments have been made, press "ENTER" to continue to MultEQ 12 calibration. 12
-
 1
1 -
2
-
3
-
4
-
 5
5 -
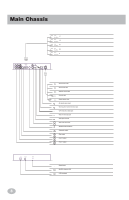 6
6 -
 7
7 -
 8
8 -
 9
9 -
 10
10 -
 11
11 -
 12
12 -
 13
13 -
 14
14 -
 15
15 -
16
-
17
-
18
-
19
-
20
-
21
-
22
-
23
-
24
-
25
-
26
-
27
-
28
-
29
-
30
-
31
-
32
-
33
-
34
-
35
-
36
-
37
-
38
-
39
-
40
-
41
-
42
-
43
-
44
-
45
-
46
-
47
-
48
 |
 |
