Alpine PXE-H650 User Guide - Page 8
Prior To Setup - available
 |
UPC - 793276310262
View all Alpine PXE-H650 manuals
Add to My Manuals
Save this manual to your list of manuals |
Page 8 highlights
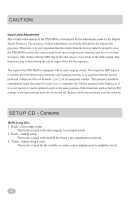
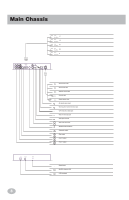
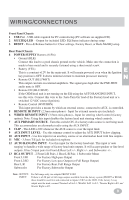
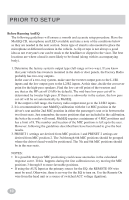
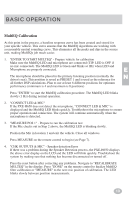
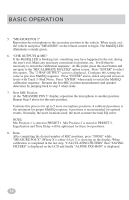
PRIOR TO SETUP Before Running AntEQ The following guidelines will ensure a smooth and accurate setup procedure. Have the MultEQ CD, microphone and LED available and take a note of the conditions below as they are needed in the next section. Some type of stand is also needed to place the microphone at different locations in the vehicle. A clip or tape is not always a good idea as not everyone's ear can be stuck to the headliner or clipped to the visor. The best locations are where a head is most likely to be found (along with its accompanying body). 1. Determine the factory system's output type (full-range or two-way). If you know that your vehicle has tweeters mounted in the dash or door panels, the Factory Radio probably has two-way outputs. In the case of a two-way system, make sure the tweeter output goes to the L1/R1 inputs and the low output goes to the L2/R2 inputs. At this time, decide the crossover point for the high-pass speakers. Find the low cut-off point of the tweeters and use that as the HP cut-off (5 kHz by default). The mid-bass low-pass cut-off is determined by tweeter high-pass. If there is a subwoofer in the system, the low pass cut-off will be set automatically by MultEQ. If the output is full range, the factory radio output must go to the L2/R2 inputs. 2. It is recommended to start MultEQ calibration with the 1st MIC position in the driver's seat and the 2nd MIC position in either the passenger's seat or in between the two front seats. Just remember, the more positions that are included in the calibration, the better the results will sound. MultEQ requires a minimum of 4 MIC positions and has a limit of 8. The number and location of the MIC positions is left up to the user. However, following the guidelines described here have been found to give the best results. 3. PRESET 1 settings are derived from MIC position 1 and PRESET 2 settings are derived from MIC position 2. The 3rd through 6th MIC positions should be grouped where the driver's head would be positioned. The 7th and 8th MIC positions should be in the rear seats. NOTES: • It is possible that poor MIC positioning could cause anomalies in the calculated response curve. If this happens during the first calibration run, try moving the MIC positions 3 through 8 to more favorable positions. • If using the AUX Input as the primary source for the EQ, the REMOTE ON wire must be used. Otherwise, there is no way for the EQ to turn on. Use the Remote On wire from the head unit or a source of switched ACC voltage (Ignition). 10
-
 1
1 -
2
-
 3
3 -
 4
4 -
 5
5 -
 6
6 -
 7
7 -
 8
8 -
 9
9 -
 10
10 -
 11
11 -
 12
12 -
 13
13 -
14
-
15
-
16
-
17
-
18
-
19
-
20
-
21
-
22
-
23
-
24
-
25
-
26
-
27
-
28
-
29
-
30
-
31
-
32
-
33
-
34
-
35
-
36
-
37
-
38
-
39
-
40
-
41
-
42
-
43
-
44
-
45
-
46
-
47
-
48
 |
 |