Alpine PXE-H650 User Guide - Page 17
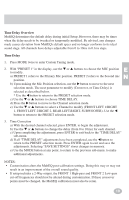
Time Delay Overview, Time Delay - specs
 |
UPC - 793276310262
View all Alpine PXE-H650 manuals
Add to My Manuals
Save this manual to your list of manuals |
Page 17 highlights
Time Delay Overview MultEQ determines the default delay during initial Setup. However, there may be times when the delay needs to be tweaked or temporarily modified. Be advised, any changes made causes deviation from MultEQ's default specs and no longer conforms to its ideal sound stage. All channels have delays adjustable from 0 to 10ms in 0.1ms steps. Time Delay 1. Press MODE twice to enter Custom Tuning mode. E 2. With "PRESET 1" in the display, use the ▼ or ▲ buttons to choose the MIC position to modify. N a) PRESET 1 refers to the Primary Mic position. PRESET 2 refers to the Second mic position. b) Upon making the Mic Position selection, use the button to move to the next selection mode. The next parameter to modify (Crossover, or Time Delay) is selected as described below. * Use the button to return to the PRESET selection mode. c) Use the ▼ or ▲ buttons to choose TIME DELAY. d) Press the button to move to the Channel selection mode. e) Use the ▼ or ▲ buttons to select a Channel to modify (FRONT LEFT 1/RIGHT 1, FRONT LEFT 2/RIGHT 2, REAR LEFT,RIGHT, SUBWOOFER). Use the button to return to the PRESET selection mode. 3. Time Correction a) With the desired channel selected, press ENTER, to begin the adjustment. b) Use the ▼ or ▲ buttons to change the delay (from 0 to 10ms) for each channel. c) Upon completing the adjustment, press ENTER to exit back to the "TIME DELAY" sub-menu. d) If all "TIME DELAY" adjustments have been completed, use the button to return to the PRESET selection mode. Press ENTER again to exit and save the adjustments. Selecting "SAVE SETTINGS" stores changes in memory. e) Use the MODE button at any point, to return to the previous sub-menu. to make additional adjustments. NOTES: • Customization alters the MultEQ post-calibration settings. Doing this may or may not result in an improvement of the overall sound quality. • If setup includes a 2-Way output, the FRONT 1 High-pass and FRONT 2 Low-pass cut-off frequencies should not be altered during customization. If these crossover points must be changed, the MultEQ calibration must also be rerun. 19 19
-
 1
1 -
2
-
3
-
4
-
5
-
6
-
7
-
8
-
9
-
10
-
11
-
 12
12 -
 13
13 -
 14
14 -
 15
15 -
 16
16 -
 17
17 -
 18
18 -
 19
19 -
 20
20 -
 21
21 -
 22
22 -
23
-
24
-
25
-
26
-
27
-
28
-
29
-
30
-
31
-
32
-
33
-
34
-
35
-
36
-
37
-
38
-
39
-
40
-
41
-
42
-
43
-
44
-
45
-
46
-
47
-
48
 |
 |