Alpine PXE-H650 User Guide - Page 12
Chk Outputs & Mic - eq
 |
UPC - 793276310262
View all Alpine PXE-H650 manuals
Add to My Manuals
Save this manual to your list of manuals |
Page 12 highlights
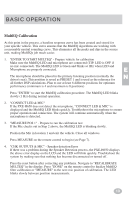
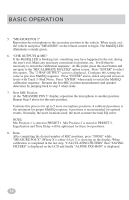
BASIC OPERATION 5. "MEASURE POS 2" Reposition the microphone to the secondary position in the vehicle. When ready, exit the vehicle and press "MEASURE" on the remote control to begin. The MultEQ LED illuminates a steady green. 6. "CHK OUTPUTS & MIC" If the MultEQ LED is blinking fast, something may have happened to the mic during the user's exit. Make any necessary corrections to position, etc. It will then be necessary to restart the calibration sequence. At this point, press the reset button and navigate to the "RECALIBRATE MULTEQ" option screen. Press "ENTER" to select this option. The "2-WAY OUTPUT" screen is displayed. Configure this setting the same as previous MultEQ sequence. Press "ENTER" and re-check amp and crossover levels with Track 3 -Pink Noise. Press "ENTER" when ready to restart the MultEQ calibration sequence. Resume the first MIC position measurement (and speaker detection) by jumping back to step 3 when ready. 7. Next MIC Position At the "MEASURE POS 3" display, reposition the microphone to another position. Repeat Step 5 above for this new position. Continue this process for up to 5 more microphone positions. 4 calibrated positions is the minimum for proper MultEQ response. 6 positions is recommended for optimal results. Normally, the more locations used, the more accurate the final EQ curve. NOTE: Mic Position 1 is stored in PRESET 1. Mic Position 2 is stored in PRESET 2. Equalization and Time Delay will be optimized for these two positions. 8. Done After completing the desired number of MIC positions, press "DONE" while "MEASURE POS X" (Where X is either 5,6,or 7) is showing on the display. When calibration is completed in the last step, "CALCULATING FILTERS" then "SAVING FILTERS" is displayed on the LCD and finally "ALPINE PXE-H650" is displayed. 14
-
 1
1 -
2
-
3
-
4
-
5
-
6
-
 7
7 -
 8
8 -
 9
9 -
 10
10 -
 11
11 -
 12
12 -
 13
13 -
 14
14 -
 15
15 -
 16
16 -
 17
17 -
18
-
19
-
20
-
21
-
22
-
23
-
24
-
25
-
26
-
27
-
28
-
29
-
30
-
31
-
32
-
33
-
34
-
35
-
36
-
37
-
38
-
39
-
40
-
41
-
42
-
43
-
44
-
45
-
46
-
47
-
48
 |
 |