Alpine X409-WRA-JK Installation Manual EN - Page 8
Installation Instructions
 |
View all Alpine X409-WRA-JK manuals
Add to My Manuals
Save this manual to your list of manuals |
Page 8 highlights
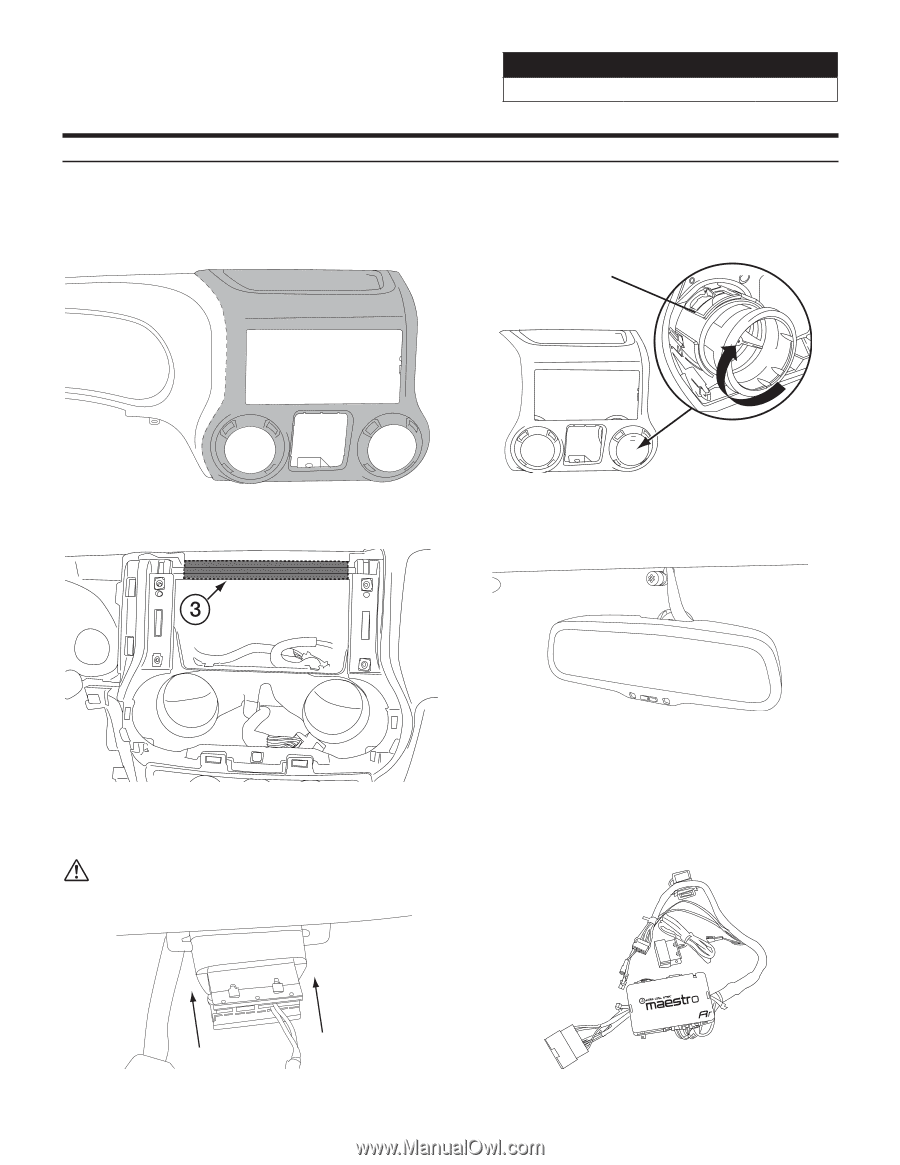
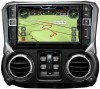
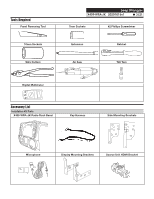
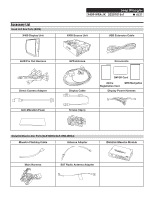
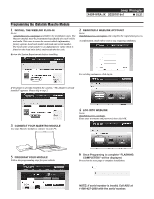
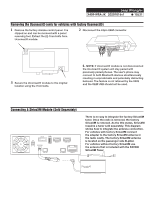
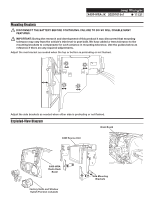
Jeep Wrangler X409-WRA-JK 20201016v1 ˜ 8/21 Installation Instructions 1 The factory dash panel needs to be trimmed to allow the new X409-WRA-JK bezel to fit into place. Remove the highlighted area by cutting along the dashed line. 2 Remove the vents from the radio section on the OEM dash panel by pressing down on the lock tab and turning right. Mount vents on to the X409-WRAJK bezel. Lock tab 3 Use a cutting tool to trim the highlighted area shown below. Rear view 4 Mount the microphone as illustrated and run the cable to the radio cavity. 5 Plug the OBDII connector on to the OBDII port below the driver side dash and run the extension to the radio cavity. Avoid any sharp edges or interfering with any safety equipment. 6 Attach the Maestro to the main harness. *See page 13 for more details.
-
 1
1 -
2
-
 3
3 -
 4
4 -
 5
5 -
 6
6 -
 7
7 -
 8
8 -
 9
9 -
 10
10 -
 11
11 -
 12
12 -
 13
13 -
14
-
15
-
16
-
17
-
18
-
19
-
20
-
21
 |
 |