Arlo Essential Spotlight User Manual - Page 18
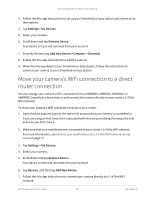
Move your camera’s WiFi connection to a SmartHub or base station
 |
View all Arlo Essential Spotlight manuals
Add to My Manuals
Save this manual to your list of manuals |
Page 18 highlights
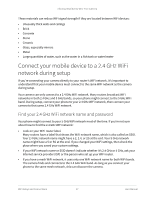
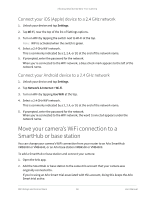
Arlo Essential Series Wire-Free Camera Connect your iOS (Apple) device to a 2.4 GHz network 1. Unlock your device and tap Settings. 2. Tap Wi-Fi, near the top of the list of Settings options. 3. Turn on WiFi by tapping the switch next to Wi-Fi at the top. Note: WiFi is activated when the switch is green. 4. Select a 2.4 GHz WiFi network. This is commonly indicated by a 2, 2.4, or 2G at the end of the network name. 5. If prompted, enter the password for the network. When you're connected to the WiFi network, a blue check mark appears to the left of the network name. Connect your Android device to a 2.4 GHz network 1. Unlock your device and tap Settings. 2. Tap Network & Internet > Wi-Fi. 3. Turn on WiFi by tapping Use WiFi at the top. 4. Select a 2.4 GHz WiFi network. This is commonly indicated by a 2, 2.4, or 2G at the end of the network name. 5. If prompted, enter the password for the network. When you're connected to the WiFi network, the word Connected appears under the network name. Move your camera's WiFi connection to a SmartHub or base station You can change your camera's WiFi connection from your router to an Arlo SmartHub VMB5000 or VMB4540, or an Arlo base station VMB4500 or VMB4000. To add a SmartHub or base station and connect your camera: 1. Open the Arlo app. 2. Add the SmartHub or base station to the same Arlo account that your camera was originally connected to. If you're using an Arlo Smart trial associated with this account, doing this keeps the Arlo Smart trial active. WiFi Setup and Connections 18 User Manual
-
 1
1 -
2
-
3
-
4
-
5
-
6
-
7
-
8
-
9
-
10
-
11
-
12
-
 13
13 -
 14
14 -
 15
15 -
 16
16 -
 17
17 -
 18
18 -
 19
19 -
 20
20 -
 21
21 -
 22
22 -
 23
23 -
24
-
25
-
26
-
27
-
28
-
29
-
30
-
31
-
32
-
33
-
34
-
35
-
36
-
37
-
38
-
39
-
40
-
41
-
42
-
43
-
44
-
45
-
46
-
47
-
48
-
49
-
50
-
51
-
52
-
53
-
54
-
55
-
56
-
57
-
58
-
59
-
60
-
61
-
62
-
63
-
64
-
65
-
66
-
67
-
68
-
69
-
70
-
71
 |
 |
