Asus AP1600R User Guide - Page 35
Installing the external SCSI cable
 |
View all Asus AP1600R manuals
Add to My Manuals
Save this manual to your list of manuals |
Page 35 highlights
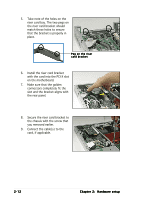
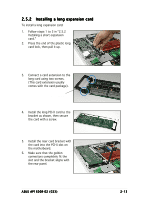
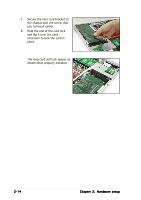
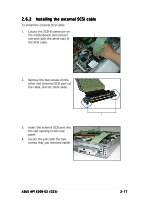
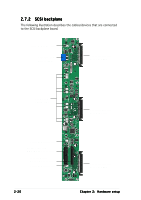
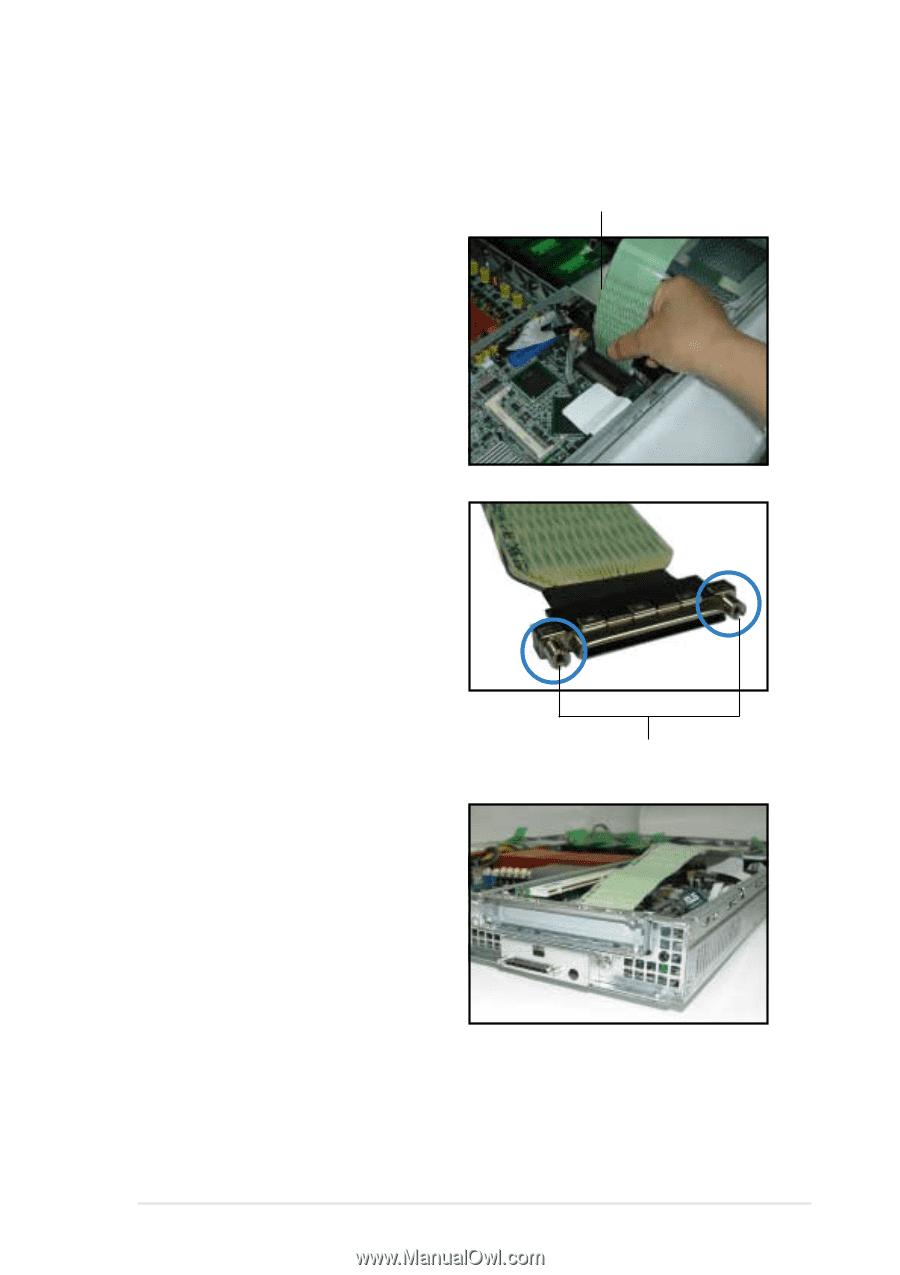
2.6.2 Installing the external SCSI cable To install the external SCSI cable: 1. Locate the SCSI-B connector on Pin 1 the motherboard, and connect one end (with the white tab) of the SCSI cable. 2. Remove the two screws on the other end (external SCSI port) of the cable, and set them aside. 3. Insert the external SCSI port into the slot opening on the rear panel. 4. Secure the port with the two screws that you removed earlier. Screws ASUS AP1600R-E2 (CS3) 2-17
-
 1
1 -
2
-
3
-
4
-
5
-
6
-
7
-
8
-
9
-
10
-
11
-
12
-
13
-
14
-
15
-
16
-
17
-
18
-
19
-
20
-
21
-
22
-
23
-
24
-
25
-
26
-
27
-
28
-
29
-
 30
30 -
 31
31 -
 32
32 -
 33
33 -
 34
34 -
 35
35 -
 36
36 -
 37
37 -
 38
38 -
 39
39 -
 40
40 -
41
-
42
-
43
-
44
-
45
-
46
-
47
-
48
-
49
-
50
-
51
-
52
-
53
-
54
-
55
-
56
-
57
-
58
-
59
-
60
-
61
-
62
-
63
-
64
-
65
-
66
-
67
-
68
-
69
-
70
-
71
-
72
-
73
-
74
-
75
-
76
-
77
-
78
-
79
-
80
-
81
-
82
-
83
-
84
-
85
-
86
-
87
-
88
-
89
-
90
-
91
-
92
-
93
-
94
-
95
-
96
-
97
-
98
-
99
-
100
-
101
-
102
-
103
-
104
 |
 |
2-17
2-17
2-17
2-17
2-17
ASUS AP1600R-E2 (CS3)
ASUS AP1600R-E2 (CS3)
ASUS AP1600R-E2 (CS3)
ASUS AP1600R-E2 (CS3)
ASUS AP1600R-E2 (CS3)
2.6.2
2.6.2
2.6.2
2.6.2
2.6.2
Installing the external SCSI cable
Installing the external SCSI cable
Installing the external SCSI cable
Installing the external SCSI cable
Installing the external SCSI cable
To install the external SCSI cable:
1.
Locate the SCSI-B connector on
the motherboard, and connect
one end (with the white tab) of
the SCSI cable.
Pin 1
Screws
2.
Remove the two screws on the
other end (external SCSI port) of
the cable, and set them aside.
3.
Insert the external SCSI port into
the slot opening on the rear
panel.
4.
Secure the port with the two
screws that you removed earlier.