Asus AP1600R User Guide - Page 42
Optical drive, Floppy disk drive
 |
View all Asus AP1600R manuals
Add to My Manuals
Save this manual to your list of manuals |
Page 42 highlights
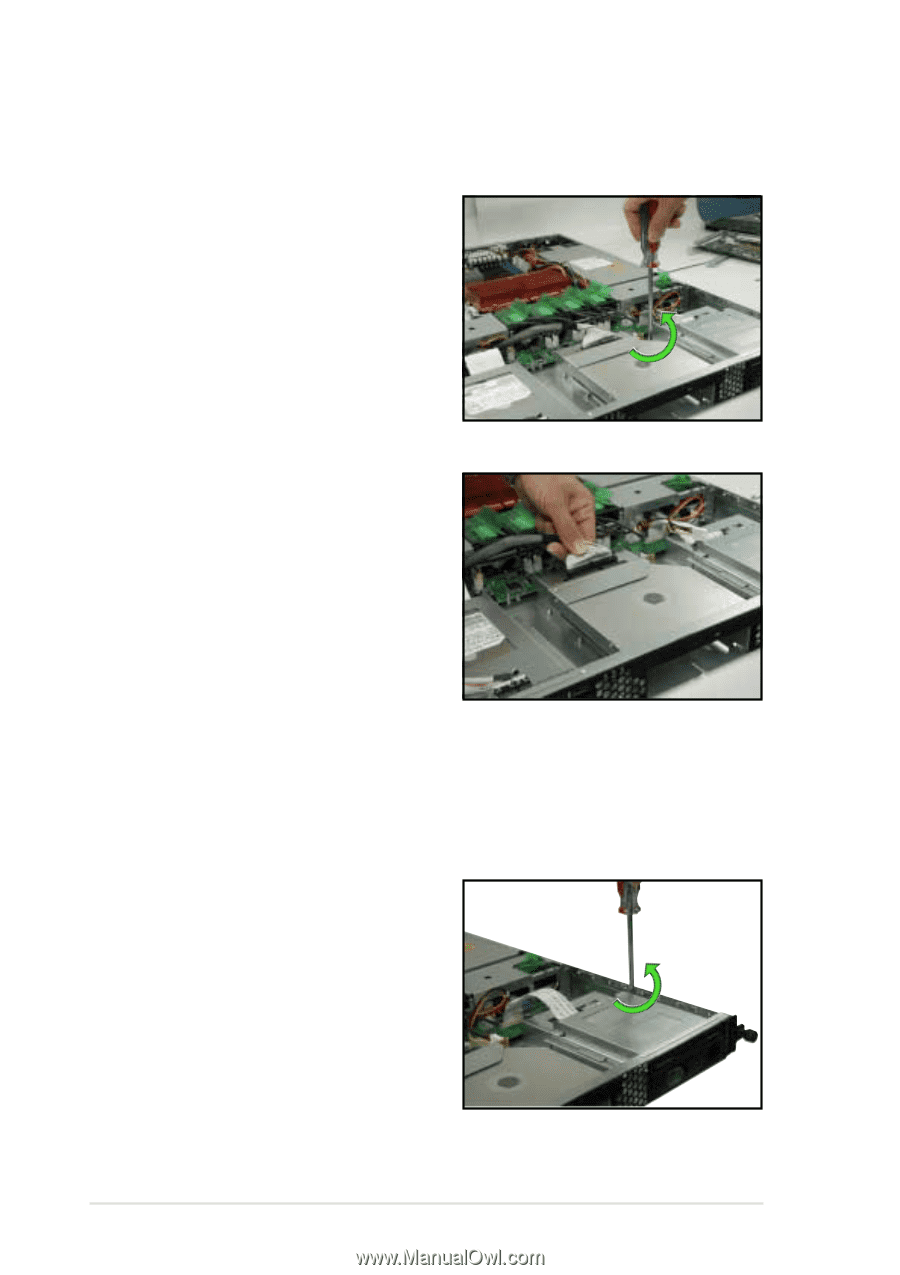
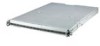
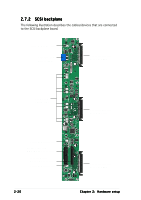
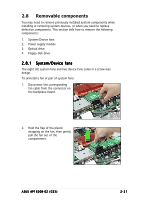
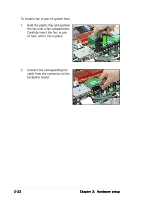
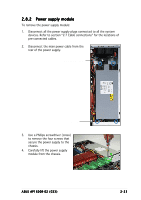
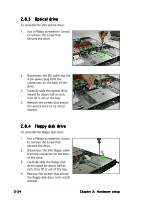
2.8.3 Optical drive To uninstall the slim optical drive: 1. Use a Phillips screwdriver (cross) to remove the screw that secures the drive. 2. Disconnect the IDE cable and the 4-pin power plug from the connectors on the back of the drive. 3. Carefully slide the optical drive inward for about half an inch, then lift it out of the bay. 4. Remove the screws that secure the optical drive to its metal bracket. 2.8.4 Floppy disk drive To uninstall the floppy disk drive: 1. Use a Phillips screwdriver (cross) to remove the screw that secures the drive. 2. Disconnect the slim floppy cable from the connector on the back of the drive. 3. Carefully slide the floppy disk drive inward for about half an inch, then lift it out of the bay. 4. Remove the screws that secure the floppy disk drive to its metal bracket. 2-24 Chapter 2: Hardware setup
-
 1
1 -
2
-
3
-
4
-
5
-
6
-
7
-
8
-
9
-
10
-
11
-
12
-
13
-
14
-
15
-
16
-
17
-
18
-
19
-
20
-
21
-
22
-
23
-
24
-
25
-
26
-
27
-
28
-
29
-
30
-
31
-
32
-
33
-
34
-
35
-
36
-
 37
37 -
 38
38 -
 39
39 -
 40
40 -
 41
41 -
 42
42 -
 43
43 -
 44
44 -
 45
45 -
 46
46 -
 47
47 -
48
-
49
-
50
-
51
-
52
-
53
-
54
-
55
-
56
-
57
-
58
-
59
-
60
-
61
-
62
-
63
-
64
-
65
-
66
-
67
-
68
-
69
-
70
-
71
-
72
-
73
-
74
-
75
-
76
-
77
-
78
-
79
-
80
-
81
-
82
-
83
-
84
-
85
-
86
-
87
-
88
-
89
-
90
-
91
-
92
-
93
-
94
-
95
-
96
-
97
-
98
-
99
-
100
-
101
-
102
-
103
-
104
 |
 |