Asus AP6000 Hardware Reference - Page 10
Tools Required, Server Preparation
 |
View all Asus AP6000 manuals
Add to My Manuals
Save this manual to your list of manuals |
Page 10 highlights
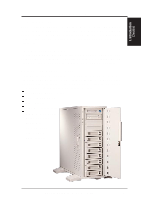
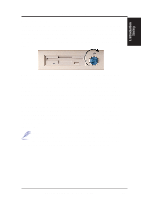
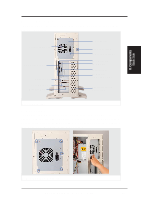
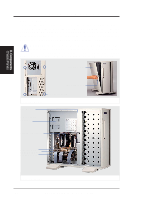
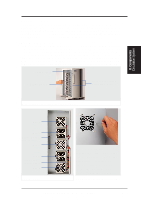
I. Introduction Tools / Preparation II. Components I. Introduction Tools Required A Phillips (cross) and standard (flat) screwdriver is needed to install or remove the components in this server. Server Preparation 1. Unpack your server, do not connect the power cord. IMPORTANT: Most servers uses an AT power supply that has a fixed On and Off switch located on the front. This server uses an ATX power supply that is normally off until an electrical signal is given to the power supply through a momentary switch located on the front of the server. There is always a standby power in the power supply in order for ATX power supply features to work, therefore removing the power cord is necessary to prevent electrical shocks when working on the server components. 2. Unlock the keylocks if necessary. This server is equipped with three security locks to prevent unauthorized access. Turn the key counterclockwise to unlock and clockwise to lock the side panels or front door. 3. Open the front door and side panels to install final server components, such as CPU, Memory, Hard Disk Drives, expansion cards. Use this hardware reference guide along with your motherboard manual in order to make these installations. 4. Connect a Keyboard and Mouse (purchased separately) 5. Connect a VGA-compatible monitor (purchased separately) 6. Connect a printer to the parallel port if desired. 7. Connect server to network (an optional network card is needed) WARNING: To prevent electrical shock or fire, be sure not to plug telecommunications/telephone cables into the network RJ45 connector in the server if one is installed. 8. Connect power cord to the server's power supply. 9. Connect Server to AC power - The power supply will automatically detect and adjust to 120VAC or 240VAC power. WARNING: This server is designed for connection to a grounded (earthed) outlet. To reduce the risk of electrical shock or damage to your server, do not bypass the grounding plug. 10 AP6000 Hardware Reference Guide
-
 1
1 -
2
-
3
-
4
-
 5
5 -
 6
6 -
 7
7 -
 8
8 -
 9
9 -
 10
10 -
 11
11 -
 12
12 -
 13
13 -
 14
14 -
 15
15 -
16
-
17
-
18
-
19
-
20
-
21
-
22
-
23
-
24
-
25
-
26
-
27
-
28
-
29
-
30
-
31
-
32
 |
 |
