Asus AP6000 Hardware Reference - Page 11
Starting the Server
 |
View all Asus AP6000 manuals
Add to My Manuals
Save this manual to your list of manuals |
Page 11 highlights
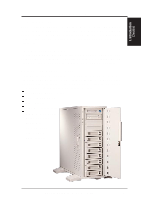
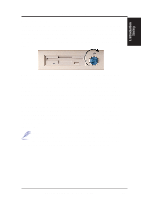
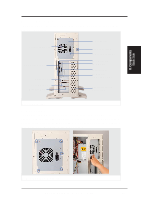
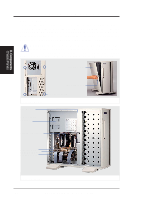
I. Introduction Starting II. Components I. Introduction Starting the Server Turn on the system unit by turning the power knob clockwise and pushing inwards momentarily. The power button will snap back because ATX power systems have a electrical On/Off switch unlike AT systems which require a permanent On or Off position. If the power indicator does not light, make sure the power cord is connected to the system unit and to a working grounded outlet. When booting your server for the first time, hold the "Delete" key and enter BIOS setup in order to make settings. ISA cards requires that you set "IRQ XX Used by ISA : Yes" in BIOS PNP AND PCI SETUP in order for that IRQ to be reserved for your ISA expansion card. You need to set "Boot Sequence : A, C" in BIOS FEATURES SETUP in order to boot from a floppy diskette to setup your hard disk. Insert a bootable floppy diskette and select "Save & Exit Setup" from the BIOS main menu. Once your server has properly booted, an "A:\>" prompt will appear. Replace your boot disk with a RAID setup diskette and setup your RAID. Reboot your server with the operating system boot disk in order to install drivers for your devices (such as CD-ROM and SCSI devices) and install your server operating system. You may be prompted for manufacturer supplied driver diskettes for each device on your server if they are not included in the operating system setup drivers. NOTE: Non-RAID hard disk drives can be setup using boot diskettes provided with the server operating system or with MSDOS "FDISK.EXE". You must have the motherboard or other SCSI device driver diskettes when prompted by the operating system setup. AP6000 Hardware Reference Guide 11
-
 1
1 -
2
-
3
-
4
-
5
-
 6
6 -
 7
7 -
 8
8 -
 9
9 -
 10
10 -
 11
11 -
 12
12 -
 13
13 -
 14
14 -
 15
15 -
 16
16 -
17
-
18
-
19
-
20
-
21
-
22
-
23
-
24
-
25
-
26
-
27
-
28
-
29
-
30
-
31
-
32
 |
 |
