Asus P3C2000 P3C20000 User Manual - Page 29
ASUS P3C2000 User's Manual, Attach the Heatsink, Using SECC fan with Pentium, Using SECC2 fan
 |
View all Asus P3C2000 manuals
Add to My Manuals
Save this manual to your list of manuals |
Page 29 highlights
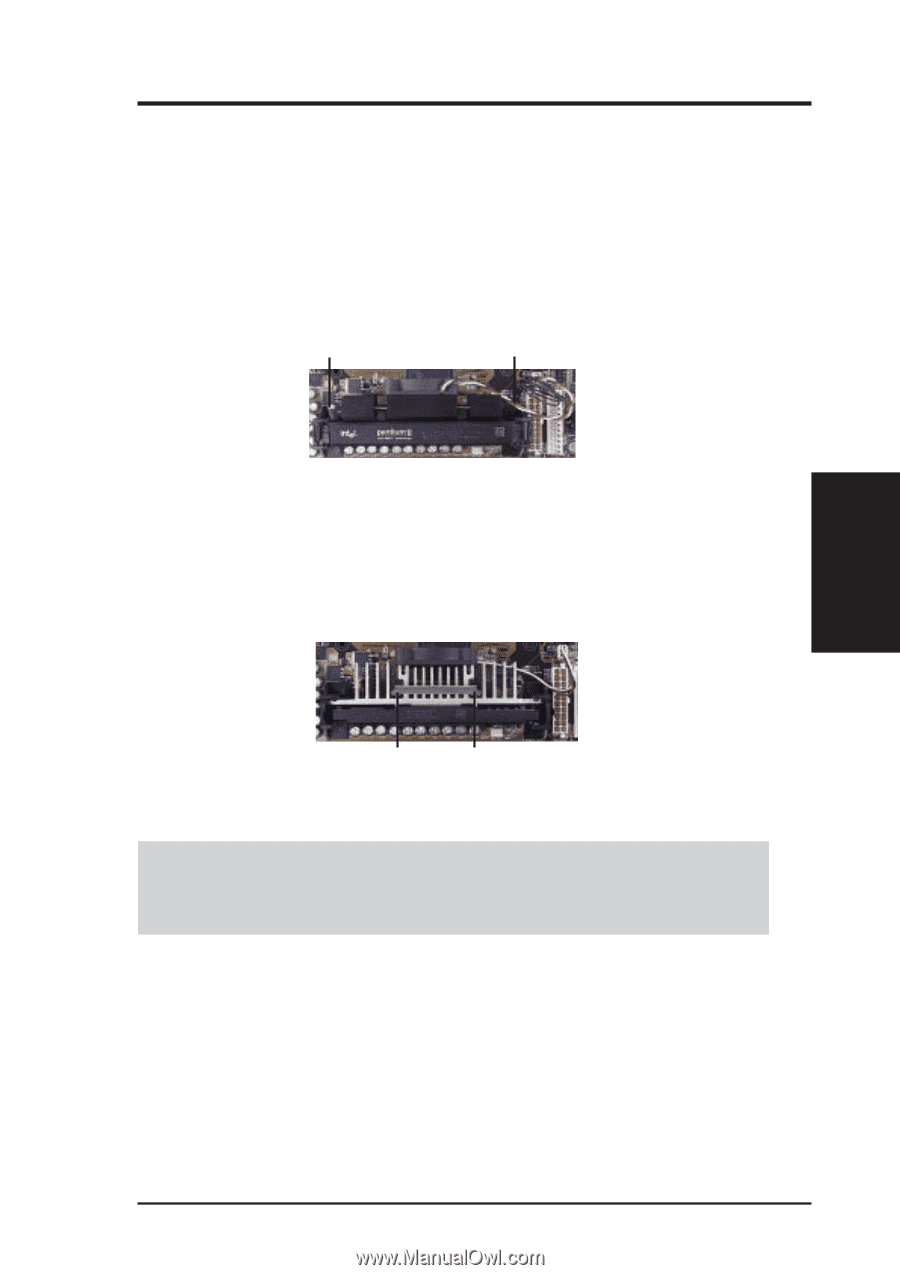
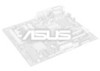
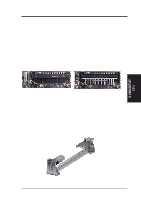
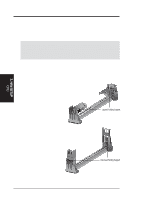
3. H/W SETUP CPU 3. HARDWARE SETUP 2. Attach the Heatsink NOTE: If provided, you should follow the heatsink attachment instructions that came with your heatsink or processor. The following steps are provided only as a general guide and may not reflect those for your heatsink. Using SECC fan with Pentium® II Push the two lock arms one direction to clamp the heatsink onto the processor and the other direction to release. Lock Arm Lock Arm Using SECC2 fan with Pentium® III Insert the four heatsink's pins through the holes of the SECC2. Place the metal clip on the ends of the pins and slide until it locks into place. Four Pins and metal clip WARNING! Make sure the heatsink is mounted tightly against the SECC2, SECC, or SEPP; otherwise, the CPU will overheat. You may install an auxiliary fan to provide adequate circulation across the processor's passive heatsink. NOTE: The SEPP heatsink and fan (for Intel Celeron processors) is similar to the SECC2 heatsink and fan except that the clamping design is different. ASUS P3C2000 User's Manual 29
-
 1
1 -
2
-
3
-
4
-
5
-
6
-
7
-
8
-
9
-
10
-
11
-
12
-
13
-
14
-
15
-
16
-
17
-
18
-
19
-
20
-
21
-
22
-
23
-
 24
24 -
 25
25 -
 26
26 -
 27
27 -
 28
28 -
 29
29 -
 30
30 -
 31
31 -
 32
32 -
 33
33 -
 34
34 -
35
-
36
-
37
-
38
-
39
-
40
-
41
-
42
-
43
-
44
-
45
-
46
-
47
-
48
-
49
-
50
-
51
-
52
-
53
-
54
-
55
-
56
-
57
-
58
-
59
-
60
-
61
-
62
-
63
-
64
-
65
-
66
-
67
-
68
-
69
-
70
-
71
-
72
-
73
-
74
-
75
-
76
-
77
-
78
-
79
-
80
-
81
-
82
-
83
-
84
-
85
-
86
-
87
-
88
-
89
-
90
-
91
-
92
-
93
-
94
-
95
-
96
-
97
-
98
-
99
-
100
-
101
-
102
-
103
-
104
-
105
-
106
-
107
-
108
-
109
-
110
 |
 |