Asus P6TD DELUXE User Manual - Page 152
Getting on the Internet
 |
View all Asus P6TD DELUXE manuals
Add to My Manuals
Save this manual to your list of manuals |
Page 152 highlights
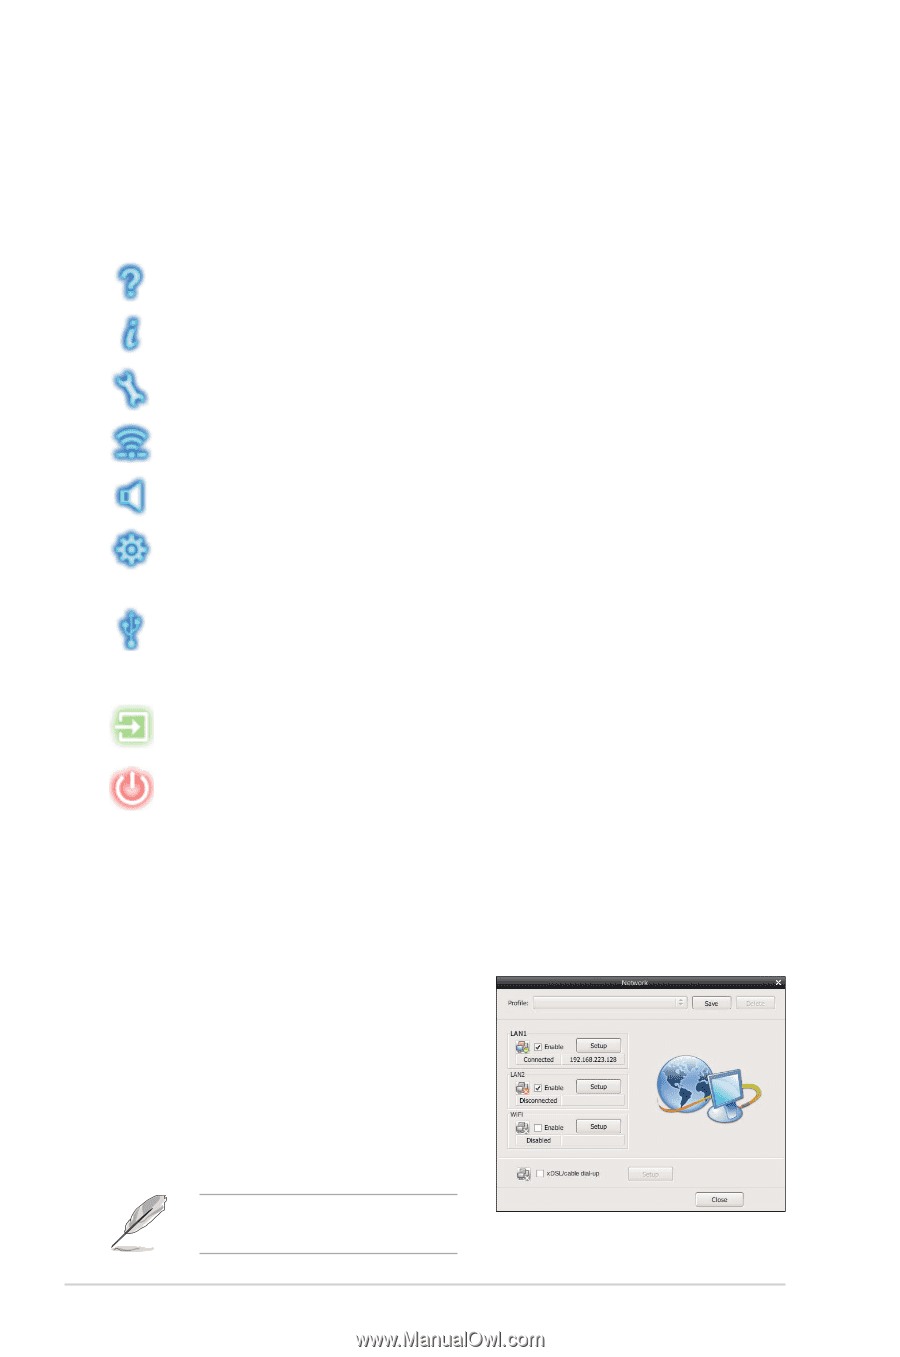
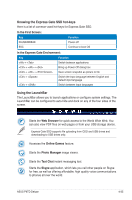
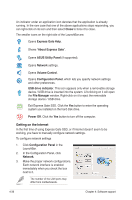
An indicator under an application icon denotes that the application is already running. In the rare case that one of the above applications stops responding, you can right-click on its icon and then select Close to force it to close. The smaller icons on the right side of the LaunchBar are: Opens Express Gate Help. Shows "About Express Gate". Opens ASUS Utility Panel (if supported). Opens Network settings. Opens Volume Control. Opens Configuration Panel, which lets you specify network settings and other preferences. USB drive indicator. This icon appears only when a removable storage device / USB drive is inserted into the system. Lift-clicking on it will open the File Manager window. Right-click on it to eject the removable storage device / USB drive. Exit Express Gate SSD. Click the Yes button to enter the operating system you installed on the hard disk drive. Power Off. Click the Yes button to turn off the computer. Getting on the Internet In the first time of using Express Gate SSD, or if Internet doesn't seem to be working, you have to manually configure network settings. To configure network settings 1. Click Configuration Panel in the LaunchBar. 2. In the Configuration Panel, click Network. 3. Make the proper network configurations. Each network interface is enabled immediately when you check the box next to it. The number of the LAN ports may differ from motherboards. 4-36 Chapter 4: Software support
-
 1
1 -
2
-
3
-
4
-
5
-
6
-
7
-
8
-
9
-
10
-
11
-
12
-
13
-
14
-
15
-
16
-
17
-
18
-
19
-
20
-
21
-
22
-
23
-
24
-
25
-
26
-
27
-
28
-
29
-
30
-
31
-
32
-
33
-
34
-
35
-
36
-
37
-
38
-
39
-
40
-
41
-
42
-
43
-
44
-
45
-
46
-
47
-
48
-
49
-
50
-
51
-
52
-
53
-
54
-
55
-
56
-
57
-
58
-
59
-
60
-
61
-
62
-
63
-
64
-
65
-
66
-
67
-
68
-
69
-
70
-
71
-
72
-
73
-
74
-
75
-
76
-
77
-
78
-
79
-
80
-
81
-
82
-
83
-
84
-
85
-
86
-
87
-
88
-
89
-
90
-
91
-
92
-
93
-
94
-
95
-
96
-
97
-
98
-
99
-
100
-
101
-
102
-
103
-
104
-
105
-
106
-
107
-
108
-
109
-
110
-
111
-
112
-
113
-
114
-
115
-
116
-
117
-
118
-
119
-
120
-
121
-
122
-
123
-
124
-
125
-
126
-
127
-
128
-
129
-
130
-
131
-
132
-
133
-
134
-
135
-
136
-
137
-
138
-
139
-
140
-
141
-
142
-
143
-
144
-
145
-
146
-
 147
147 -
 148
148 -
 149
149 -
 150
150 -
 151
151 -
 152
152 -
 153
153 -
 154
154 -
 155
155 -
 156
156 -
 157
157 -
158
-
159
-
160
-
161
-
162
-
163
-
164
-
165
-
166
-
167
-
168
-
169
-
170
-
171
-
172
-
173
-
174
-
175
-
176
-
177
-
178
 |
 |