Asus P8B-X User Guide - Page 119
Finish, Accept, User Name, Organization, Install
 |
View all Asus P8B-X manuals
Add to My Manuals
Save this manual to your list of manuals |
Page 119 highlights
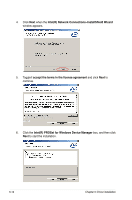
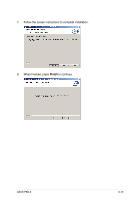
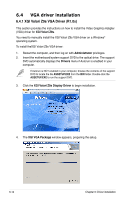
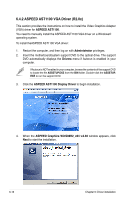
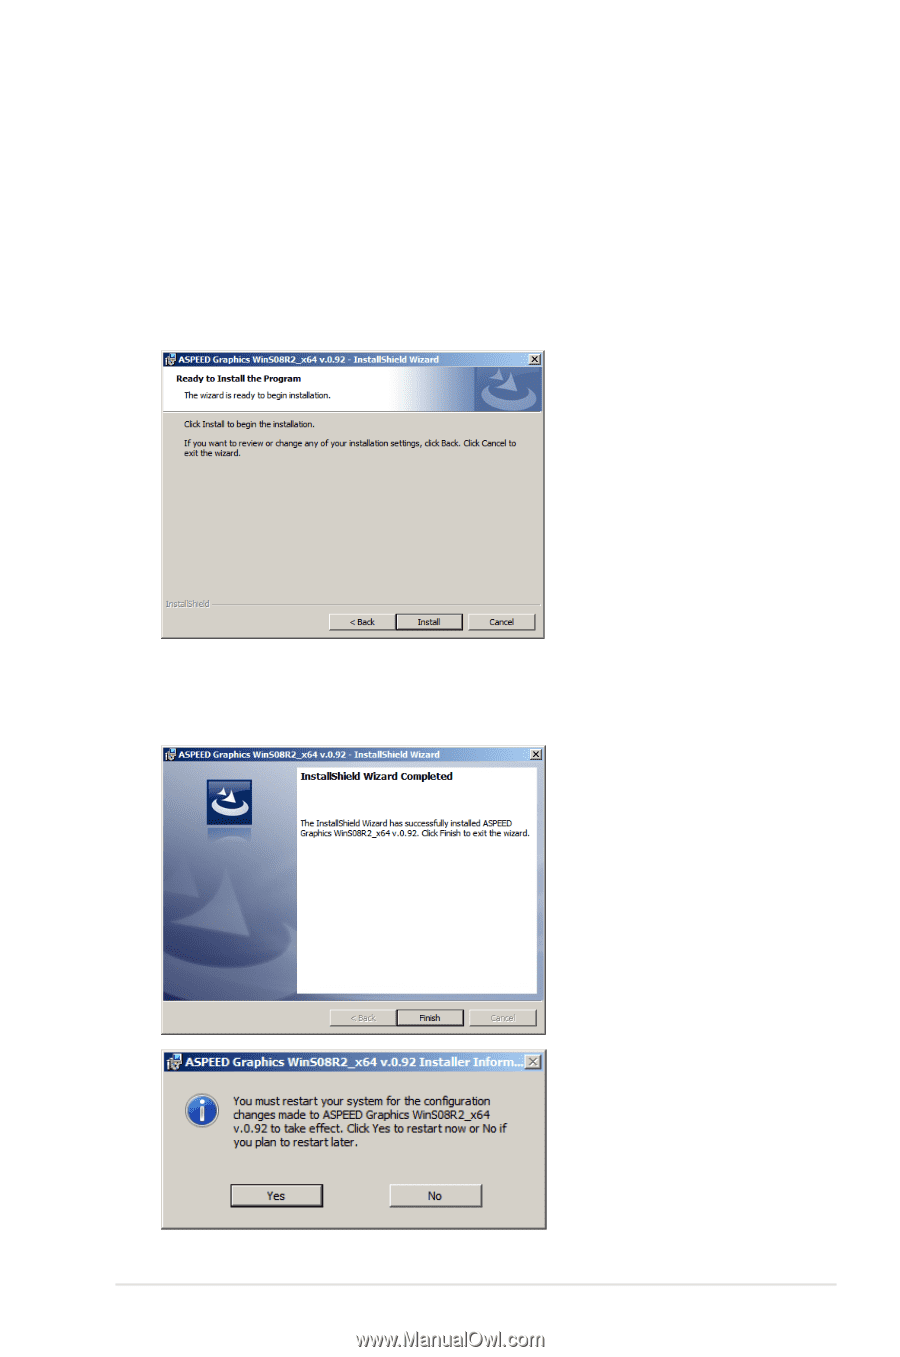
5. To allow the system to update the VGA driver, follow the steps shown in the next few windows, and click Next when finished. a. Accept the terms in the license agreement. b. Fill in User Name and Organization. (optional) c. Select a setup type. 6. Click Install to begin the installation. 7. When the installation completes, click Finish and select Yes to restart your computer for the configuration changes to take effect. ASUS P8B-X 6-17
-
 1
1 -
2
-
3
-
4
-
5
-
6
-
7
-
8
-
9
-
10
-
11
-
12
-
13
-
14
-
15
-
16
-
17
-
18
-
19
-
20
-
21
-
22
-
23
-
24
-
25
-
26
-
27
-
28
-
29
-
30
-
31
-
32
-
33
-
34
-
35
-
36
-
37
-
38
-
39
-
40
-
41
-
42
-
43
-
44
-
45
-
46
-
47
-
48
-
49
-
50
-
51
-
52
-
53
-
54
-
55
-
56
-
57
-
58
-
59
-
60
-
61
-
62
-
63
-
64
-
65
-
66
-
67
-
68
-
69
-
70
-
71
-
72
-
73
-
74
-
75
-
76
-
77
-
78
-
79
-
80
-
81
-
82
-
83
-
84
-
85
-
86
-
87
-
88
-
89
-
90
-
91
-
92
-
93
-
94
-
95
-
96
-
97
-
98
-
99
-
100
-
101
-
102
-
103
-
104
-
105
-
106
-
107
-
108
-
109
-
110
-
111
-
112
-
113
-
 114
114 -
 115
115 -
 116
116 -
 117
117 -
 118
118 -
 119
119 -
 120
120 -
 121
121 -
 122
122 -
 123
123 -
 124
124 -
125
-
126
-
127
-
128
 |
 |
ASUS P8B-X
6-17
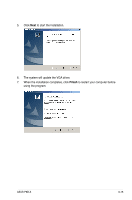
7.
When the installation completes, click
Finish
and select
Yes
to restart your
computer for the configuration changes to take effect.
5.
To allow the system to update the VGA driver, follow the steps shown in the
next few windows, and click
Next
when finished.
a.
Accept
the terms in the license agreement.
b. Fill in
User Name
and
Organization
. (optional)
c. Select a setup type.
6.
Click
Install
to begin the installation.