Asus P8B-X User Guide - Page 43
Force BIOS recovery setting 3-pin RECOVERY1 R1.0x only - bios update
 |
View all Asus P8B-X manuals
Add to My Manuals
Save this manual to your list of manuals |
Page 43 highlights
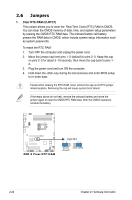
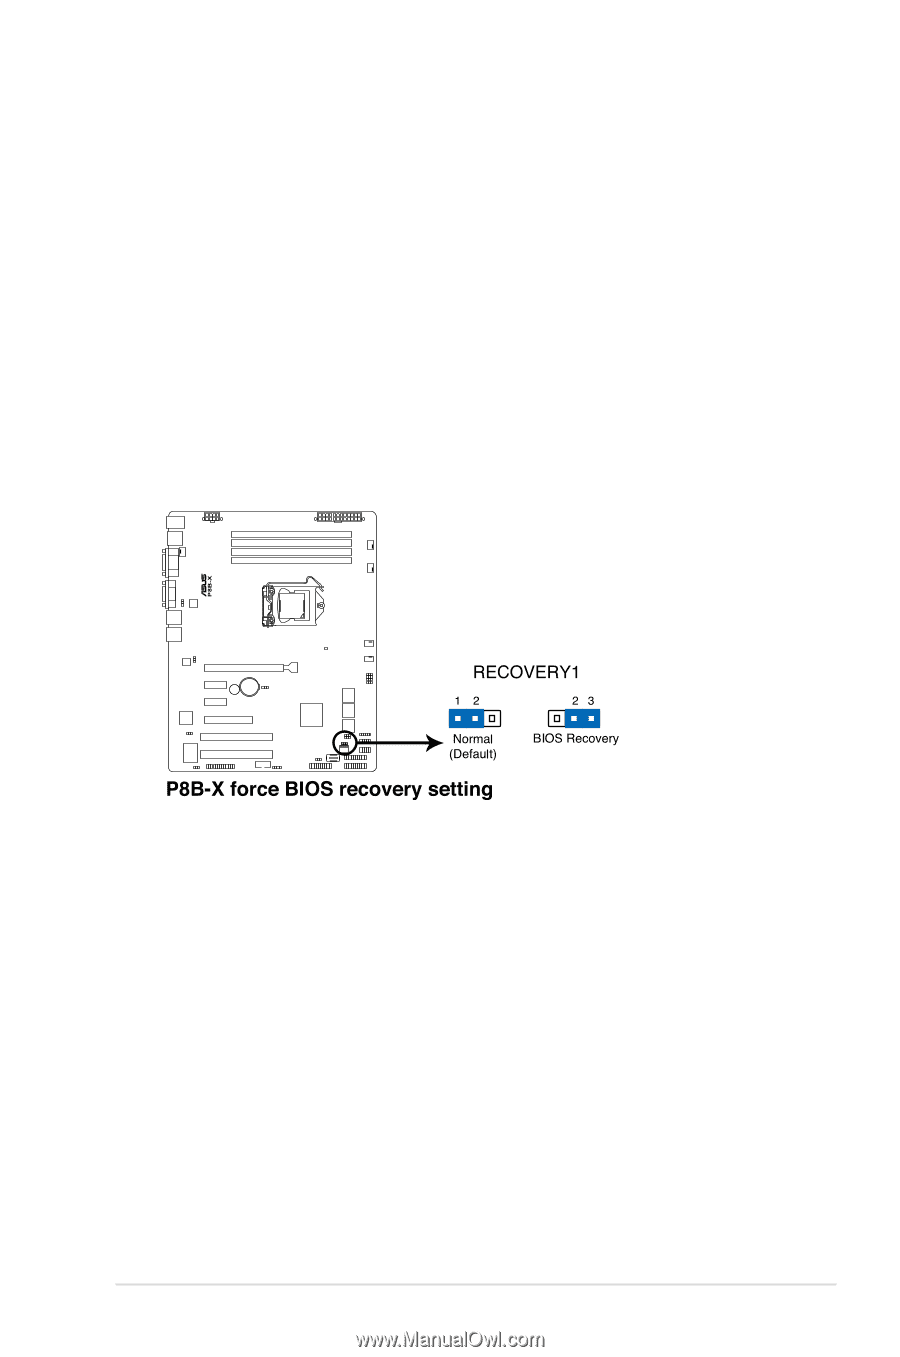
5. Force BIOS recovery setting (3-pin RECOVERY1) (R1.0x only) This jumper allows you to quickly update or recover the BIOS settings when it becomes corrupted. To update the BIOS (for R1.0x): 1. Prepare a USB flash disk that contains the original or latest BIOS for the motherboard (XXXXXX.ROM) and the BUPDATER.EXE utility. 2. Set the jumper to pins 2-3. 3. Insert the USB flash and turn on the system to update the BIOS. 4. Shut down the system. 5. Set the jumper back to pins 1-2. 6. Turn on the system. ASUS P8B-X 2-25
-
 1
1 -
2
-
3
-
4
-
5
-
6
-
7
-
8
-
9
-
10
-
11
-
12
-
13
-
14
-
15
-
16
-
17
-
18
-
19
-
20
-
21
-
22
-
23
-
24
-
25
-
26
-
27
-
28
-
29
-
30
-
31
-
32
-
33
-
34
-
35
-
36
-
37
-
 38
38 -
 39
39 -
 40
40 -
 41
41 -
 42
42 -
 43
43 -
 44
44 -
 45
45 -
 46
46 -
 47
47 -
 48
48 -
49
-
50
-
51
-
52
-
53
-
54
-
55
-
56
-
57
-
58
-
59
-
60
-
61
-
62
-
63
-
64
-
65
-
66
-
67
-
68
-
69
-
70
-
71
-
72
-
73
-
74
-
75
-
76
-
77
-
78
-
79
-
80
-
81
-
82
-
83
-
84
-
85
-
86
-
87
-
88
-
89
-
90
-
91
-
92
-
93
-
94
-
95
-
96
-
97
-
98
-
99
-
100
-
101
-
102
-
103
-
104
-
105
-
106
-
107
-
108
-
109
-
110
-
111
-
112
-
113
-
114
-
115
-
116
-
117
-
118
-
119
-
120
-
121
-
122
-
123
-
124
-
125
-
126
-
127
-
128
 |
 |
ASUS P8B-X
2-25
5.
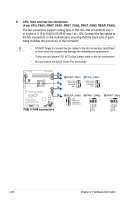
Force BIOS recovery setting (3-pin RECOVERY1) (R1.0x only)
This jumper allows you to quickly update or recover the BIOS settings when it
becomes corrupted.
To update the BIOS (for R1.0x):
1.
Prepare a USB flash disk that contains the original or latest BIOS for the
motherboard (XXXXXX.ROM) and the BUPDATER.EXE utility.
2.
Set the jumper to pins 2–3.
3.
Insert the USB flash and turn on the system to update the BIOS.
4.
Shut down the system.
5.
Set the jumper back to pins 1–2.
6.
Turn on the system.