Asus P8B-X User Guide - Page 33
Installing the CPU heatsink in rack - 1155
 |
View all Asus P8B-X manuals
Add to My Manuals
Save this manual to your list of manuals |
Page 33 highlights
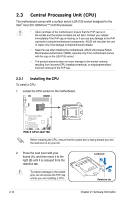
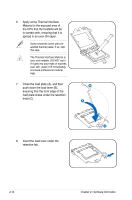
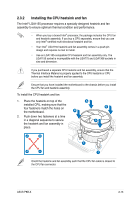
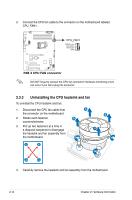
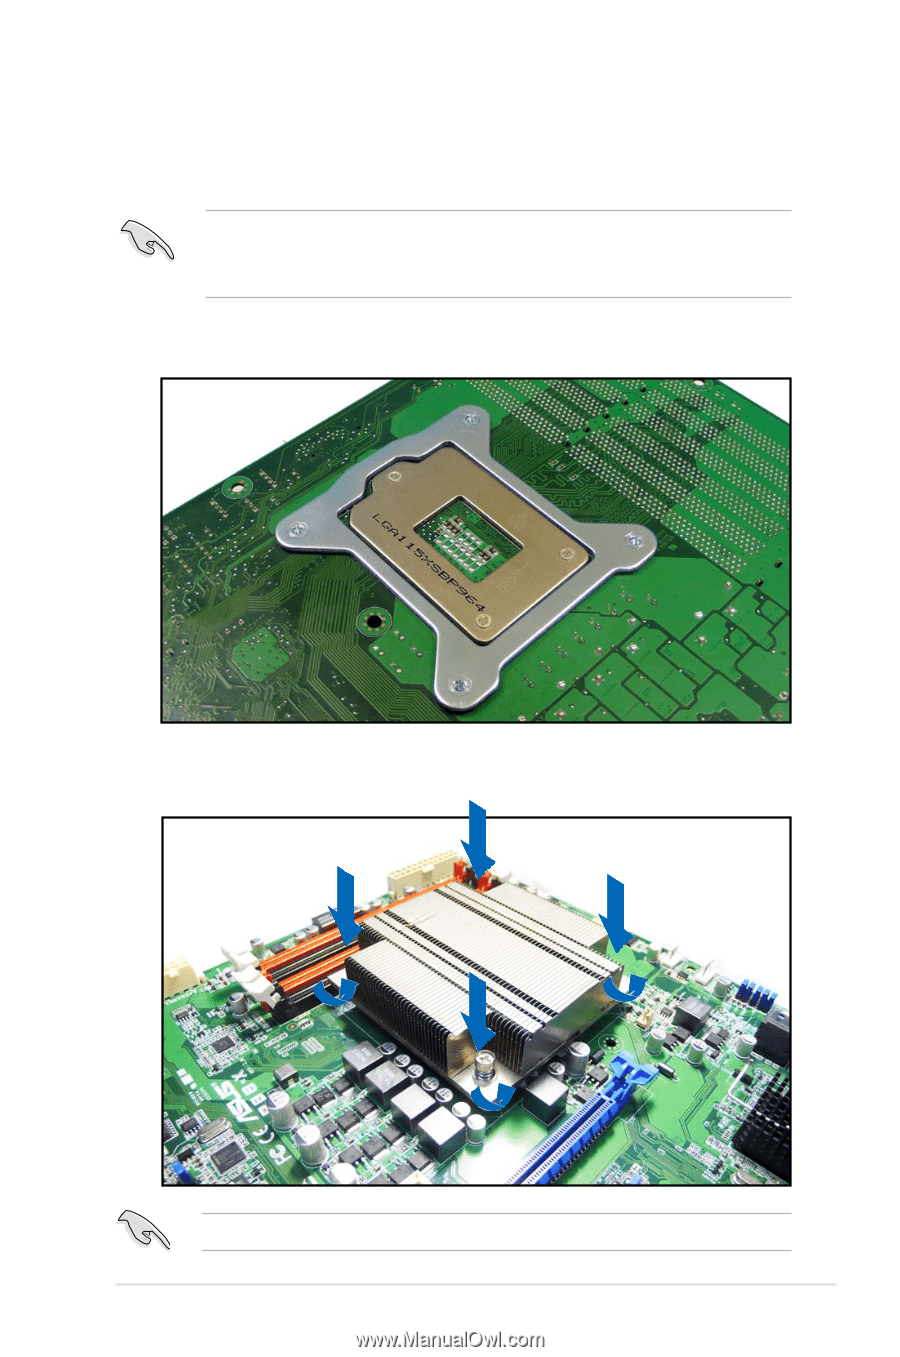
2.3.4 Installing the CPU heatsink in rack The Intel® 1155 processor requires a specially designed heatsink to ensure optimum thermal condition and performance. • Ensure that you use qualified heatsink assembly only. • Ensure that you have applied the thermal interface material to the top of the CPU before installing the heatsink and fan. 1. Peel off the sticker on the heatsink metal plate and affix the plate to the back of the motherboard, matching the standoffs to the heatsink screw holes. 2. Use a Phillips screwdriver to tighten the four heatsink screws in a diagonal sequence. Ensure that the heatsink is not skewed or tilted, otherwise the CPU will overheat. ASUS P8B-X 2-15
-
 1
1 -
2
-
3
-
4
-
5
-
6
-
7
-
8
-
9
-
10
-
11
-
12
-
13
-
14
-
15
-
16
-
17
-
18
-
19
-
20
-
21
-
22
-
23
-
24
-
25
-
26
-
27
-
 28
28 -
 29
29 -
 30
30 -
 31
31 -
 32
32 -
 33
33 -
 34
34 -
 35
35 -
 36
36 -
 37
37 -
 38
38 -
39
-
40
-
41
-
42
-
43
-
44
-
45
-
46
-
47
-
48
-
49
-
50
-
51
-
52
-
53
-
54
-
55
-
56
-
57
-
58
-
59
-
60
-
61
-
62
-
63
-
64
-
65
-
66
-
67
-
68
-
69
-
70
-
71
-
72
-
73
-
74
-
75
-
76
-
77
-
78
-
79
-
80
-
81
-
82
-
83
-
84
-
85
-
86
-
87
-
88
-
89
-
90
-
91
-
92
-
93
-
94
-
95
-
96
-
97
-
98
-
99
-
100
-
101
-
102
-
103
-
104
-
105
-
106
-
107
-
108
-
109
-
110
-
111
-
112
-
113
-
114
-
115
-
116
-
117
-
118
-
119
-
120
-
121
-
122
-
123
-
124
-
125
-
126
-
127
-
128
 |
 |
ASUS P8B-X
2-15
2.3.4
Installing the CPU heatsink in rack
The Intel
®
1155 processor requires a specially designed heatsink to ensure
optimum thermal condition and performance.
•
Ensure that you use qualified heatsink assembly only.
•
Ensure that you have applied the thermal interface material to the top of the
CPU before installing the heatsink and fan.
1.
Peel off the sticker on the heatsink metal plate and affix the plate to the back
of the motherboard, matching the standoffs to the heatsink screw holes.
2.
Use a Phillips screwdriver to tighten the four heatsink screws in a diagonal
sequence.
Ensure that the heatsink is not skewed or tilted, otherwise the CPU will overheat.