Asus ROG GR8 ROG GR8 User Guide English - Page 23
Connecting Windows® 8.1 / Windows 8.1 PRO devices
 |
View all Asus ROG GR8 manuals
Add to My Manuals
Save this manual to your list of manuals |
Page 23 highlights
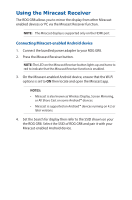
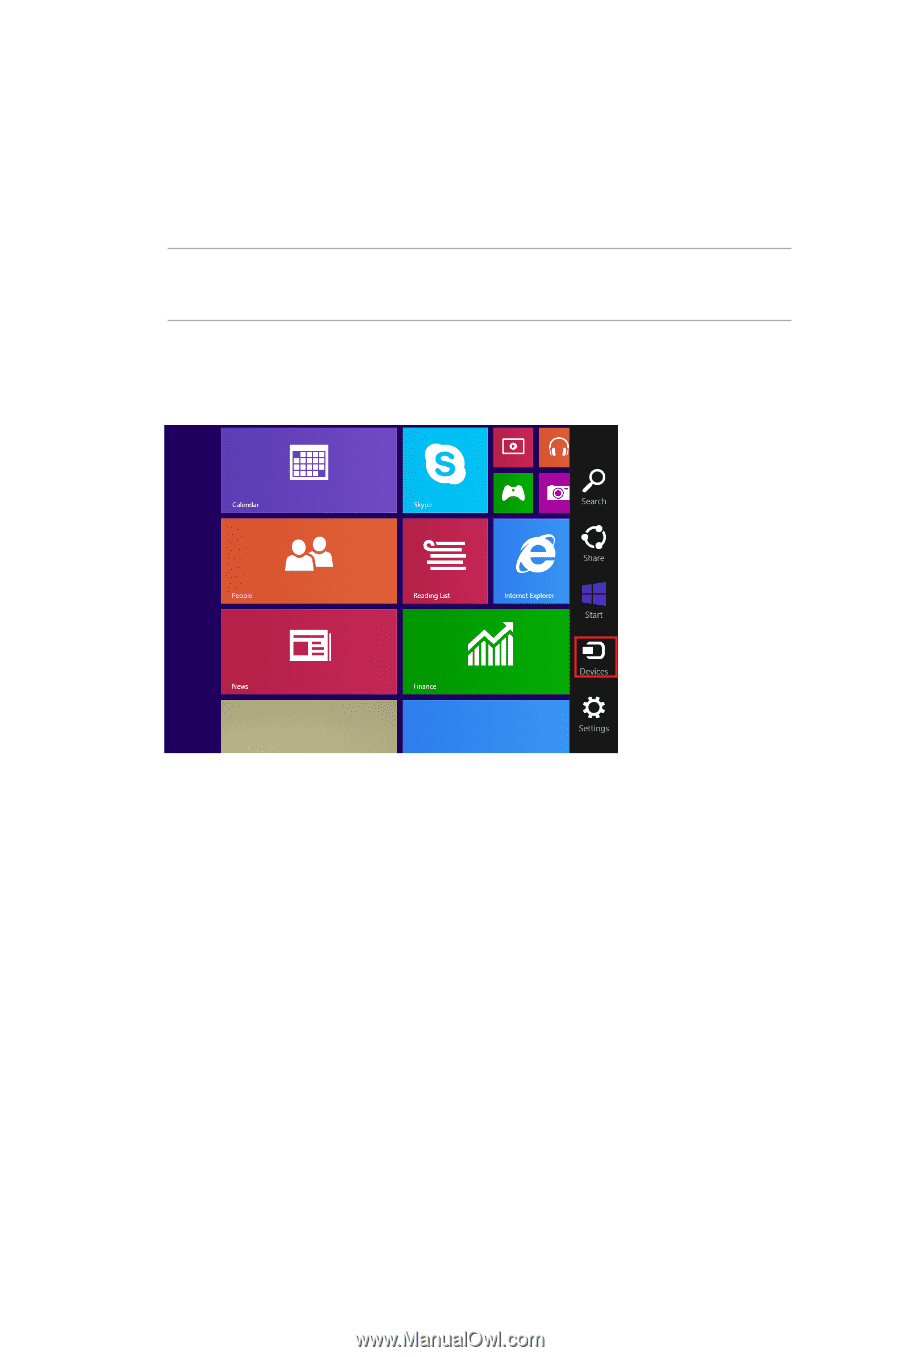
Connecting Windows® 8.1 / Windows 8.1 PRO devices 1. Connect the bundled power adapter to your ROG GR8. 2. Press the Miracast Receiver button. NOTE: The LED on the Miracast Receiver button lights up and turns to red to indicate that the Miracast Receiver function is enabled. 3. On your device with Windows® 8.1 / Windows 8.1 PRO OS, call out the Charms bar then select Devices. 4. Under Devices, select Project then click the SSID of ROG GR8. For Windows 8.1 PRO, go to Devices > Project > Add a wireless display. From the Add a wireless display screen, click Add a device. 5. Key-in the WPS PIN shown on ROG GR8 to start screencasting from your Windows® 8.1 / Windows® 8.1 PRO device to the ROG GR8.
-
 1
1 -
2
-
3
-
4
-
5
-
6
-
7
-
8
-
9
-
10
-
11
-
12
-
13
-
14
-
15
-
16
-
17
-
 18
18 -
 19
19 -
 20
20 -
 21
21 -
 22
22 -
 23
23 -
 24
24 -
 25
25 -
 26
26 -
 27
27 -
 28
28 -
29
-
30
-
31
-
32
-
33
-
34
-
35
-
36
-
37
-
38
-
39
-
40
-
41
-
42
-
43
-
44
-
45
-
46
-
47
-
48
-
49
-
50
-
51
-
52
-
53
-
54
 |
 |
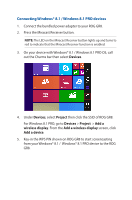
Connecting Windows® 8.1 / Windows 8.1 PRO devices
1.
Connect the bundled power adapter to your ROG GR8.
2.
Press the Miracast Receiver button.
NOTE:
The LED on the Miracast Receiver button lights up and turns to
red to indicate that the Miracast Receiver function is enabled.
3.
On your device with Windows® 8.1 / Windows 8.1 PRO OS, call
out the Charms bar then select
Devices
.
4.
Under
Devices
, select
Project
then click the SSID of ROG GR8.
For Windows 8.1 PRO, go to
Devices
>
Project
>
Add a
wireless display
. From the
Add a wireless display
screen, click
Add a device
.
5.
Key-in the WPS PIN shown on ROG GR8 to start screencasting
from your Windows® 8.1 /
Windows® 8.1 PRO device to the ROG
GR8.