Behringer TD-3-SR Quick Start Guide - Page 21
TD-3 Operation
 |
View all Behringer TD-3-SR manuals
Add to My Manuals
Save this manual to your list of manuals |
Page 21 highlights
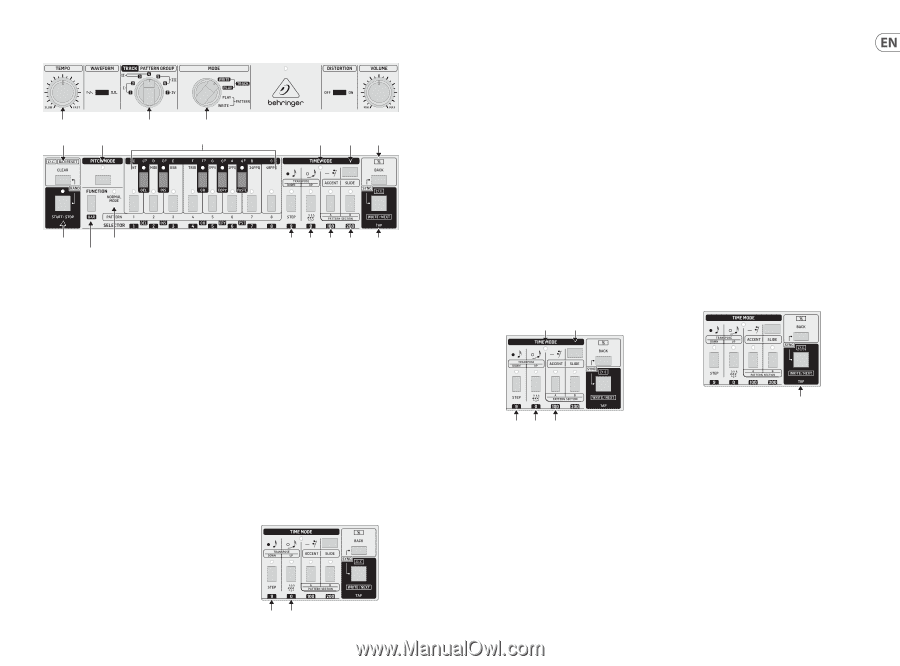
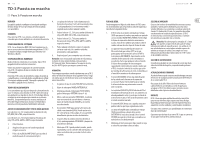
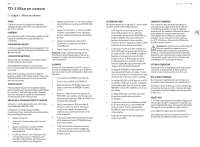
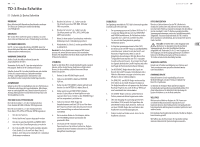
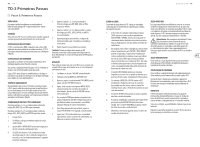
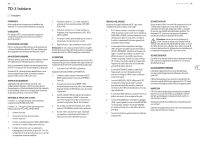
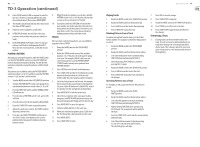
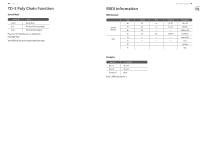
40 TD-3 TD-3 Operation TEMPO TRACK/PATTERN GROUP MODE CLEAR PITCH MODE 13 KEY KEYBOARD LED TIME MODE BACK START/STOP LED FUNCTION OVERVIEW The following details show some of the basic operations of the TD-3. Keep it simple to start with, until you become familiar with the steps required, and it becomes routine. There are four pattern groups, I, II, III and IV. Each pattern group can have up to eight A patterns and eight B patterns. Each pattern can have up to 16 steps. The default step is a 16th note. A pattern of desired notes is first entered in PITCH MODE, and then the timing of each note is added in TIME MODE. WRITING A PATTERN As an example, we will program pattern 1A of pattern group I. All writing (pitch and timing) is done in PATTERN WRITE Mode. Writing the notes in PITCH MODE 1. Turn the MODE switch to PATTERN WRITE. 2. Turn the PATTERN GROUP switch to Group I, position 1 or 2 (it does not matter which). 3. Press FUNCTION, and the nearby NORMAL MODE LED will turn on, and one of the PATTERN switch LEDs will be flashing. 4. Press the PATTERN 1 switch (note C) and its LED will flash, showing that we are getting ready to program it. (Press it anyway, even if it is already flashing.) TRANSPOSE DOWN UP ACCENT SLIDE WRITE/NEXT STEP TRIPLET PAT A PAT B TAP NOTE TIE REST 5. Press the PATTERN A switch (100) and its LED will turn on (it may even be on already). 6. If PATTERN 1A already exists, press and hold the PATTERN 1 switch and then press CLEAR. If you now press START/STOP, you should not hear a pattern. (Remember to press START/STOP once more to get out of play mode.) 7. Enter the number of steps in your pattern, by holding down FUNCTION and pressing the STEP switch by the number of steps required. For example, you can press it 8 times. If you skip this step, then the pattern will be 16 steps. 8. Press PITCH MODE and its LED will turn on. Now you can enter the notes required for your pattern by pressing any of the 13 notes in the keyboard. 9. To change the octave for a note, press and hold either of the TRANSPOSE up or down switches and then press the required note. DOWN UP TRANSPOSE Quick Start Guide 41 Checking and editing notes 10. To listen to the pattern of notes, press PITCH MODE to return to the start of the pattern, and press WRITE/NEXT to play the notes one at a time. (Press PITCH MODE at any time to return to the start.) 11. To change a note that has just played, press BACK to go back to that step. Then press the new note (or to change octave, press and hold either of the TRANSPOSE up or down switches and then press the desired note). 12. Continue to press WRITE/NEXT until all notes have been played, or press PITCH MODE to return to the start, or FUNCTION to exit PITCH MODE. 13. To redo the whole pattern, repeat step 3 onwards. Writing the timing in TIME MODE After all notes have been entered, you need to enter the timing of each note in TIME MODE. Note: While in TIME MODE, no sounds will be heard. Checking and editing timing 16. To check the timing is OK, press TIME MODE, and press WRITE/NEXT to cycle through the pattern steps, one at a time. Look at the LEDs to see which step is a note, tie, or rest. 17. To change the timing of the pattern, repeat steps 14 and 15 to re-enter the new timing. (Press TIME MODE at any time to return to the start of the pattern.) 18. Now that the notes and timing have been added, you can play the pattern by pressing FUNCTION to return to normal mode, and then press START/STOP. As the pattern repeats, you can change the TEMPO and adjust the synthesizer controls as required. Alternative timing method There is another way of entering the timing: 19. Press FUNCTION and then START/STOP to play the existing pattern. LED TIME MODE TAP NOTE TIE REST 20. Press the CLEAR switch and you will hear a metronome, with a downbeat at the beginning of 14. Press the TIME MODE switch and its LED will turn on. the pattern. 15. In TIME MODE, you can play the NOTE as it is, or add a 21. Tap on the TAP switch, in the timing you would TIE, or a REST using three switches as shown above. like. Turn down the TEMPO if this will help. To add Sustain, press and hold down TAP. For example, for 16 notes, you could press these three switches as follows: Note, Rest, Rest, Note, Tie, 22. Repeat steps 20 and 21 until the timing sounds good Note, Note, Tie, Note, Note, Tie, Note, Note, Note, (or repeat steps 14 and 15 if you prefer this method). Tie, Note. Whenever you reach the required number of notes (which you set in procedure 7 above), it will automatically exit TIME MODE. Note: To play all the notes just as they are, repeatedly press the NOTE switch until you exit TIME MODE. This will create a simple Arpeggio. Adding or deleting ACCENT and SLIDE 23. While still in PATTERN WRITE MODE, press PITCH MODE and its LED will turn on. Press WRITE/NEXT repeatedly to play each note of the current pattern. 24. When you reach a note that you would like to add an accent or a slide to, keep holding the WRITE/ NEXT(don't release it). If you go past a note you want to change, press BACK first, then press and hold WRITE/NEXT.
-
 1
1 -
2
-
3
-
4
-
5
-
6
-
7
-
8
-
9
-
10
-
11
-
12
-
13
-
14
-
15
-
 16
16 -
 17
17 -
 18
18 -
 19
19 -
 20
20 -
 21
21 -
 22
22 -
 23
23 -
 24
24 -
 25
25 -
 26
26 -
27
 |
 |