Belkin F1UP0301 F1UP0301 Manual - Page 23
Click Close on the Printer Ports window.
 |
View all Belkin F1UP0301 manuals
Add to My Manuals
Save this manual to your list of manuals |
Page 23 highlights
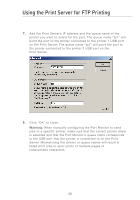
section Printing to Multiple Print Servers 1 3. In the "Enter New Port" window, enter a unique name for the port and click "OK". 2 3 4 4. Click "Close" on the "Printer Ports" window. 5. On the "Ports" tab, select the newly created port; click "Configure Port". 5 6 7 8 9 10 6. On the next window (Belkin Port 2: Properties), click the "Locate Servers" button. 21
-
 1
1 -
2
-
3
-
4
-
5
-
6
-
7
-
8
-
9
-
10
-
11
-
12
-
13
-
14
-
15
-
16
-
17
-
 18
18 -
 19
19 -
 20
20 -
 21
21 -
 22
22 -
 23
23 -
 24
24 -
 25
25 -
 26
26 -
 27
27 -
 28
28 -
29
-
30
-
31
-
32
-
33
-
34
-
35
-
36
-
37
-
38
-
39
-
40
 |
 |

21
section
2
1
3
4
5
6
7
8
9
10
3.
In the “Enter New Port” window, enter a unique name for the port
and click “OK”.
4.
Click “Close” on the “Printer Ports” window.
5.
On the “Ports” tab, select the newly created port; click “Configure Port”.
6.
On the next window (Belkin Port 2: Properties), click the “Locate
Servers” button.
Printing to Multiple Print Servers