Beretta Cx4 Storm Beretta CX4 Storm User Manual - Page 37
Reversing The Controls - clips
 |
View all Beretta Cx4 Storm manuals
Add to My Manuals
Save this manual to your list of manuals |
Page 37 highlights
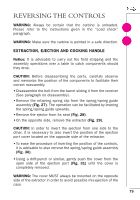
REVERSING THE CONTROLS WARNING: Always be certain that the carbine is unloaded. Please refer to the instructions given in the "Load check" paragraph. WARNING: Make sure the carbine is pointed in a safe direction. EXTRACTION, EJECTION AND COCKING HANDLE Notice: It is advisable to carry out the field stripping and the assembly operations over a table to catch components should they drop. CAUTION: Before disassembling the parts, carefully observe and memorize the position of the components to facilitate their correct reassembly. • Disassemble the bolt from the barrel sliding it from the receiver (See paragraph on disassembly). • Remove the retaining spring clip from the spring/spring guide assembly (Fig. 27). The operation can be facilitated by levering the spring/spring guide upwards. • Remove the ejector from its seat (Fig. 28). • On the opposite side, remove the extractor (Fig. 29). CAUTION: In order to invert the ejection from one side to the other, it is necessary to also invert the position of the ejection port cover located on the opposite side of the extractor. • To ease the procedure of inverting the position of the controls, it is advisable to also remove the spring/spring guide assembly (Fig. 30). • Using a drift-punch or similar, gently push the cover from the open side of the ejection port (Fig. 31) until the cover is completely removed. WARNING: The cover MUST always be mounted on the opposite side of the extractor in order to avoid possible mis-ejection of the case. ! ! 79
-
 1
1 -
2
-
3
-
4
-
5
-
6
-
7
-
8
-
9
-
10
-
11
-
12
-
13
-
14
-
15
-
16
-
17
-
18
-
19
-
20
-
21
-
22
-
23
-
24
-
25
-
26
-
27
-
28
-
29
-
30
-
31
-
 32
32 -
 33
33 -
 34
34 -
 35
35 -
 36
36 -
 37
37 -
 38
38 -
 39
39 -
 40
40 -
 41
41 -
 42
42 -
43
-
44
-
45
-
46
-
47
 |
 |