Beretta Cx4 Storm Beretta CX4 Storm User Manual - Page 38
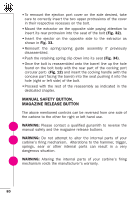
Manual Safety Button, Magazine Release Button
 |
View all Beretta Cx4 Storm manuals
Add to My Manuals
Save this manual to your list of manuals |
Page 38 highlights
• To remount the ejection port cover on the side desired, take care to correctly insert the two upper protrusions of the cover in their respective recesses on the bolt. • Mount the extractor on the opposite side paying attention to insert its rear protrusion into the seat of the bolt (Fig. 32). • Insert the ejector on the opposite side to the extractor as shown in Fig. 33. • Remount the spring/spring guide assembly if previously disassembled. • Push the retaining spring clip down into its seat (Fig. 34). • Once the bolt is reassembled onto the barrel line up the hole found on the bolt body with the rear part of the cocking port (circular part) (Fig. 12) and insert the cocking handle (with the concave part facing the barrel) into the seat pushing it into the hole (right or left side) of the bolt. • Proceed with the rest of the reassembly as indicated in the dedicated chapter. MANUAL SAFETY BUTTON, MAGAZINE RELEASE BUTTON The above mentioned controls can be reversed from one side of the carbine to the other for right or left hand use. ! WARNING: Please contact a qualified gunsmith to reverse the manual safety and the magazine release buttons. ! WARNING: Do not attempt to alter the internal parts of your carbine's firing mechanism. Alterations to the hammer, trigger, springs, sear or other internal parts can result in a very dangerous situation. ! WARNING: Altering the internal parts of your carbine's firing mechanism voids the manufacturer's warranty. 80
-
 1
1 -
2
-
3
-
4
-
5
-
6
-
7
-
8
-
9
-
10
-
11
-
12
-
13
-
14
-
15
-
16
-
17
-
18
-
19
-
20
-
21
-
22
-
23
-
24
-
25
-
26
-
27
-
28
-
29
-
30
-
31
-
32
-
 33
33 -
 34
34 -
 35
35 -
 36
36 -
 37
37 -
 38
38 -
 39
39 -
 40
40 -
 41
41 -
 42
42 -
 43
43 -
44
-
45
-
46
-
47
 |
 |