Biostar M7NCD ULTRA M7NCD Ultra user's manual - Page 27
Installation, 1.1 Error Messages
 |
View all Biostar M7NCD ULTRA manuals
Add to My Manuals
Save this manual to your list of manuals |
Page 27 highlights
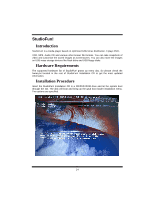
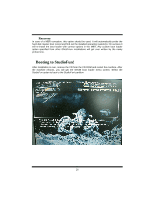
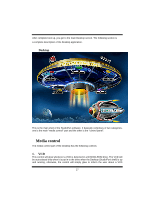
Installation This option will do the basic installation of the distribution. The installation works on pre-installed windows or GNU/Linux distribution. On selecting the 'installation' option the installer boots and displays a dialog box indicating the space required and waits for a confirmation. Selecting Ok will continue the installation while selecting Cancel will terminate the installation and reboot the machine. If Windows or GNU/Linux is the only OS installed on the hard disk with no free space, it will resize the partition, either NTFS or FAT32 or ext2, and install StudioFun!. In case the hard disk has a 128MB of free space available, the installation will use the free space. After installing the base system you will be prompted to select the resolution from the following choices 1. 1024x768 (recommended) 2. 800x600 3. 640x480 Select the desired resolution. The default is 1024x768 for high-end graphics. Next you will be prompted to choose the DVD area/region selection code. Choose this based on the type of DVDs you will be playing. The installation procedure will then probe for the type of mouse installed. The distribution currently supports PS/2, USB and Serial mice. In case of serial mouse you will have to move the mouse when prompted. The other two are probed and installed automatically. The installation procedure will now finish, the CD is ejected and a dialog box prompting to reboot the machine is displayed. Press OK button and enjoy StudioFun!. 3.1.1 Error Messages 1. Media corrupted!! Please check the media! The CD-ROM is corrupted. 2. Extraction of base system failed!! Please try again later!! The CD-ROM is corrupted. 3. Unsupported hardware found, Aborting... If you try to install StudioFun! on an unsupported and undocumented hardware the above error message is popped. 4. No device found! This error message is given if there is no hard disk in the system. 25
-
 1
1 -
2
-
3
-
4
-
5
-
6
-
7
-
8
-
9
-
10
-
11
-
12
-
13
-
14
-
15
-
16
-
17
-
18
-
19
-
20
-
21
-
 22
22 -
 23
23 -
 24
24 -
 25
25 -
 26
26 -
 27
27 -
 28
28 -
 29
29 -
 30
30 -
 31
31 -
 32
32 -
33
-
34
-
35
-
36
-
37
-
38
-
39
-
40
-
41
 |
 |