Bissell ProHeat 2X Upright Carpet Cleaner 1383 User Guide - Page 15
Small belt removal and replacement, Brush removal and large belt replacement
 |
View all Bissell ProHeat 2X Upright Carpet Cleaner 1383 manuals
Add to My Manuals
Save this manual to your list of manuals |
Page 15 highlights
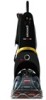
Maintenance & Care Small belt removal and replacement Occasional replacement of one or both belts may become necessary. If that is needed, please follow the instructions below. 1. Turn off the machine, and unplug it from the outlet. 2. Remove both the 2-in-1 water tank and the 3. formula tank. Set aside. 3. Unscrew the front nozzle and remove it. Set aside. 4. Turn the machine on its side. IMPORTANT: cord side down. 5. 5. Remove the clear end cap by unscrewing the 2 black screws. Take care not to drop the screws into the unit. 6. Remove 1 silver screw. 7. Remove pivot arm by gently lifting up. 7. 8. Remove small brush belt. 9. Replace small brush belt, and reverse steps above. WARNING To reduce the risk of electric shock, turn power switch off and disconnect plug from electrical outlet before performing maintenance or troubleshooting checks. 6. 8. 9. Brush removal and large belt replacement Brushes can be removed for cleaning or replacement as needed. 2. 1. Follow small belt removal instructions above. 2. Remove brush rolls by pulling them off of the metal rods. Be careful not to lose the small washer at each end of the brush rolls. 3. Place cleaned or new brush rolls back onto the rods. Make sure one washer is on each end 4. of the rollers prior to sliding onto the rod. Be sure to let the rod slide through the bushing to insure proper fit. 4. Re-attach the long belt on the bottom to the cogs of the small roller brushes. 5. Place small belt over back roller and metal 6. cog. 6. Place pivot arm in place and screw in place using the silver screw. 7. Re-attach clear end cap by tightening with the (2) black screws. 8. Return front nozzle to front of unit, by latching from underneath and then securing with a screw. 8. If you have any questions or are having trouble installing or replacing your belt(s) or brushes, please call BISSELL Consumer Care. www.bissell.com 3. 5. 7. 800.237.7691 15
-
 1
1 -
2
-
3
-
4
-
5
-
6
-
7
-
8
-
9
-
 10
10 -
 11
11 -
 12
12 -
 13
13 -
 14
14 -
 15
15 -
 16
16 -
 17
17 -
 18
18 -
 19
19 -
 20
20
 |
 |
