Black & Decker CM2045 Instruction Manual - Page 14

Blade Sharpening, When Sharpening The, Blade
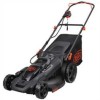
Page 14 highlights

REINSTALLED CORRECTLY, AS DESCRIBED BELOW. IMPROPER ASSEMBLY OF THE BLADE OR OTHER PARTS OF THE BLADE SYSTEM MAY CAUSE SERIOUS INJURY. 1. WARNING: RELEASE BAIL HANDLE TO TURN MOWER OFF, WAIT FOR THE BLADE TO STOP, AND REMOVE SAFETY KEY AND BATTERY PACK. 2. Cut a piece of 2x4 wood (31) (about 2 feet long) (610 mm) to keep blade from turning while removing bolt (32). 3. Wear gloves and proper eye protection. Turn the mower on its side. Be careful of sharp edges of blade. Position wood and unscrew bolt with1/2" wrench (33) as shown in Figure W. W 33 31 32 4. Remove bolt and washer (34). Pull off blade (35) as shown in Figure X. The fan (36) should not be removed. Examine all pieces for damage and replace if necessary. X 34 36 32 35 5. The blade can only be attached to the fan in one direction. To reassemble, line up the D-shaped hole of the blade with the D-shaped post of the fan, ensuring the writing on the blade faces out away from the mower. 6. To tighten firmly, position the piece of wood as shown in Figure Y to keep the blade from turning. Slide the bolt through the washer and screw bolt into place. Tighten with the wrench. Y BLADE SHARPENING KEEP BLADE SHARP FOR BEST MOWER PERFORMANCE. A DULL BLADE DOES NOT CUT GRASS CLEANLY. USE PROPER EYE PROTECTION WHILE REMOVING, SHARPENING, AND INSTALLING BLADE. ENSURE THAT SAFETY KEY AND BATTERY PACK IS REMOVED. Sharpening the blade twice during a mowing season is usually sufficient under normal circumstances. Sand causes the blade to dull quickly. If your lawn has sandy soil, more frequent sharpening may be required. REPLACE BENT OR DAMAGED BLADE IMMEDIATELY. WBLHAEDNES: HARPENING THE 1. Make sure blade remains balanced. 2. Sharpen blade at the original cutting angle. 3. Sharpen cutting edges on both ends of blade, removing equal amounts of material from both ends. TO SHARPEN BLADE IN A VISE: (Figure Z) 1. Be sure the bail handle is released, the blade has stopped and safety key and battery pack removed before removing the blade. 2. Remove blade from mower. See instructions for removing and installing blade. 3. Secure blade (35) in a vise (38). 4. Wear proper eye protection and gloves and be careful not to cut yourself. 5. Carefully file the cutting edges of the blade with a fine tooth file (39) or sharpening stone, maintaining the angle of the original cutting edge. 6. Check balance of blade. See instructions for blade balancing. 7. Replace blade on mower and tighten securely. 14

  • 1
  • 2
  • 3
  • 4
  • 5
  • 6
  • 7
  • 8
  • 9
  • 10
  • 11
  • 12
  • 13
  • 14
  • 15
  • 16
  • 17
  • 18
  • 19
  • 20
  • 21
  • 22
  • 23
  • 24
  • 25
  • 26
  • 27
  • 28
  • 29
  • 30
  • 31
  • 32
  • 33
  • 34
  • 35
  • 36
  • 37
  • 38
  • 39
  • 40
  • 41
  • 42
  • 43
  • 44
  • 45
  • 46
  • 47
  • 48
  • 49
  • 50
  • 51
  • 52
  • 53
  • 54
  • 55
  • 56

14
REINSTALLED CORRECTLY, AS
DESCRIBED BELOW. IMPROPER
ASSEMBLY OF THE BLADE OR OTHER
PARTS OF THE BLADE SYSTEM MAY
CAUSE SERIOUS INJURY.
1.
WARNING:
RELEASE BAIL
HANDLE TO TURN MOWER OFF,
WAIT FOR THE BLADE TO STOP,
AND REMOVE SAFETY KEY AND
BATTERY PACK.
2. Cut a piece of 2x4 wood (31) (about
2 feet long) (610 mm) to keep blade
from turning while removing bolt (32).
3. Wear gloves and proper eye protection.
Turn the mower on its side. Be careful
of sharp edges of blade. Position wood
and unscrew bolt with1/2” wrench (33)
as shown in
Figure W
.
W
31
32
33
4. Remove bolt and washer (34). Pull off
blade (35) as shown in
Figure X
. The
fan (36) should not be removed.
Examine all pieces for damage and
replace if necessary.
X
34
32
35
36
5. The blade can only be attached to the
fan in one direction. To reassemble,
line up the D-shaped hole of the blade
with the D-shaped post of the fan,
ensuring the writing on the blade faces
out away from the mower.
6. To tighten firmly, position the piece of
wood as shown in
Figure Y
to keep
the blade from turning. Slide the bolt
through the washer and screw bolt
into place. Tighten with the wrench.
Y
BLADE SHARPENING
KEEP BLADE SHARP FOR BEST MOWER
PERFORMANCE. A DULL BLADE DOES
NOT CUT GRASS CLEANLY.
USE PROPER EYE PROTECTION
WHILE REMOVING, SHARPENING,
AND INSTALLING BLADE. ENSURE
THAT SAFETY KEY AND BATTERY
PACK IS REMOVED.
Sharpening the blade twice during a
mowing season is usually sufficient
under normal circumstances. Sand
causes the blade to dull quickly. If your
lawn has sandy soil, more frequent
sharpening may be required.
REPLACE BENT OR DAMAGED BLADE
IMMEDIATELY.
WHEN SHARPENING THE
BLADE:
1. Make sure blade remains balanced.
2. Sharpen blade at the original cutting
angle.
3. Sharpen cutting edges on both ends
of blade, removing equal amounts of
material from both ends.
TO SHARPEN BLADE IN A VISE:
(Figure Z)
1. Be sure the bail handle is released,
the blade has stopped and safety
key and battery pack removed before
removing the blade.
2. Remove blade from mower. See
instructions for removing and installing
blade.
3. Secure blade (35) in a vise (38).
4. Wear proper eye protection and gloves
and be careful not to cut yourself.
5. Carefully file the cutting edges of
the blade with a fine tooth file (39)
or sharpening stone, maintaining the
angle of the original cutting edge.
6. Check balance of blade. See
instructions for blade balancing.
7. Replace blade on mower and tighten
securely.