Bosch HGS7052UC Installation Instructions - Page 7
Installation & Final Steps - igniter
 |
UPC - 825225843917
View all Bosch HGS7052UC manuals
Add to My Manuals
Save this manual to your list of manuals |
Page 7 highlights
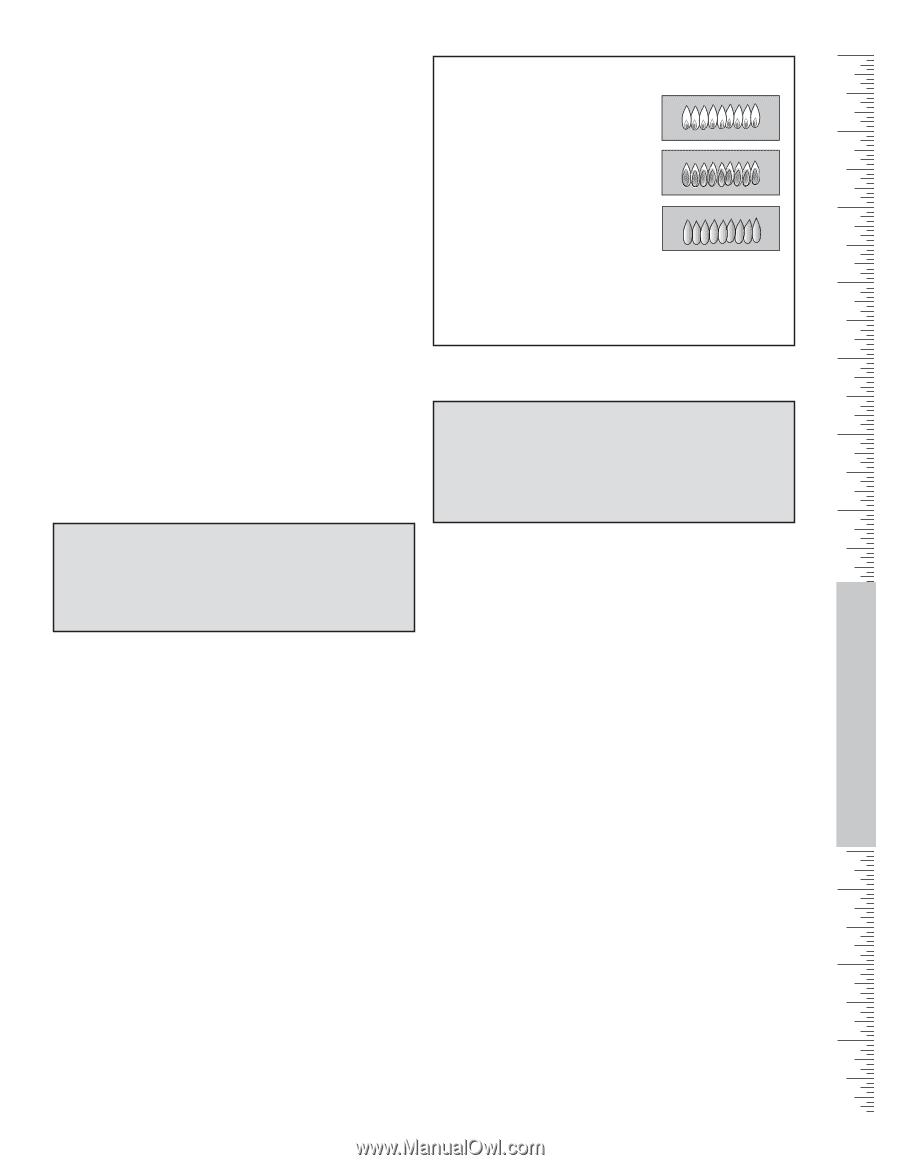
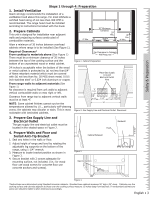
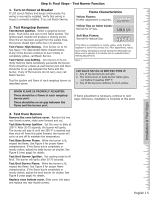
Step 6: Final Steps - Test Burner Function 1. Turn on Power at Breaker If LCD screen flashes and beeps continuously, the wiring is incorrectly installed. Verify that wiring in house is correctly installed. If so, call Bosch Service. Flame Characteristics Yellow Flames: Further adjustment is required. 2. Test Rangetop Burners Test Burner Ignition. Select a rangetop burner knob. Push down and turn to the flame symbol. The ignitor/spark module will produce a clicking sound. Once the air has been purged from the supply lines, the burner should light within four (4) seconds. Test Flame: High Setting. Turn burner on to HI. See figure 7 for appropriate flame characteristics. If any of the burners continue to burn mostly or completely yellow, call Bosch Service. Test Flame: Low Setting. Turn burner on to LO. Verify that the flame completely surrounds the burner. There should be a flame at each burner port and there should be no air gap between the flame and the burner. If any of the burners do not carry over, call Bosch Service. Test the ignition and flame of each rangetop burner as described above. Yellow Tips on Outer Cones: Normal for LP Gas. Soft Blue Flames: Normal for Natural Gas. If the flame is completely or mostly yellow, verify that the regulator is set for the correct fuel. After adjustment, retest. Some yellow streaking is normal during the initial start-up. Allow unit to operate 4-5 minutes and re-evaluate before making adjustments. Figure 7 Call Bosch Service at 800-944-2904 if: 1. Any of the burners do not light. 2. The broil burner or bake burner flame goes out before it reaches 350° F. 3. Any of the burners continue to burn yellow. WHEN FLAME IS PROPERLY ADJUSTED: There should be a flame at each rangetop burner port. There should be no air gap between the flame and the burner port. If flame adjustment is necessary, continue to next page. Otherwise, installation is complete at this point. 3. Test Oven Burners Remove the oven bottom cover. Remove the two rear thumb screws, slide cover forward and out. Test Bake Burner Ignition. Set the oven to bake at 350° F. After 30-75 seconds, the burner will ignite. The burner will stay lit until the 350° F is reached and then shut off. From this point forward, the burner will cycle on and off to maintain the temperature. Test Bake Burner Flame. While the burner is lit, inspect the flame. See Figure 6 for proper flame characteristics. If the flame burns completely or mostly yellow, adjust the bake burner air shutter. See Figure 8 (next page) for details. Test Broil Burner Ignition. Set cooking mode to Hi Broil. The burner will ignite after 30-75 seconds. Test Broil Burner Flame. While the burner is lit, inspect the flame. See Figure 6 for proper flame characteristics. If the flame burns completely or mostly yellow, adjust the broil burner air shutter. See Figure 8 (next page) for details. Replace oven bottom cover. Slide cover into place and replace two rear thumb screws. Installation & Final Steps English • 5
-
 1
1 -
 2
2 -
 3
3 -
 4
4 -
 5
5 -
 6
6 -
 7
7 -
 8
8 -
 9
9 -
 10
10 -
 11
11 -
 12
12 -
13
-
14
-
15
-
16
-
17
-
18
-
19
-
20
 |
 |