Bosch VDN-498V03-21 User Manual - Page 15
Mounting the unit
 |
View all Bosch VDN-498V03-21 manuals
Add to My Manuals
Save this manual to your list of manuals |
Page 15 highlights
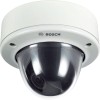
FlexiDome2X Installation | en 17 To disassemble the unit proceed as follows: 1. Use the special screwdriver bit to loosen the three tamper- resistant screws in the trim ring (the screws remain in place). 2. Remove the trim ring and dome by pulling them from the base. 3. Remove the inner liner (with sealing ring) by pulling it off of the base. 4. Remove the pink protective foam. 3.3 Mounting the unit There are several ways to mount the unit. The method of mounting depends on the type of surface and whether other mounting hardware, such as an electrical box, a surface box or other accessories are used. 3.3.1 Note: If the unit is to be surface mounted, then use the Surface Mount Box (SMB). The SMB is sold as a separate item (VDA-455SMB) or is included with the FlexiDome2X with the surface mount option. Other mounting accessories are also sold separately. Mounting tips - Use the mounting hole template to assist in marking the correct position for the camera to be mounted. - Refer to the dimensions on the mounting hole template to find the exact position of the screw holes and the entry hole for the cables. - Partially screw in two screws for the keyholes and use them to temporarily hang the camera while the connections are made. Bosch Security Systems Installation Manual AR18-08-B010 | v1.0 | 2009.03
-
 1
1 -
2
-
3
-
4
-
5
-
6
-
7
-
8
-
9
-
 10
10 -
 11
11 -
 12
12 -
 13
13 -
 14
14 -
 15
15 -
 16
16 -
 17
17 -
 18
18 -
 19
19 -
 20
20 -
21
-
22
-
23
-
24
-
25
-
26
-
27
-
28
-
29
-
30
-
31
-
32
-
33
-
34
-
35
-
36
-
37
-
38
-
39
-
40
-
41
-
42
-
43
-
44
-
45
-
46
-
47
-
48
-
49
-
50
-
51
-
52
-
53
-
54
-
55
-
56
-
57
-
58
 |
 |
