Bosch WTMC5521UC Operating, Care, Installation (all languages) - Page 20
Troubleshooting
 |
View all Bosch WTMC5521UC manuals
Add to My Manuals
Save this manual to your list of manuals |
Page 20 highlights
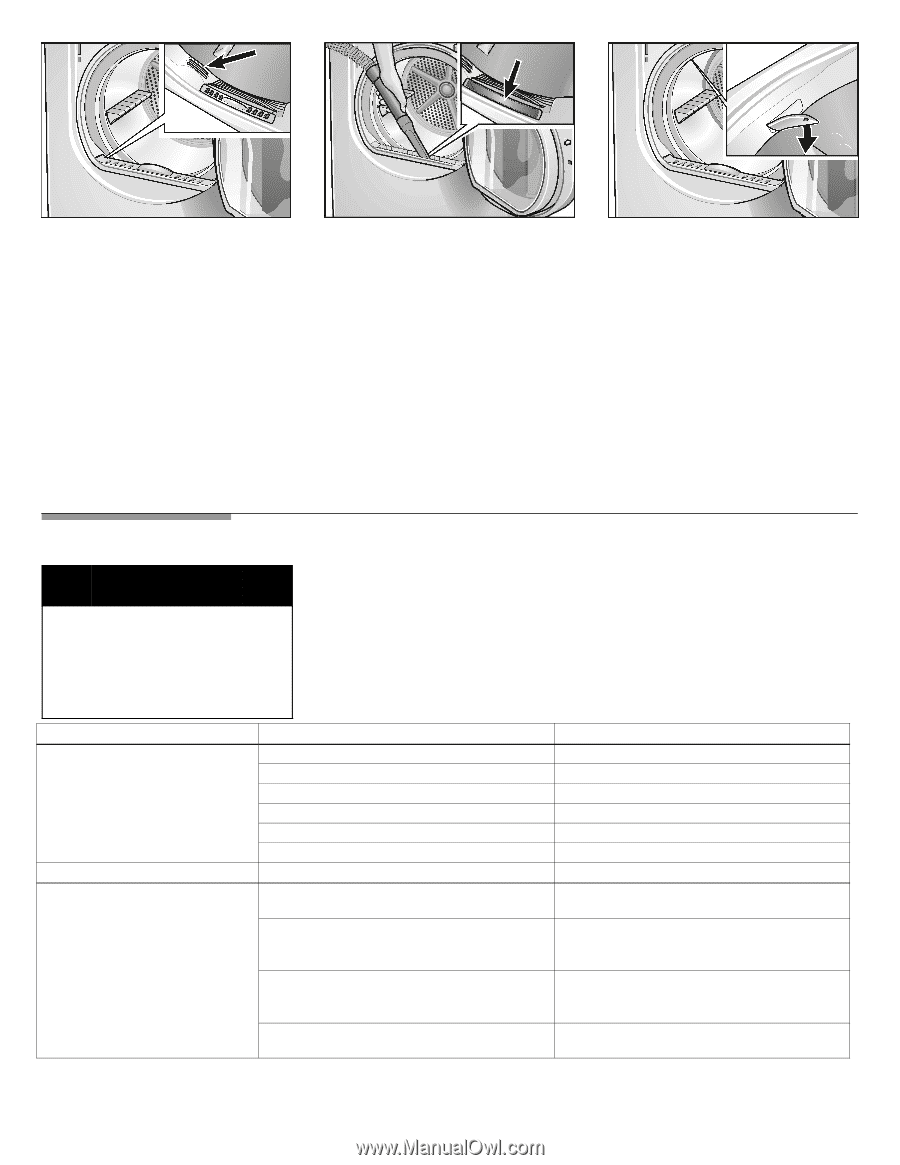
This deposit can easily be removed by wiping the sensors (the two bars next to the lint filter) with a cloth and a little white vinegar. Use white vinegar only! Clean the moisture sensor once a month. Cleaning the bearing shield Over time, fluff from the drying process collects in the bearing shield. This fluff can be easily removed using your vacuum cleaner, at least once a month. Change the light bulb The dryer light turns on inside the drum when you open the door. To change the light bulb: q Set program selector to off". q Turn off the circuit breaker. q Pull out power supply plug. q Open the door and locate the light bulb on the upper left side of the seal. q Loosen the screw of the cover and open the cover. q Turn bulb counterclockwise. Replace the bulb with a new appliance bulb only (obtainable through parts department). q Replace the cover and secure with the screw. q Plug in dryer or reconnect power supply. Troubleshooting d WARNING d TO AVOID RISK OF ELECTRICAL SHOCK ! TO AVOID EXPLOSION HAZARD! Repairs or replacement of parts may be carried out by authorized technicians only. Before calling the customer service, check whether you can rectify the fault yourself by means of the following table. If a fault cannot be rectified or a repair is required: 1. Set program selector to Off". 2. Turn off the circuit breaker. 3. Pull the main plug out of the socket. 4. Close the shutĆoff valve. 5. Call customer service (see page 21). Problem Dryer does not start. Start/Stop" indicator light does not illuminate. Laundry is wet after drying. Program has been interrupted. A warning signal is emitted and the display shows E:01". Possible cause Main plug not inserted at all or not inserted correctly. A fuse of power supply has tripped. Start/Stop" button not pressed. No program selected. Door not closed. Ambient temperature below 41 °F/5 °C. The shutĆoff valve is closed. Lint filter dirty. Exhaust air duct is blocked or too long. Fault in program sequence or malfunction. The room/cabinet is not adequately ventilated. Remedial action Insert main plug correctly. Replace/switch on fuse. Press Start/Stop" button. Select program. Close door. Increase room temperature. Open the shutĆoff valve. Clean filter as described on page 19 Switch off/switch on again. Clean exhaust air duct. Reduce exhaust air duct to maximum length as described on page 7 Switch off/switch on again. Switch off dryer, leave to cool down for 30 min, switch on again. Restart program. Provide an adequate supply of fresh air. Switch off/switch on again. 20
-
 1
1 -
2
-
3
-
4
-
5
-
6
-
7
-
8
-
9
-
10
-
11
-
12
-
13
-
14
-
 15
15 -
 16
16 -
 17
17 -
 18
18 -
 19
19 -
 20
20 -
 21
21 -
 22
22 -
 23
23 -
 24
24 -
 25
25 -
26
-
27
-
28
-
29
-
30
-
31
-
32
-
33
-
34
-
35
-
36
-
37
-
38
-
39
-
40
-
41
-
42
-
43
-
44
-
45
-
46
-
47
-
48
-
49
-
50
-
51
-
52
-
53
-
54
-
55
-
56
-
57
-
58
-
59
-
60
-
61
-
62
-
63
-
64
-
65
-
66
-
67
-
68
 |
 |